mn create-app example.micronaut.micronautguide \
    --features=graalvm \
    --build=gradle \
    --lang=java \
--test=junitConfigure CORS in a Micronaut application
Learn how to configure Cross-Origin Resource Sharing (CORS) in a Micronaut application.
Authors: Sergio del Amo
Micronaut Version: 5.0.4
1. Getting Started
In this guide, we will create a Micronaut application written in Java.
In this guide, you will configure Cross-Origin Resource Sharing (CORS) in a Micronaut application:
Cross-Origin Resource Sharing (CORS) is an HTTP-header based mechanism that allows a server to indicate any origins (domain, scheme, or port) other than its own from which a browser should permit loading resources
2. What you will need
To complete this guide, you will need the following:
-
Some time on your hands
-
A decent text editor or IDE (e.g. IntelliJ IDEA)
-
JDK 21 or greater installed with
JAVA_HOMEconfigured appropriately
3. Solution
We recommend that you follow the instructions in the next sections and create the application step by step. However, you can go right to the completed example.
-
Download and unzip the source
4. Writing the Application
Create an application using the Micronaut Command Line Interface or with Micronaut Launch.
If you don’t specify the --build argument, Gradle with the Kotlin DSL is used as the build tool. If you don’t specify the --lang argument, Java is used as the language.If you don’t specify the --test argument, JUnit is used for Java and Kotlin, and Spock is used for Groovy.
|
The previous command creates a Micronaut application with the default package example.micronaut in a directory named micronautguide.
If you use Micronaut Launch, select Micronaut Application as application type and add graalvm features.
| If you have an existing Micronaut application and want to add the functionality described here, you can view the dependency and configuration changes from the specified features, and apply those changes to your application. |
5. Static Website
In a different folder, create a static website. It makes an HTTP GET request with JavaScript and updates an HTML element with the response.
src/main/../../index.html
<!DOCTYPE html>
<html>
	<head>
		<script>
		function request(method, url) {
			const xhr = new XMLHttpRequest();
			xhr.open(method, url);
			xhr.onreadystatechange = function () {
				document.getElementById("message").innerHTML = this.responseText;
			};
			xhr.send();
		}
		request("GET","http://localhost:8080/hello");
		</script>
	</head>
	<body>
        <h1 id="message">CORS not setup</h1>
	</body>
</html>
Add a controller that the static website consumes with JavaScript.
5.1. Controller
To create a microservice that responds with "Hello World", you first need a controller.
Create a controller:
src/main/java/example/micronaut/HelloController.java
package example.micronaut;

import io.micronaut.http.MediaType;
import io.micronaut.http.annotation.Controller;
import io.micronaut.http.annotation.Get;
import io.micronaut.http.annotation.Produces;

@Controller("/hello") (1)
public class HelloController {
    @Get (2)
    @Produces(MediaType.TEXT_PLAIN) (3)
    public String index() {
        return "Hello World"; (4)
    }
}| 1 | The class is defined as a controller with the @Controller annotation mapped to the path /hello. |
| 2 | The @Get annotation maps the index method to an HTTP GET request on /hello. |
| 3 | By default, a Micronaut response uses application/json as Content-Type. We are returning a String, not a JSON object, so we set it to text/plain with the @Produces annotation. |
| 4 | A String "Hello World" is returned as the result. |
6. Running the Application
To run the application, use the ./gradlew run command, which starts the application on port 8080.
7. Run the static website
Serve the static website with jwebserver.
The jwebserver tool provides a minimal HTTP server, designed to be used for prototyping, testing, and debugging. It serves a single directory hierarchy, and only serves static files. Only HTTP/1.1 is supported; HTTP/2 and HTTPS are not supported.
To use jwebserver, use Java 18 or greater in a terminal window. You can use SDKMAN! to get a list of available Java versions for your computer with sdk list java.
For example:
% sdk use java 19.0.2-amzn
Using java version 19.0.2-amzn in this shell.
% jwebserver
Binding to loopback by default. For all interfaces use "-b 0.0.0.0" or "-b ::".
Serving ... and subdirectories on 127.0.0.1 port 8000
URL http://127.0.0.1:8000/
jwebserver serves the UI on port 8000.
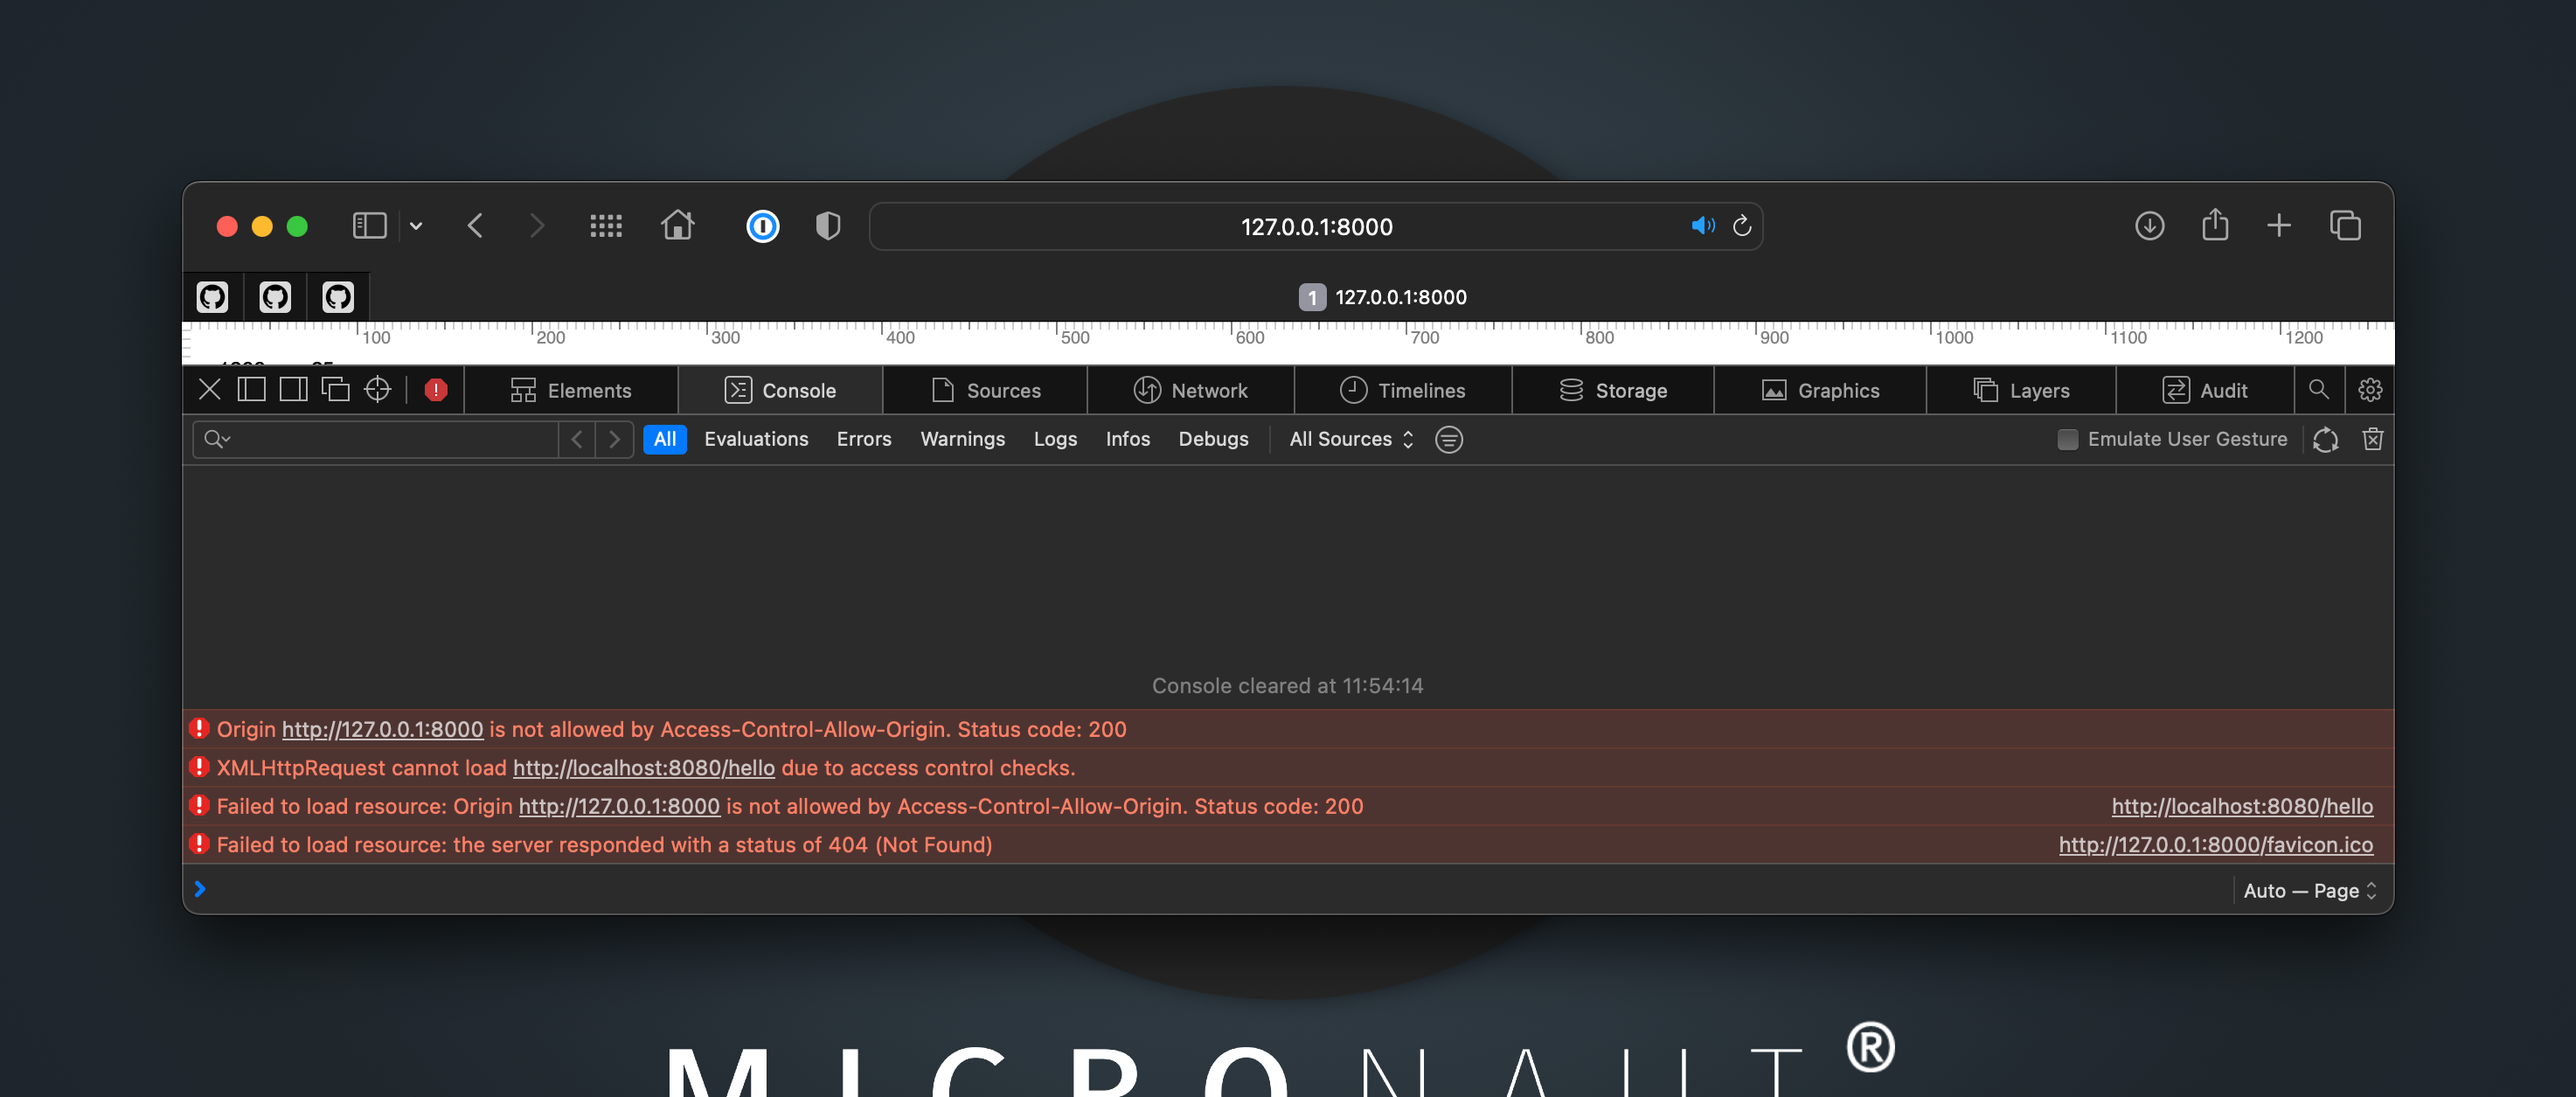
7.2. Enable CORS Configuration
Enable CORS configuration.
src/main/resources/application.properties
micronaut.server.cors.enabled=trueRestart the Micronaut application.
Refresh the UI in your browser, and you should see Hello World and no errors in the console.
7.3. Fine-grained CORS Configuration
The previous setup is a "wide open" configuration. It is best to enable CORS access only to a specific list of allowed origins.
You can do that with:
src/main/resources/application.properties
micronaut.server.cors.enabled=true

micronaut.server.cors.configurations.ui.allowed-origins[0]=http://127.0.0.1:8000
You can start the static server on a different port. For example, you could run jwebserver -p 8001 and verify that it is not allowed. The application’s configuration only allows requests with origin 127.0.0.1:8000.
8. Next Steps
Explore more features with Micronaut Guides.
Learn more about configuring CORS with the Micronaut Framework.
9. Help with the Micronaut Framework
The Micronaut Foundation sponsored the creation of this Guide. A variety of consulting and support services are available.
10. License
| All guides are released with an Apache License 2.0 for the code and a Creative Commons Attribution 4.0 license for the writing and media (images). |