aws iam create-group --group-name Administrators
aws iam create-user --user-name Administrator
aws iam add-user-to-group --user-name Administrator --group-name Administrators
aws iam attach-group-policy --group-name Administrators --policy-arn $(aws iam list-policies --query 'Policies[?PolicyName==`AdministratorAccess`].{ARN:Arn}' --output text)
aws iam create-access-key --user-name AdministratorSecure a Micronaut application with Cognito
Learn how to create a Micronaut application and secure it with an Authorization Server provided by Cognito.
Authors: Sergio del Amo, Álvaro Sánchez-Mariscal
Micronaut Version: 5.0.5
1. Getting Started
In this guide, we will create a Micronaut application written in Groovy.
2. What you will need
To complete this guide, you will need the following:
-
Some time on your hands
-
A decent text editor or IDE (e.g. IntelliJ IDEA)
-
JDK 21 or greater installed with
JAVA_HOMEconfigured appropriately
3. Amazon Web Services (AWS)
If you don’t have one already, create an AWS Account.
3.1. AWS CLI
Follow the AWS documentation for installing or updating the latest version of the AWS CLI.
3.2. Administrator IAM user
Instead of using your AWS root account, it is recommended that you use an IAM administrative user. If you don’t have one already, follow the steps below to create one:
Then, run aws configure to configure your AWS CLI to use the Administrator IAM user just created.
4. Solution
We recommend that you follow the instructions in the next sections and create the application step by step. However, you can go right to the completed example.
-
Download and unzip the source
5. Writing the Application
Create an application using the Micronaut Command Line Interface or with Micronaut Launch.
mn create-app example.micronaut.micronautguide --build=gradle --lang=groovy
If you don’t specify the --build argument, Gradle with the Kotlin DSL is used as the build tool. If you don’t specify the --lang argument, Java is used as the language.If you don’t specify the --test argument, JUnit is used for Java and Kotlin, and Spock is used for Groovy.
|
The previous command creates a Micronaut application with the default package example.micronaut in a directory named micronautguide.
6. Views
To use the Thymeleaf Java template engine to render views in a Micronaut application, add the following dependency on your classpath.
build.gradle
implementation("io.micronaut.views:micronaut-views-thymeleaf")6.1. OAuth 2.0
To provide authentication, sign in to your AWS account and go to AWS Cognito.
With the Amazon Cognito SDK, you just write a few lines of code to enable your users to sign-up and sign-in to your mobile and web apps.
Standards-based authentication
Amazon Cognito uses common identity management standards including OpenID Connect, OAuth 2.0, and SAML 2.0.
First, create an Amazon Cognito User Pool:
Amazon Cognito User Pools - A directory for all your users
You can quickly create your own directory to sign up and sign in users, and to store user profiles using Amazon Cognito User Pools. User Pools provide a user interface you can customize to match your application. User Pools also enable easy integration with social identity providers such as Facebook, Google, and Amazon, and enterprise identity providers such as Microsoft Active Directory through SAML.

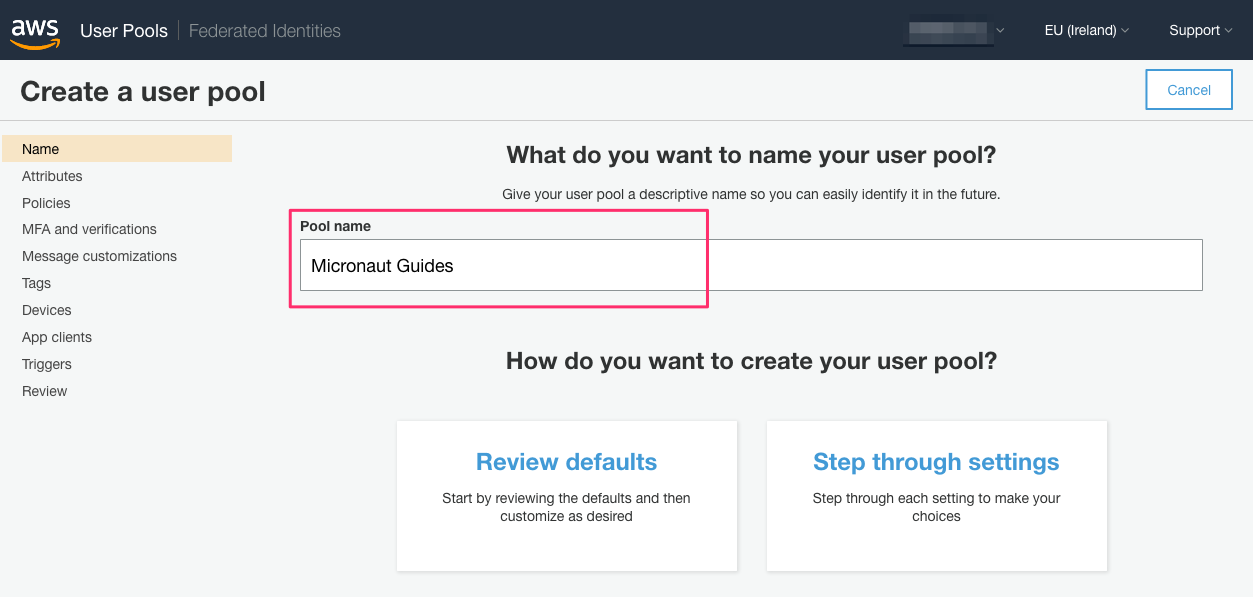
Amazon Cognito Pools are regional. Thus, annotate the region you are using.
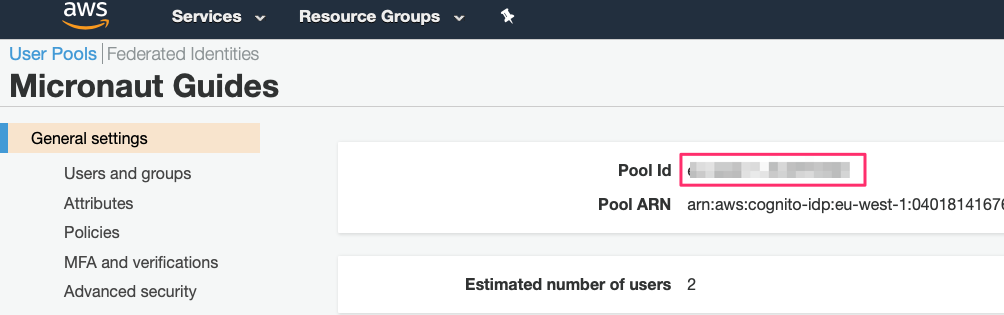
While you setup the Amazon Cognito User Pool, you will need to save the pool id:
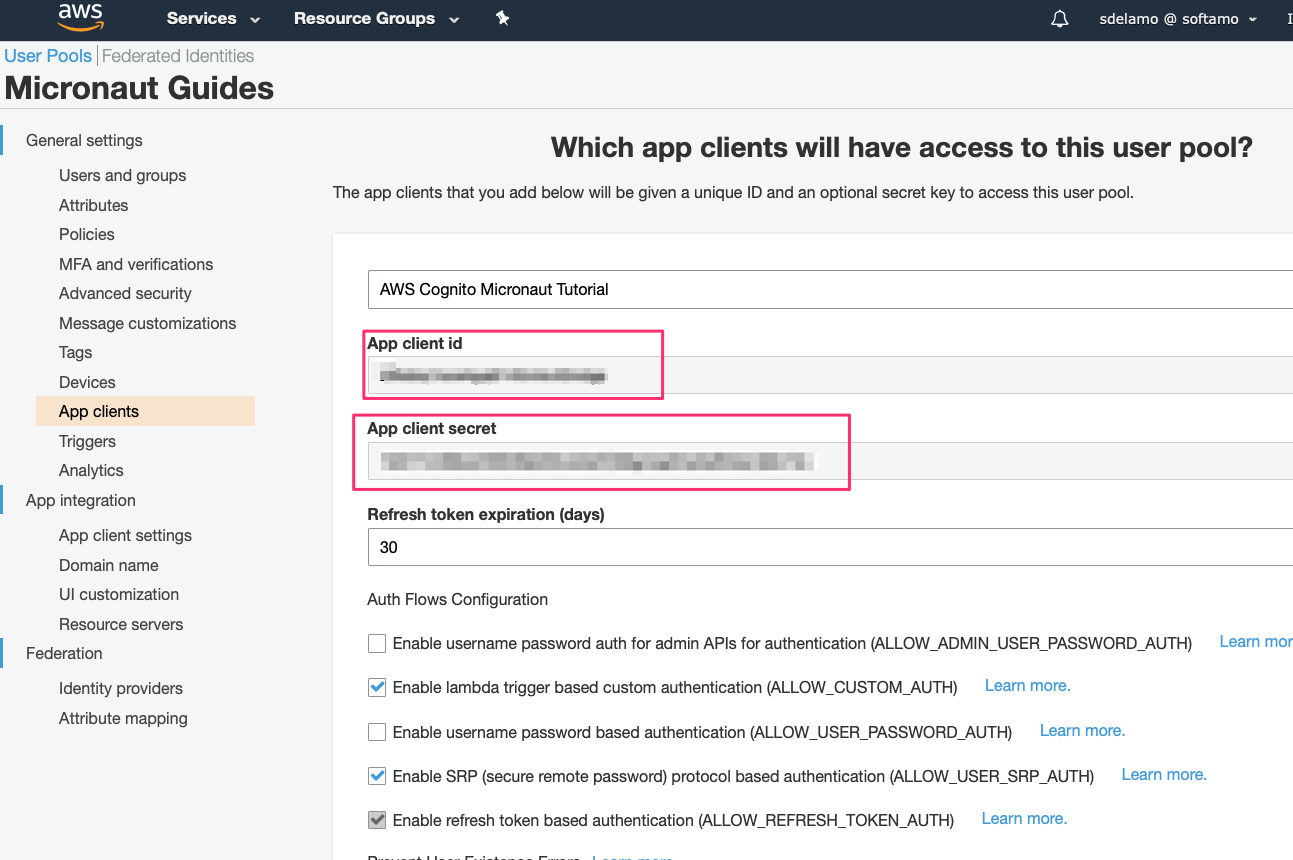
Save the client id and client secret:
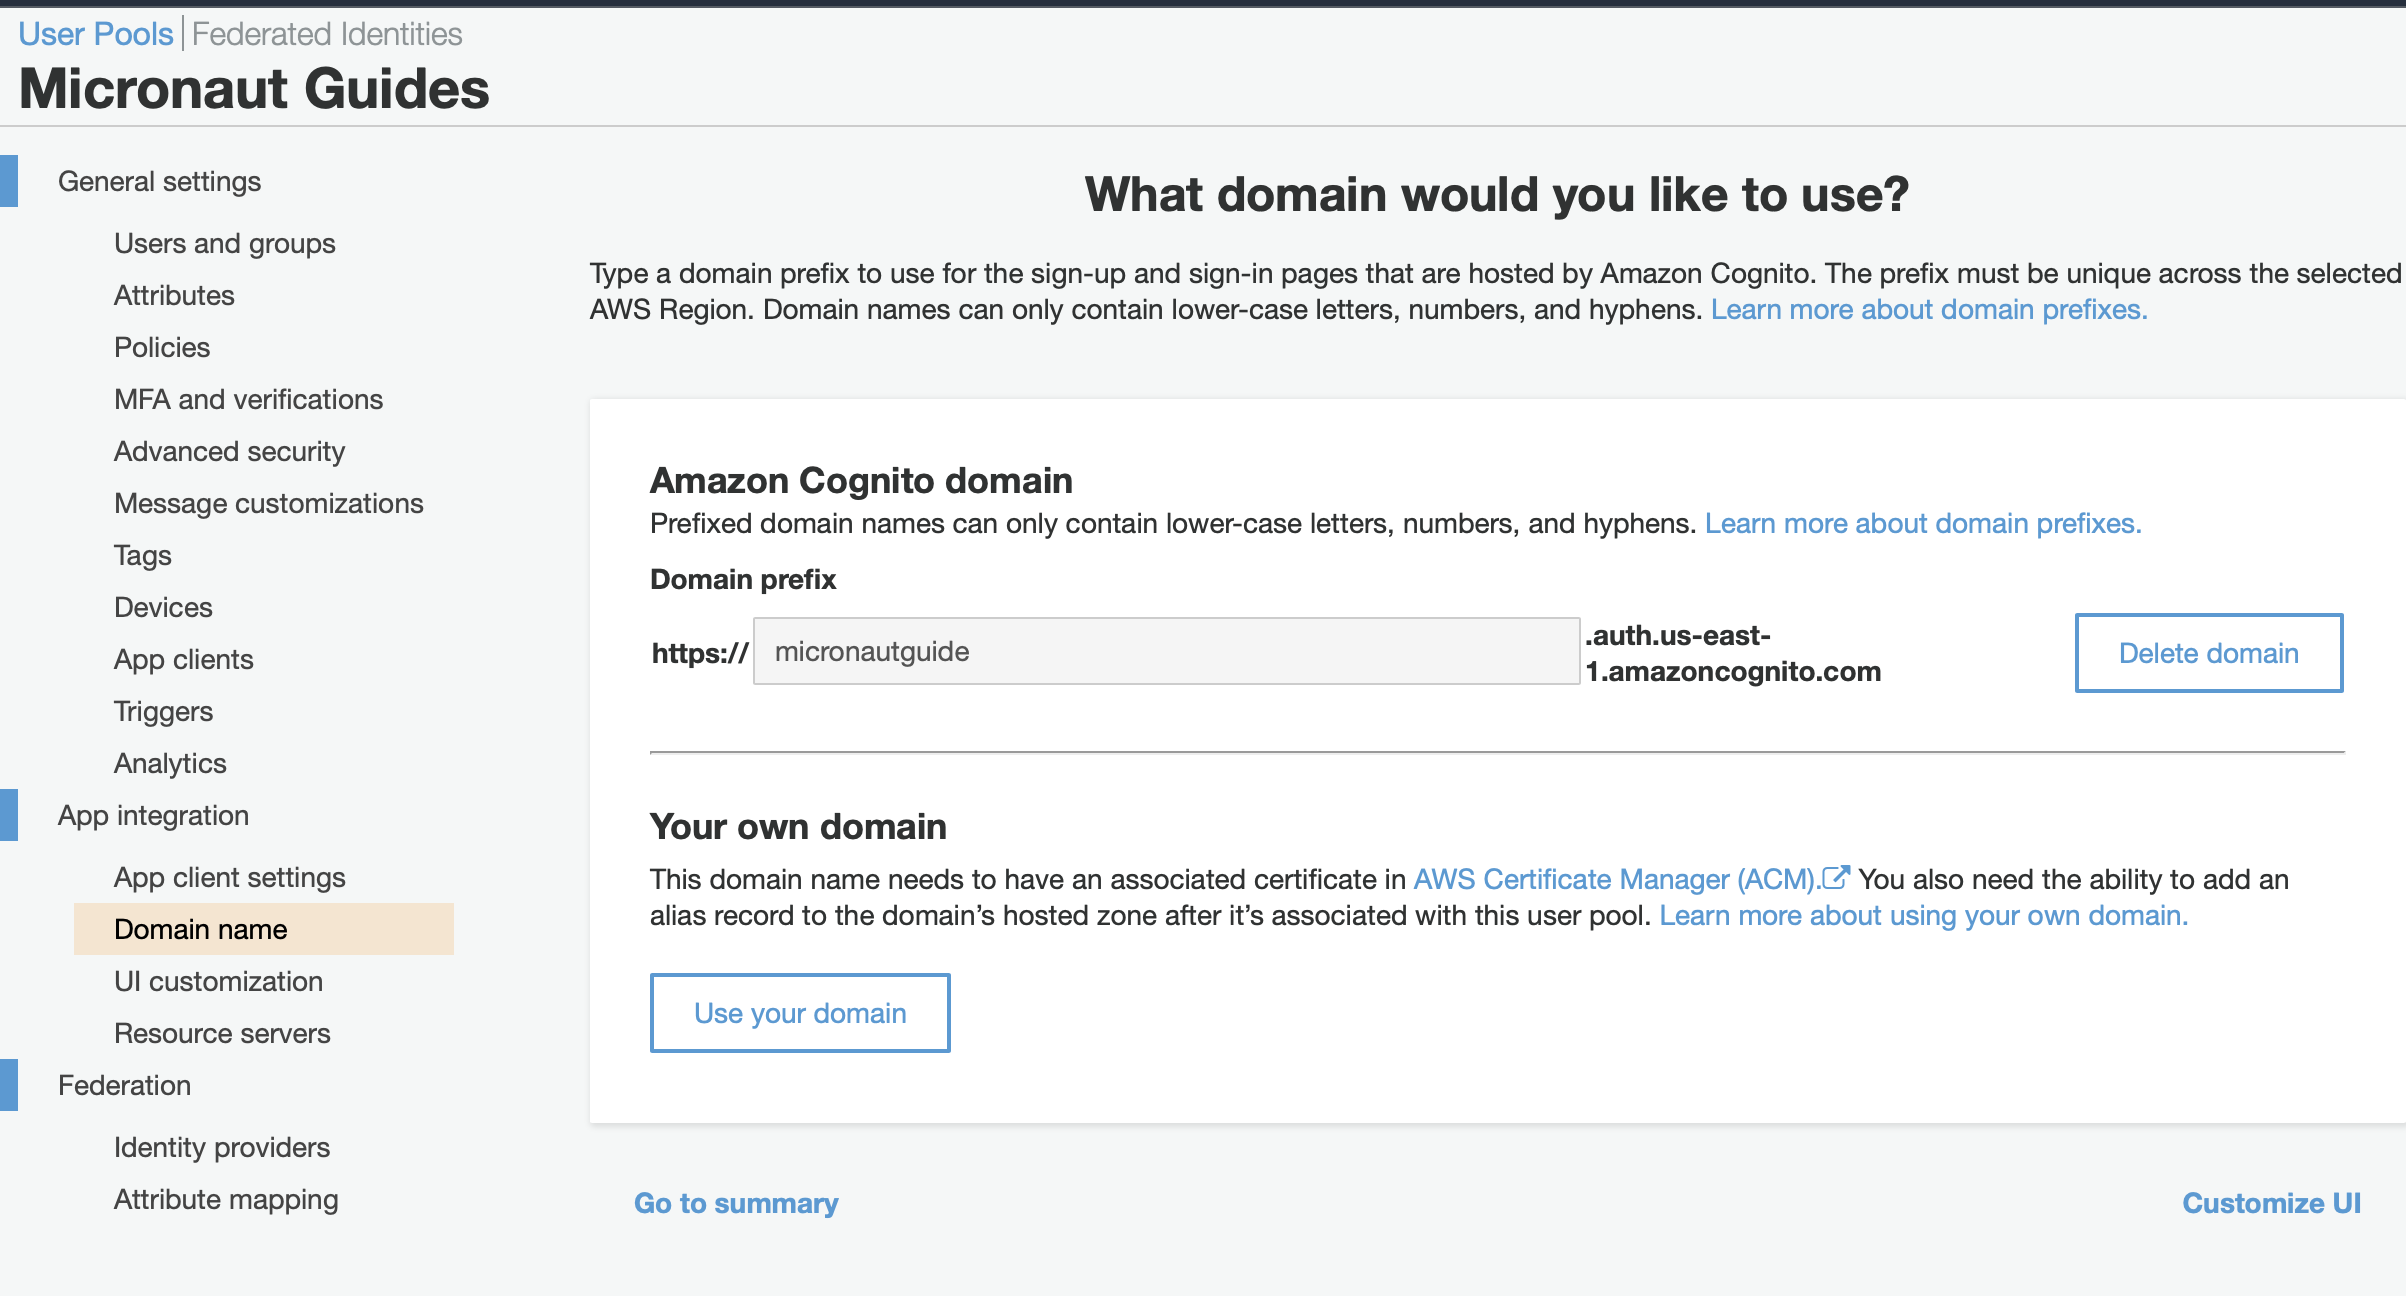
6.2. Add a domain
6.3. Using the AWS CLI
Some of the following commands use jq
jq is a lightweight and flexible command-line JSON processor
Alternatively, you can use the AWS CLI to create the user pool and client (change the region to your desired value):
export COGNITO_REGION=eu-west-1
export COGNITO_POOL_ID=$(aws cognito-idp create-user-pool --pool-name "Micronaut Guides" --username-attributes "email" --auto-verified-attributes "email" | jq -r '.UserPool.Id')
export OAUTH_CLIENT_ID=$(aws cognito-idp create-user-pool-client --generate-secret --user-pool-id $COGNITO_POOL_ID --client-name "AWS Cognito Micronaut Tutorial" --callback-urls "http://localhost:8080/oauth/callback/cognito" --logout-urls "http://localhost:8080/logout" --supported-identity-providers COGNITO --allowed-o-auth-flows "code" --allowed-o-auth-scopes "phone" "email" "openid" "profile" "aws.cognito.signin.user.admin" --allowed-o-auth-flows-user-pool-client | jq -r '.UserPoolClient.ClientId')
export OAUTH_CLIENT_SECRET=$(aws cognito-idp describe-user-pool-client --user-pool-id $COGNITO_POOL_ID --client-id $OAUTH_CLIENT_ID | jq -r '.UserPoolClient.ClientSecret')
export COGNITO_DOMAIN="micronaut-guides-$RANDOM"
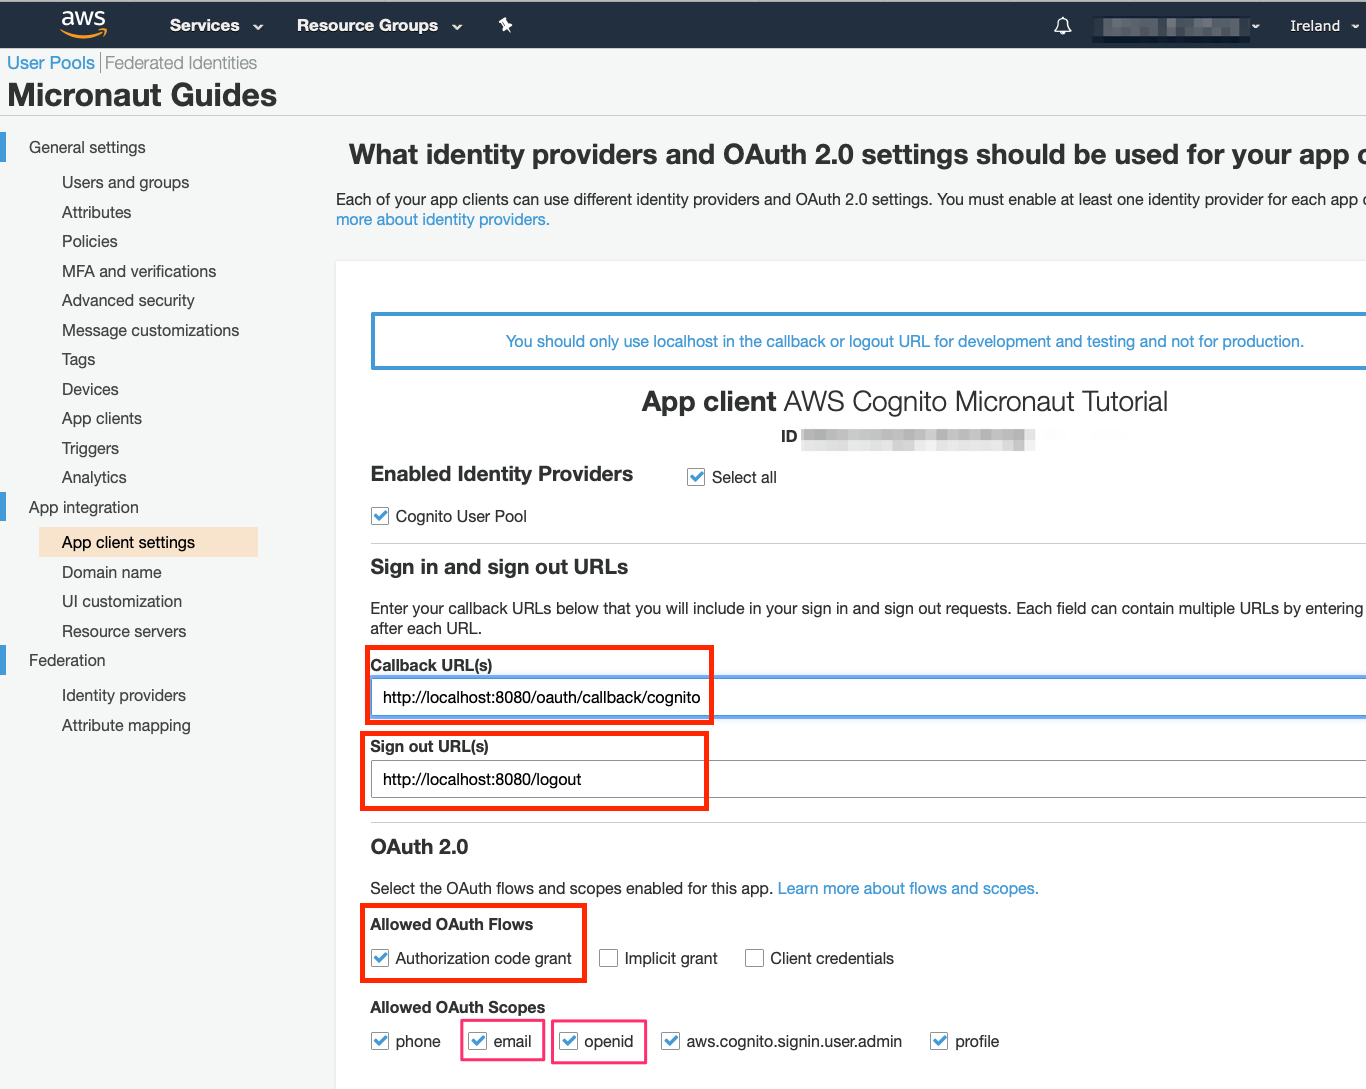
aws cognito-idp create-user-pool-domain --domain $COGNITO_DOMAIN --user-pool-id $COGNITO_POOL_IDConfigure the appropriate callback, make sure you allow the Authorization code grant OAuth flow, and select the openid and email scopes.
To use OAuth 2.0 integration, add the following dependency:
build.gradle
implementation("io.micronaut.security:micronaut-security-oauth2")Also add Micronaut JWT support dependencies:
build.gradle
implementation("io.micronaut.security:micronaut-security-jwt")Add the following OAuth 2.0 configuration:
src/main/resources/application.properties
(1)
micronaut.security.authentication=idtoken
(2)
(3)
micronaut.security.oauth2.clients.cognito.client-id=${OAUTH_CLIENT_ID:xxx}
(4)
micronaut.security.oauth2.clients.cognito.client-secret=${OAUTH_CLIENT_SECRET:yyy}
(5)
micronaut.security.oauth2.clients.cognito.openid.issuer=https://cognito-idp.${COGNITO_REGION:us-east-1}.amazonaws.com/${COGNITO_POOL_ID:12345}/
(6)
micronaut.security.endpoints.logout.get-allowed=true| 1 | Set micronaut.security.authentication as idtoken. The idtoken provided by Cognito when the OAuth 2.0 Authorization code flow ends will be saved in a cookie. The id token is a signed JWT. For every request, the Micronaut framework extracts the JWT from the Cookie and validates the JWT signature with the remote Json Web Key Set exposed by Cognito. JWKS is exposed by the jws-uri entry of Cognito .well-known/openid-configuration. |
| 2 | The provider identifier must match the last part of the URL you entered as a redirect URL: /oauth/callback/cognito. |
| 3 | Client ID. See previous screenshot. |
| 4 | Client Secret. See previous screenshot. |
| 5 | issuer URL. It allows the Micronaut framework to discover the configuration of the OpenID Connect server. Note: we will use the pool id and region mentioned previously. |
| 6 | Accept GET request to the /logout endpoint. |
The previous configuration uses several placeholders. If you used the AWS CLI, then you are all set.
Otherwise, you will need to set up OAUTH_CLIENT_ID, OAUTH_CLIENT_SECRET, COGNITO_REGION, and COGNITO_POOL_ID environment variables.
export OAUTH_CLIENT_ID=XXXXXXXXXX
export OAUTH_CLIENT_SECRET=YYYYYYYYYY
export COGNITO_REGION=eu-west-1
export COGNITO_POOL_ID=eu-west-XXCCCAZZZ
Although undocumented in the Amazon Cognito User Pools Auth API Reference, Cognito provides an openid-configuration endpoint which the Micronaut framework uses to configure your application.
curl https://cognito-idp.${COGNITO_REGION}.amazonaws.com/${COGNITO_POOL_ID}/.well-known/openid-configurationWe want to use an Authorization Code grant type flow, which is described in the following diagram:

6.4. Home
Create a controller to handle requests to /. You will display the email of the authenticated person if any. Annotate the controller endpoint with @View since we will use a Thymeleaf template.
src/main/groovy/example/micronaut/HomeController.groovy
package example.micronaut

import groovy.transform.CompileStatic
import io.micronaut.http.annotation.Controller
import io.micronaut.http.annotation.Get
import io.micronaut.security.annotation.Secured
import io.micronaut.security.rules.SecurityRule
import io.micronaut.views.View

@CompileStatic
@Controller (1)
class HomeController {

    @Secured(SecurityRule.IS_ANONYMOUS) (2)
    @View('home') (3)
    @Get (4)
    Map<String, Object> index() {
        [:]
    }
}| 1 | The class is defined as a controller with the @Controller annotation mapped to the path /. |
| 2 | Annotate with io.micronaut.security.Secured to configure secured access. The SecurityRule.IS_ANONYMOUS expression will allow access without authentication. |
| 3 | Use View annotation to specify which template to use to render the response. |
| 4 | The @Get annotation maps the index method to GET / requests. |
Create a Thymeleaf template:
src/main/resources/views/home.html
<!DOCTYPE html>
<html xmlns:th="http://www.thymeleaf.org">
<head>
<title>Home</title>
</head>
<body>
<h1>Micronaut - Cognito example</h1>
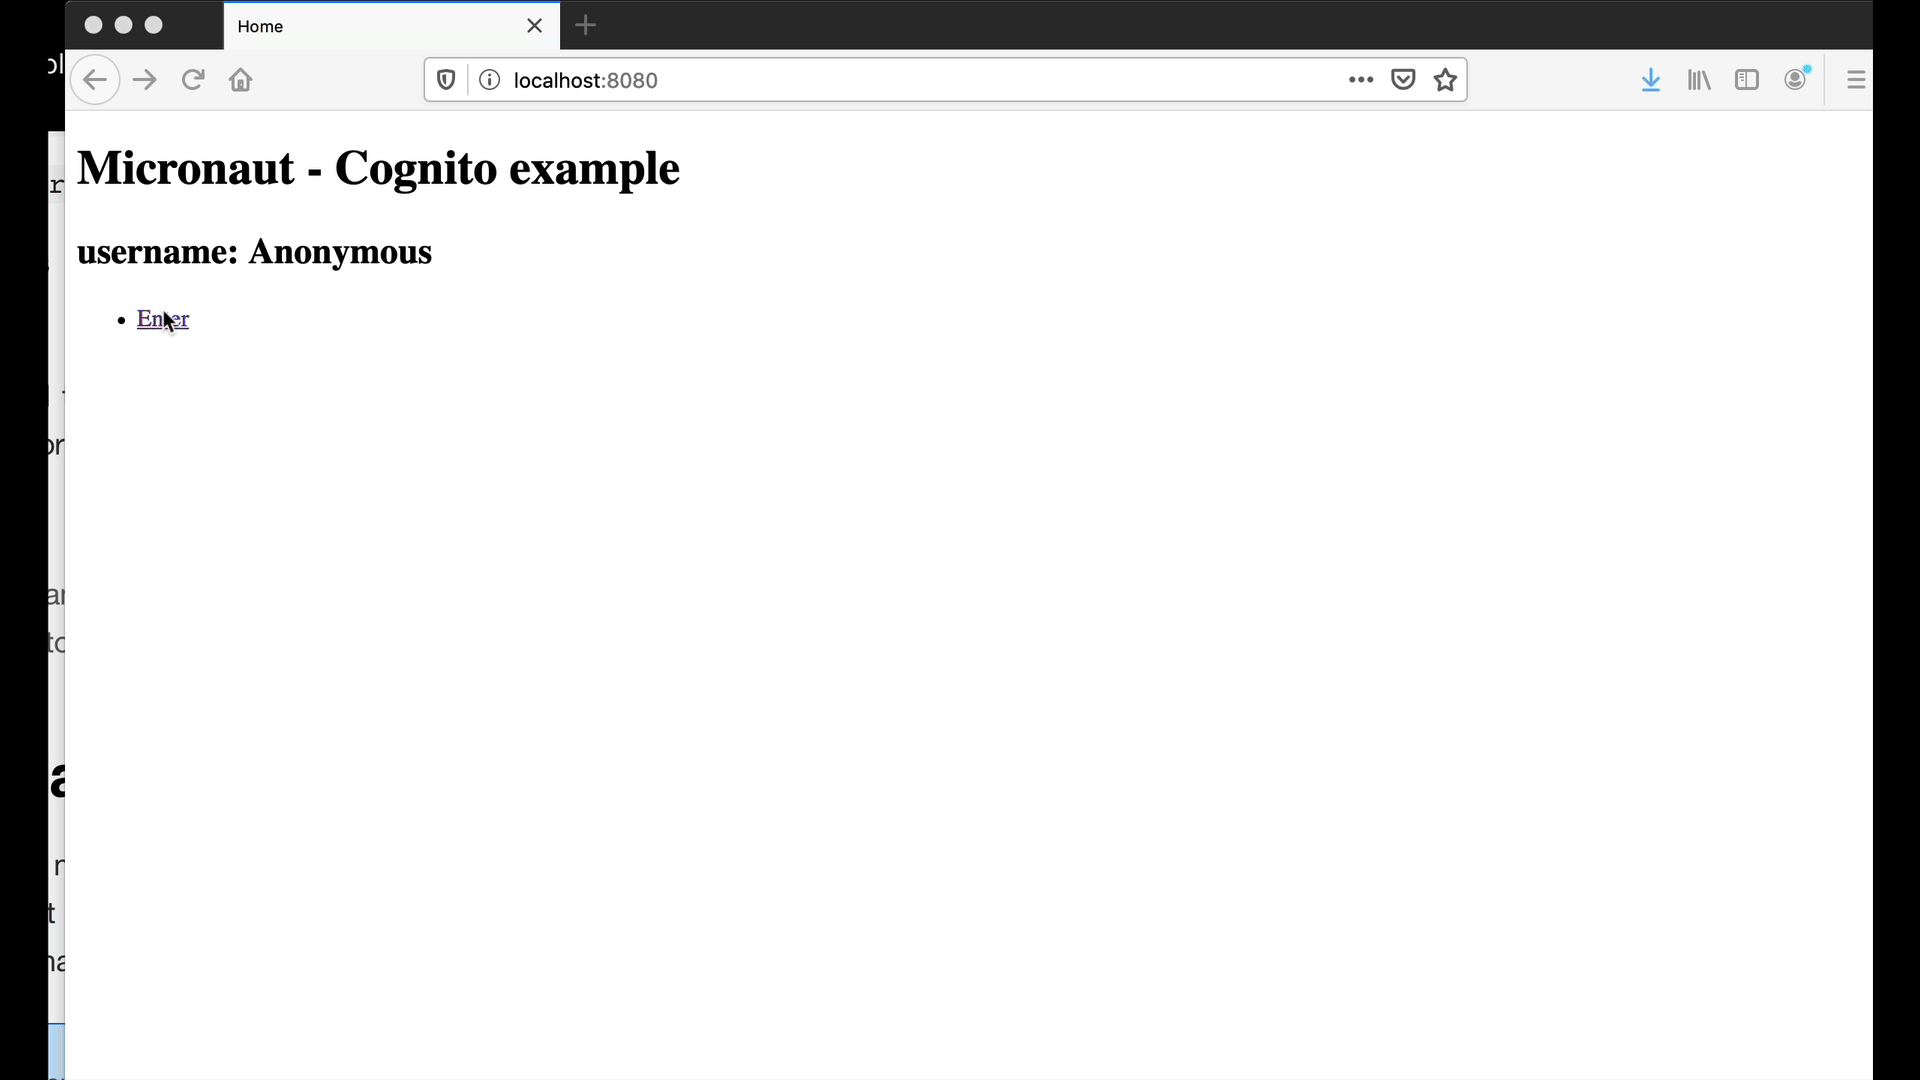
<h2 th:if="${security}">username: <span th:text="${security.attributes.get('email')}"></span></h2>
<h2 th:unless="${security}">username: Anonymous</h2>
<nav>
<ul>
<li th:unless="${security}"><a href="/oauth/login/cognito">Enter</a></li>
<li th:if="${security}"><a href="/oauth/logout">Logout</a></li>
</ul>
</nav>
</body>
</html>Also, note that we return an empty model in the controller. However, we are accessing security in the Thymeleaf template.
-
The SecurityViewModelProcessor injects into the model a
securitymap with the authenticated user. See User in a view documentation.
7. Running the Application
To run the application, use the ./gradlew run command, which starts the application on port 8080.
7.1. Cleanup
Once you are done with this guide, you can stop/delete the AWS resources created to avoid incurring unnecessary charges.
aws cognito-idp delete-user-pool-domain --domain $COGNITO_DOMAIN --user-pool-id $COGNITO_POOL_ID
aws cognito-idp delete-user-pool-client --client-id $OAUTH_CLIENT_ID --user-pool-id $COGNITO_POOL_ID
aws cognito-idp delete-user-pool --user-pool-id $COGNITO_POOL_ID
8. Next Steps
Read Micronaut OAuth 2.0 documentation to learn more.
9. Help with the Micronaut Framework
The Micronaut Foundation sponsored the creation of this Guide. A variety of consulting and support services are available.
10. License
| All guides are released with an Apache License 2.0 for the code and a Creative Commons Attribution 4.0 license for the writing and media (images). |