mn create-function-app --features=graalvm,oracle-function,oracle-cloud-httpclient-netty example.micronaut.micronautguide --build=maven --lang=kotlinDeploy a Micronaut Function (Serverless) application to Oracle Cloud
Learn how to deploy a Micronaut Function (Serverless) application to Oracle Cloud.
Authors: Burt Beckwith
Micronaut Version: 4.10.9
1. Getting Started
In this guide, we will create a Micronaut application written in Kotlin.
2. What you will need
To complete this guide, you will need the following:
-
Some time on your hands
-
A decent text editor or IDE
-
JDK 11 or greater installed with
JAVA_HOMEconfigured appropriately -
Docker installed
-
A paid or free trial Oracle Cloud account (create an account at signup.oraclecloud.com)
-
Oracle Cloud CLI installed with local access to Oracle Cloud configured by running
oci setup config
3. Solution
We recommend that you follow the instructions in the next sections and create the application step by step. However, you can go right to the completed example.
-
Download and unzip the source
4. Writing the App
Create an application using the Micronaut Command Line Interface or with Micronaut Launch.
If you don’t specify the --build argument, Gradle with the Kotlin DSL is used as the build tool. If you don’t specify the --lang argument, Java is used as the language.If you don’t specify the --test argument, JUnit is used for Java and Kotlin, and Spock is used for Groovy.
|
If you use Micronaut Launch, select "Function Application for Serverless" as application type, JDK version 11 or higher, and add the graalvm, oracle-function and oracle-cloud-httpclient-netty features.
The previous command creates a Micronaut application with the default package example.micronaut in a directory named micronautguide.
| If you have an existing Micronaut application and want to add the functionality described here, you can view the dependency and configuration changes from the specified features, and apply those changes to your application. |
The generated application contains a Function class with a simple Oracle Cloud API call to retrieve the tenancy OCID from the injected TenancyIdProvider bean. That will be sufficient to ensure that the deployed function works correctly:
src/main/kotlin/example/micronaut/Function.kt
package example.micronaut

import io.micronaut.core.annotation.ReflectiveAccess
import io.micronaut.oraclecloud.core.TenancyIdProvider
import io.micronaut.oraclecloud.function.OciFunction
import jakarta.inject.Inject
import jakarta.inject.Singleton

@Singleton
@ReflectiveAccess (1)
class Function : OciFunction() {

    @Inject
    lateinit var tenantIdProvider : TenancyIdProvider

    fun handleRequest() : String {
        val tenancyId = tenantIdProvider.tenancyId
        return "Your tenancy is: $tenancyId"
    }
}| 1 | This is needed because Project.fn invokes the function handler via reflection |
5. Testing the Application
To run the tests:
./mvnw test6. Configuring Oracle Cloud Resources
We need to configure some cloud infrastructure to support deploying functions.
First, login to your Oracle Cloud tenancy as an administrator, or a user with sufficient permissions to create the infrastructure described below.
6.1. Compartment
Use an existing compartment to create your function in, or create a new one by opening the Oracle Cloud Menu and clicking "Identity & Security", and then "Compartments"
See the Compartments docs for more information.
6.2. Function user and group
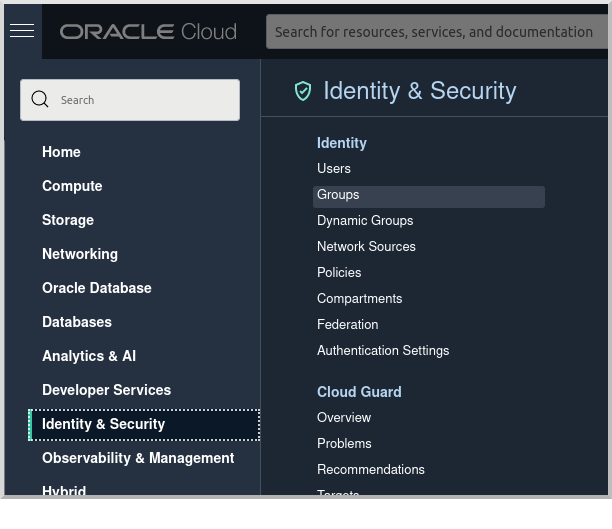
Create a group for Oracle Functions users by clicking the Oracle Cloud menu and selecting "Identity & Security", and then click "Groups":
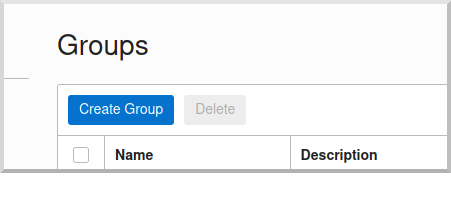
Click "Create Group":
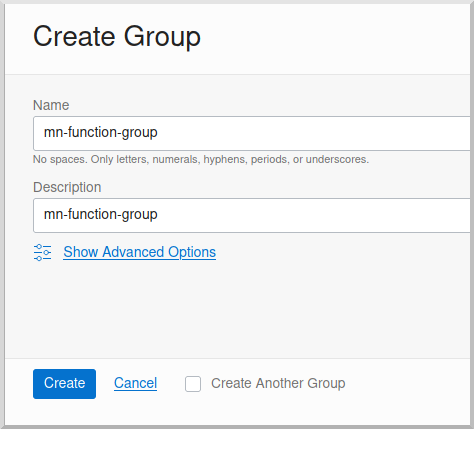
Choose a name and a description, e.g. "mn-function-group", and click "Create":
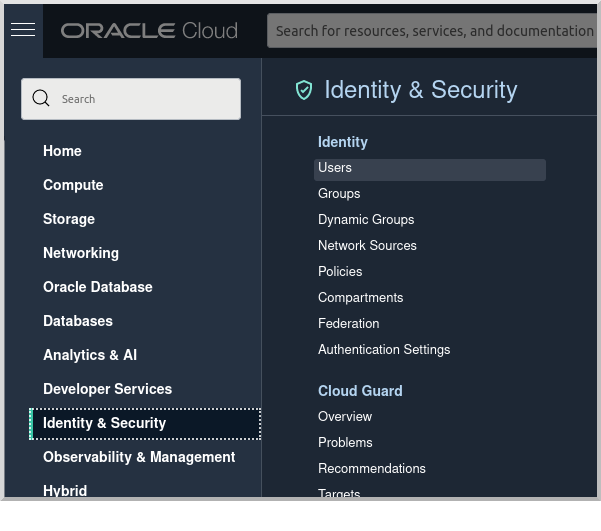
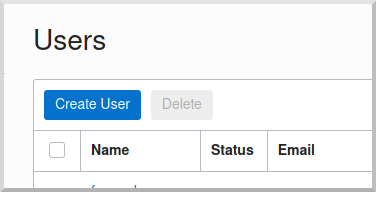
Create a user by clicking the Oracle Cloud menu and selecting "Identity & Security", and then click "Users":
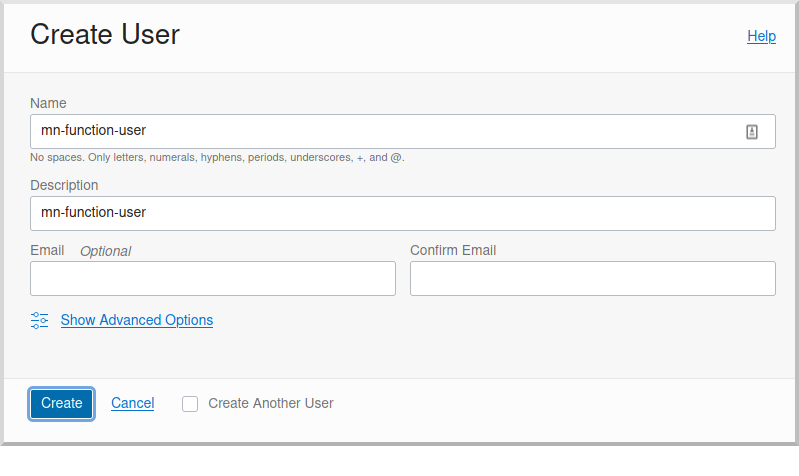
Click "Create User":
Choose a name and a description, e.g. "mn-function-user", and click "Create":
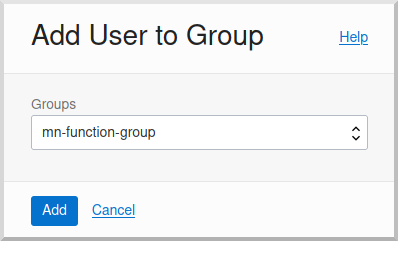
Scroll down and click "Add User to Group":
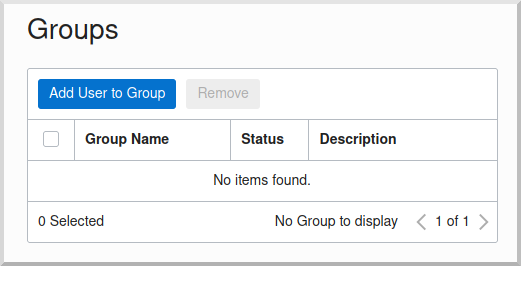
Select the group you created and click "Add":
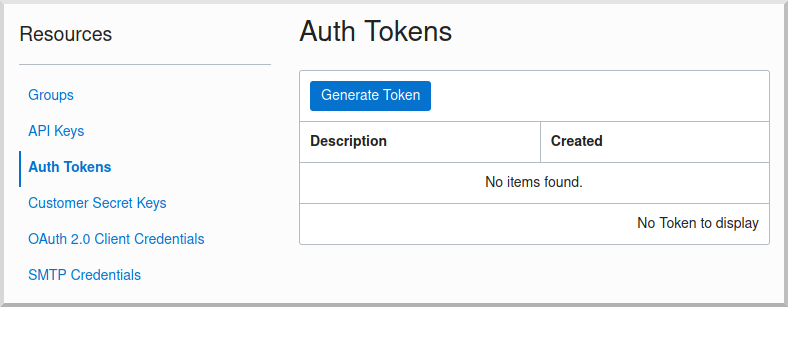
You’ll need an auth token to authenticate to the container registry that will contain the Docker images for your functions. Click "Auth Tokens" and then "Generate Token":
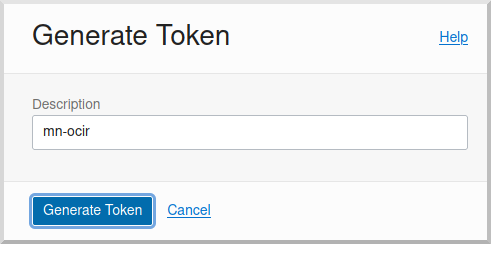
Enter a name for the token, e.g. "mn-ocir", and click "Generate Token":
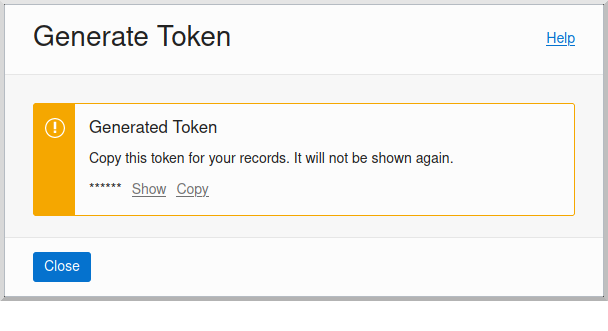
Copy the token to the clipboard and save it for later:
You will need a password to login as this user, so click the "Create/Reset Password" button:

and then click the "Create/Reset Password" button in the dialog:
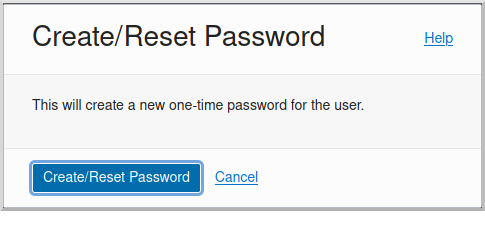
Click the "Copy" link and save the generated password for later.
See the Groups and Users docs for more information.
6.3. Oracle Cloud Infrastructure Registry (OCIR) repository
Your function will be deployed as a Docker image, so you need to choose a repo name in your tenancy. The repo will be created for you the first time you push an image to it.
The name can be simple, e.g. "mn-functions", or you can add a path prefix to help group the repos when there are many of them, e.g. "my-username/my-repo/mn-functions"
Update your build script with the location to deploy the Docker container.
Edit pom.xml and change jib.docker.image property in the <properties> section, replacing REGION, TENANCY, and REPO with appropriate values:
pom.xml
<jib.docker.image>[REGION].ocir.io/[TENANCY]/[REPO]/${project.artifactId}</jib.docker.image>For REGION, use the lowercase value from the "Region Key" column in Regions and Availability Domains, e.g. iad.
For TENANCY, use the Object Storage namespace string of the tenancy (as shown on the Tenancy Information page), e.g. my-tenancy.
For REPO, use the name of the repository to use, e.g. mn-functions (or my-username/my-repo/mn-functions).
The final properties should look something like this:
pom.xml
<jib.docker.image>iad.ocir.io/my-tenancy/mn-functions/${project.artifactId}</jib.docker.image>6.4. OCIR authentication
Login to OCIR by running:
docker login <region-key>.ocir.ioReplace <region-key> with the value you used for REGION above, e.g. iad.ocir.io.
For the username, enter <tenancy-namespace>/<username>, e.g. my-tenancy/mn-function-user. If your tenancy is federated with Oracle Identity Cloud Service, use the format <tenancy-namespace>/oracleidentitycloudservice/<username>.
For the password, use the auth token you copied earlier.
See the OCIR login docs for more information.
6.5. Virtual Cloud Network (VCN) and Subnet
If you have a suitable VCN and subnet you can use those, or create new ones.
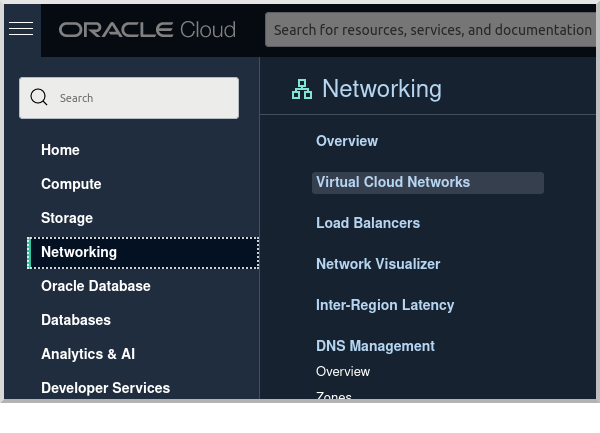
To create a VCN, open the Oracle Cloud Menu and click "Networking", then "Virtual Cloud Networks":
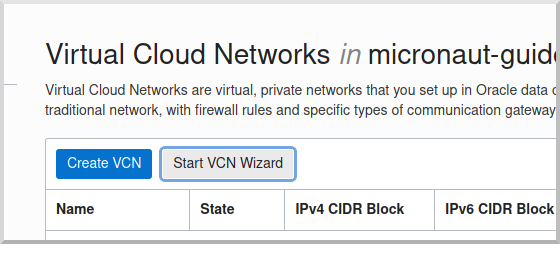
Click "Start VCN Wizard":
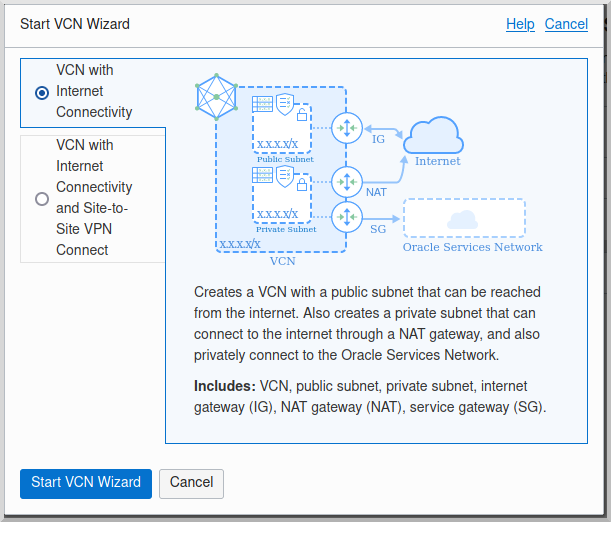
Select "VCN with Internet Connectivity" and click "Start VCN Wizard":
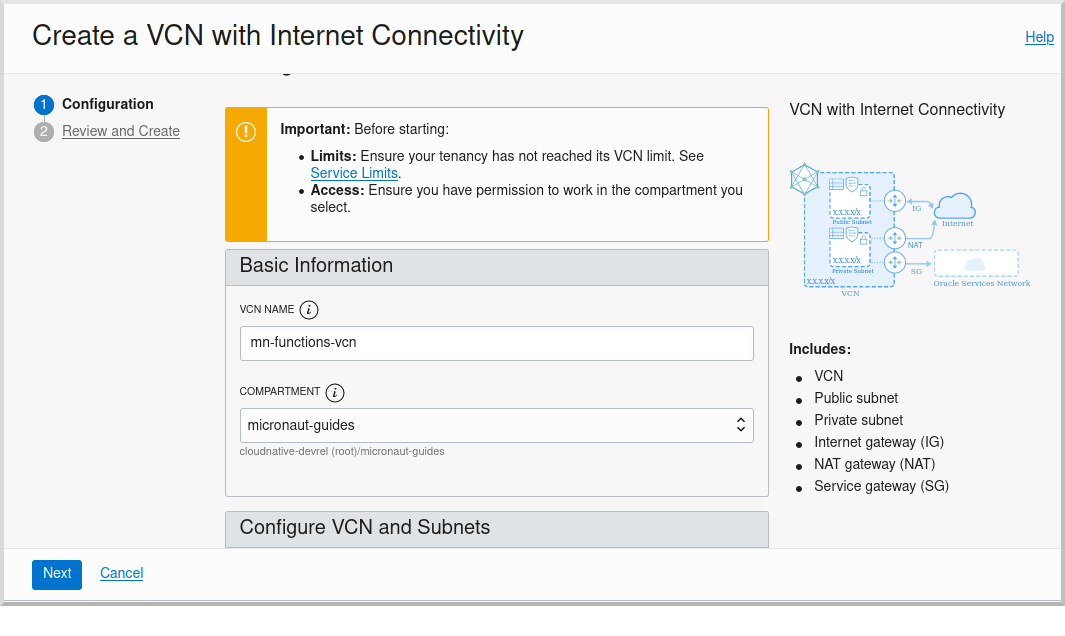
Enter a name for the VCN, e.g. "mn-functions-vcn", and change the CIDR block values if needed:
Review the settings and click "Create":
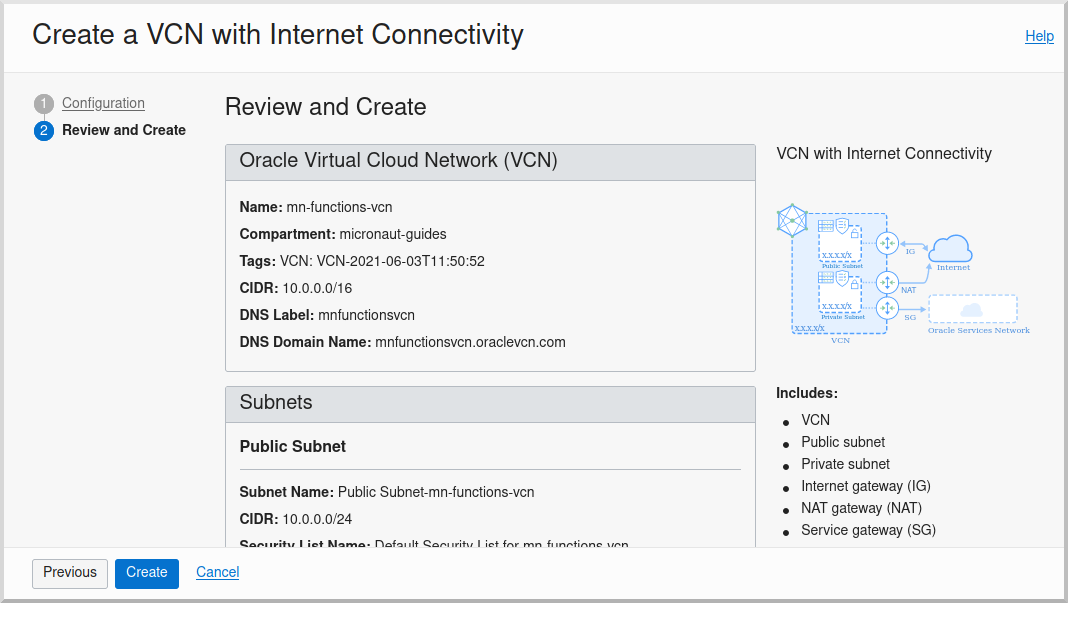
See the VCN and Subnets docs for more information.
6.6. Policies
We’ll need to create some policies to grant various function-related permissions.
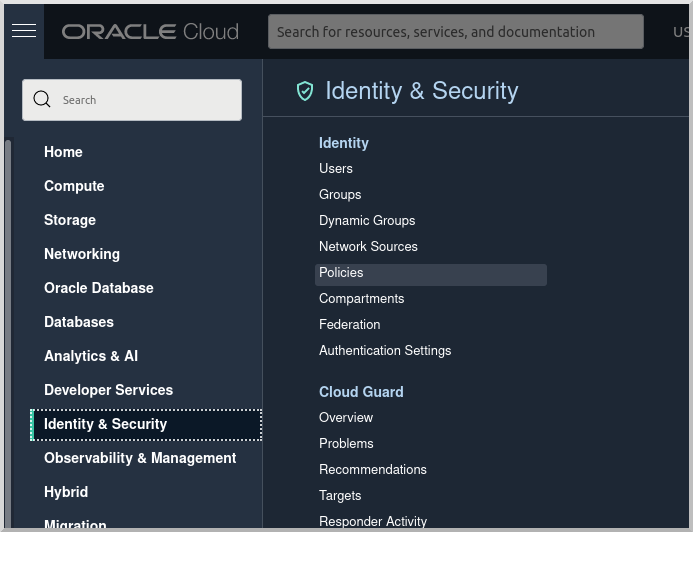
Open the Oracle Cloud Menu and click "Identity & Security", and then "Policies":
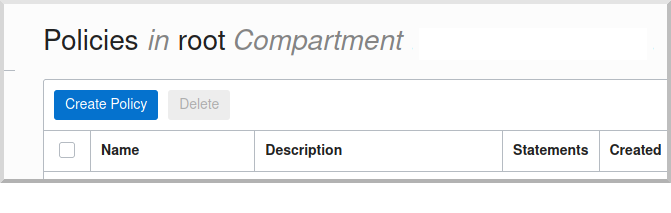
Select the root compartment from the drop-down and click "Create Policy":
Choose a name and description, e.g. "mn-functions-root-policy", and click "Show Manual Editor". Copy the following and paste it into the "Policy Builder" field, replacing "<group-name>" with the name of the group created earlier (e.g. "mn-function-group") and "<compartment-name>" with the name of the compartment you’re using, and click "Create":
Allow group <group-name> to manage repos in tenancy
Allow group <group-name> to read objectstorage-namespaces in tenancy
Allow group <group-name> to manage logging-family in compartment <compartment-name>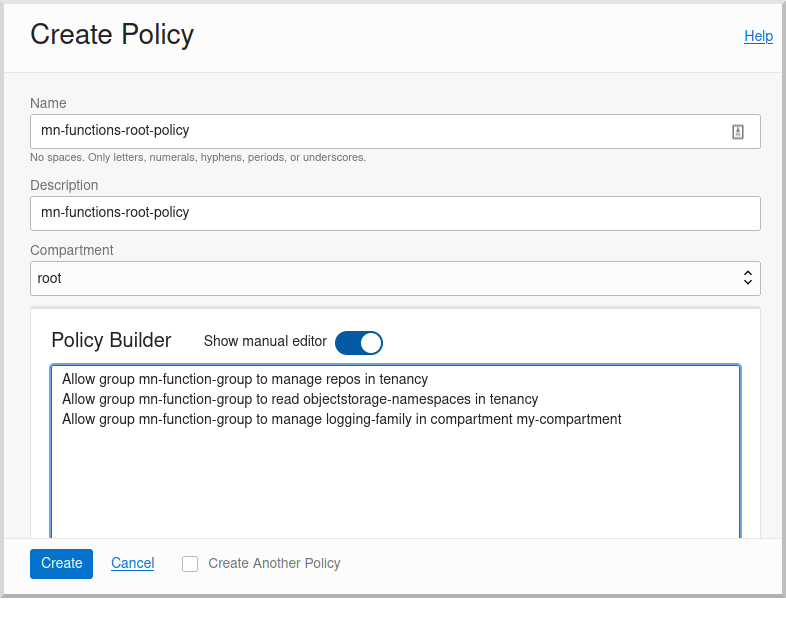
Create another policy in the compartment where your function will be and choose a name and description, e.g. "mn-functions-compartment-policy". Copy the following and paste it into the "Policy Builder" field, again replacing "<group-name>" and "<compartment-name>", and click "Create":
Allow group <group-name> to manage functions-family in compartment <compartment-name>
Allow group <group-name> to read metrics in compartment <compartment-name>
Allow group <group-name> to use virtual-network-family in compartment <compartment-name>
Allow group <group-name> to use apm-domains in compartment <compartment-name>
Allow service faas to use apm-domains in compartment <compartment-name>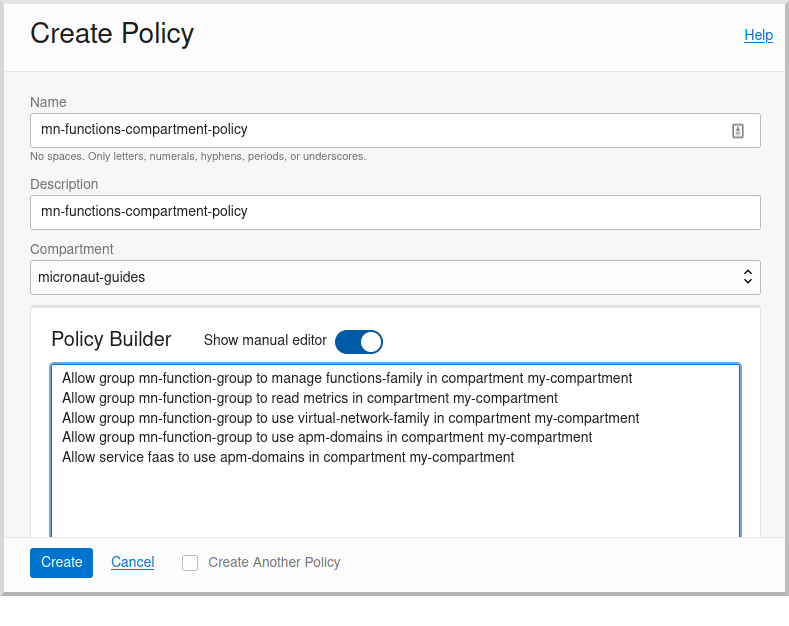
See the Policies docs for more information.
7. Creating the function
First we’ll need to build the function as a Docker image and push it to the OCIR repository.
From the demo project directory, run:
./mvnw deploy -Dpackaging=dockerOnce you’ve pushed the Docker container, create the function in the console. First, log out from your administrator account and log in as the user created above.
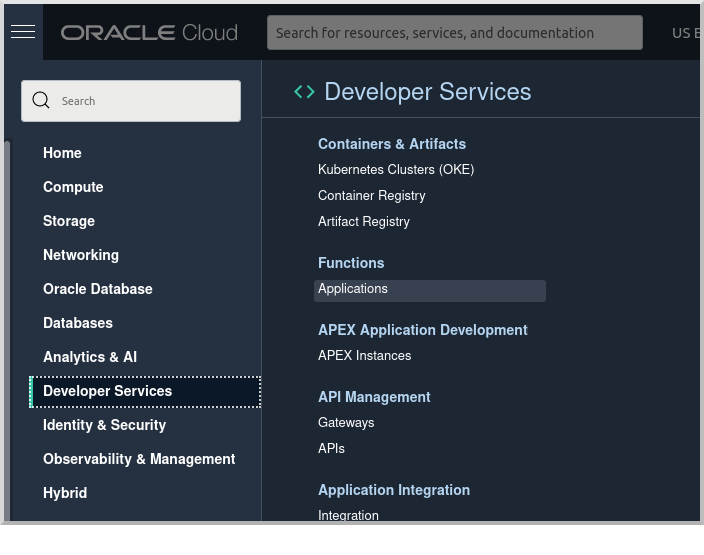
Open the Oracle Cloud Menu and click "Developer Services", and then "Applications" under "Functions":
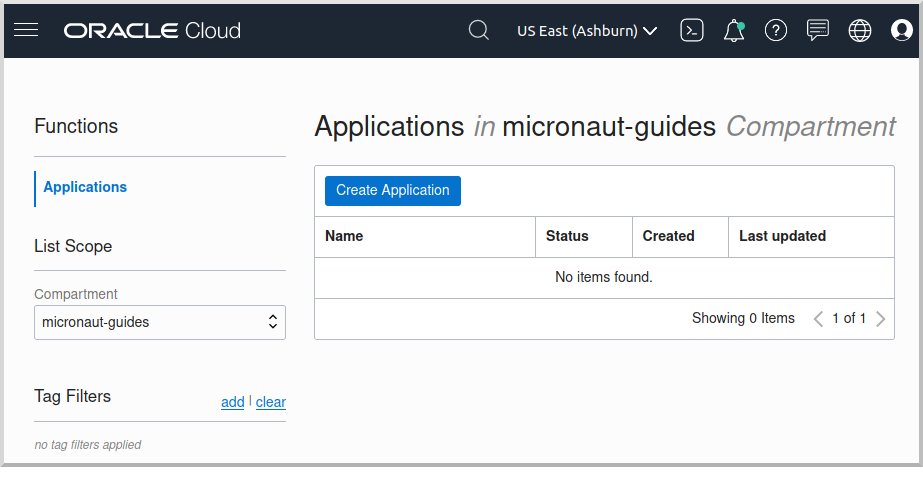
Click "Create Application":
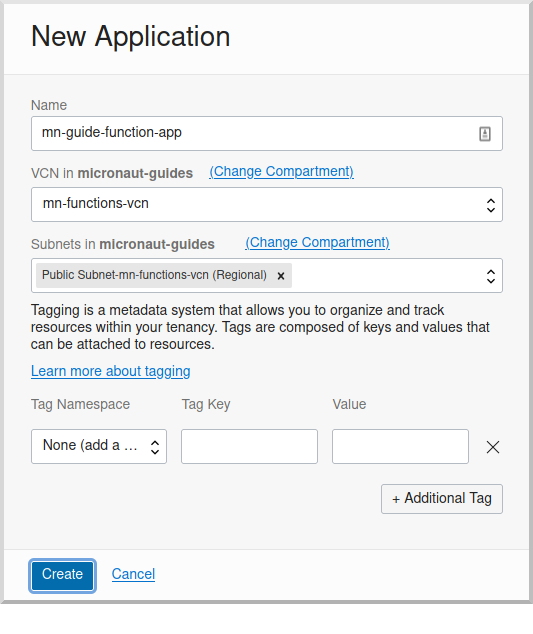
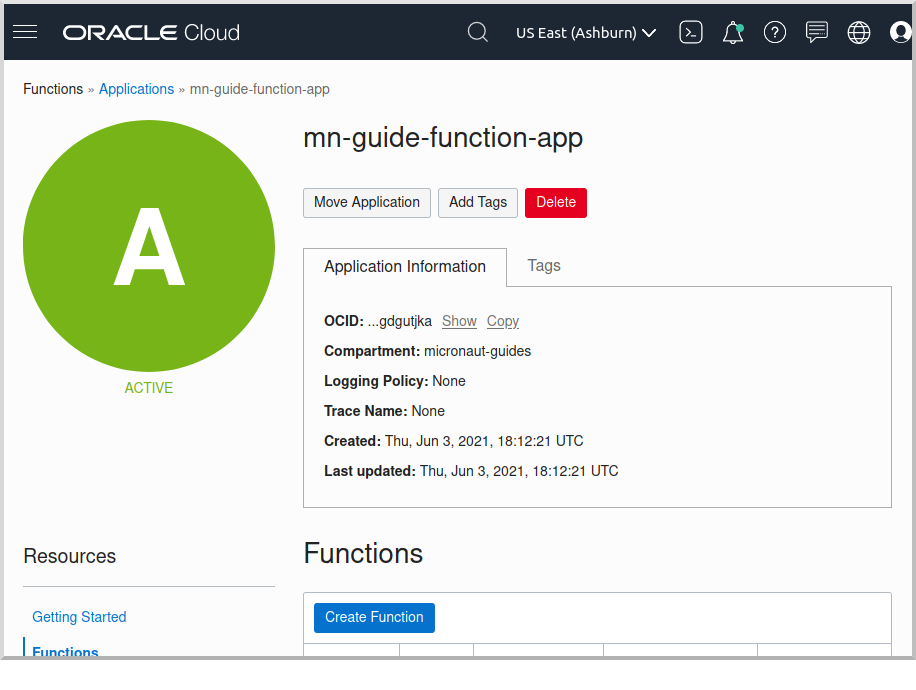
Choose a name for the application, e.g. "mn-guide-function-app", and select the VCN created earlier. Select the private subnet, and click "Create":
Click "Functions" (under "Resources") in the lower left, and then click "Create Function":
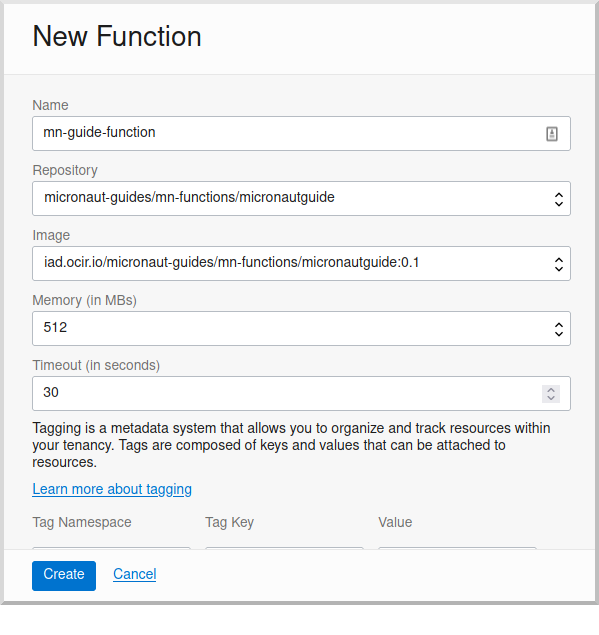
Choose a name for the function, e.g. "mn-guide-function", select the repository where you pushed the Docker image, and select the uploaded image. Select 512MB memory and click "Create":
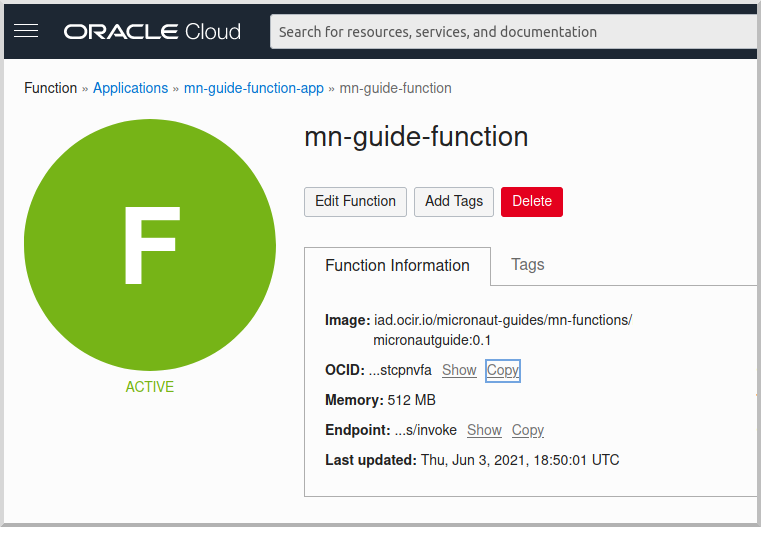
Click the function link in the list, and click the "Copy" link in the OCID row; you’ll need the OCID of the function to invoke the function:
8. Enable Tracing and Logs
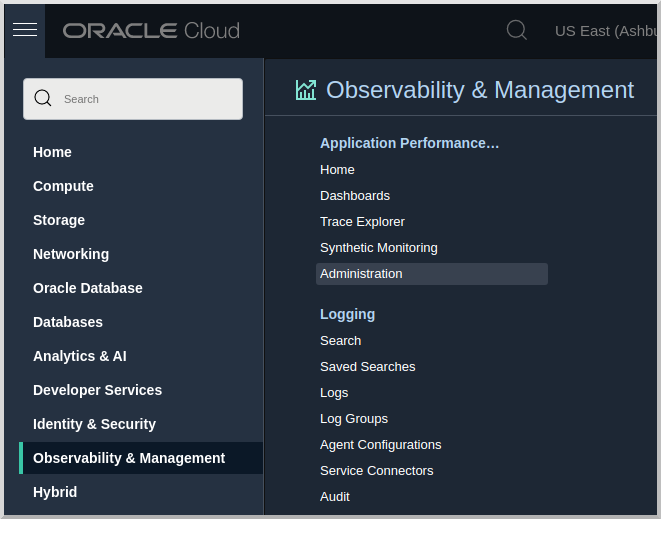
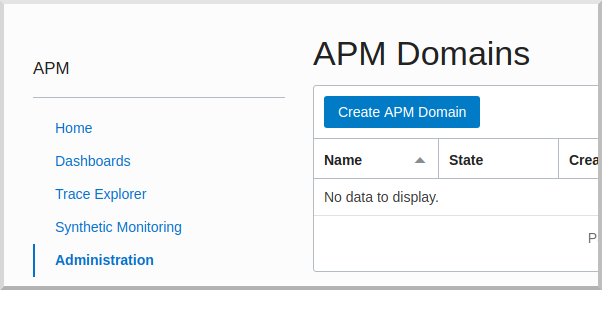
Open the Oracle Cloud Menu and click "Observability & Management", and then "Administration" under "Application Performance…":
Click "Create APM Domain":
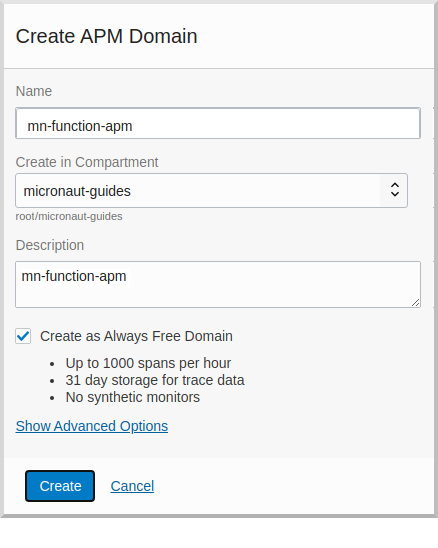
Choose a name and description, e.g. "mn-function-apm", the compartment (and optionally check "Create as Always Free Domain"), then click "Create":
Navigate back to the function application page and click "Logs" (under "Resources") in the lower left:
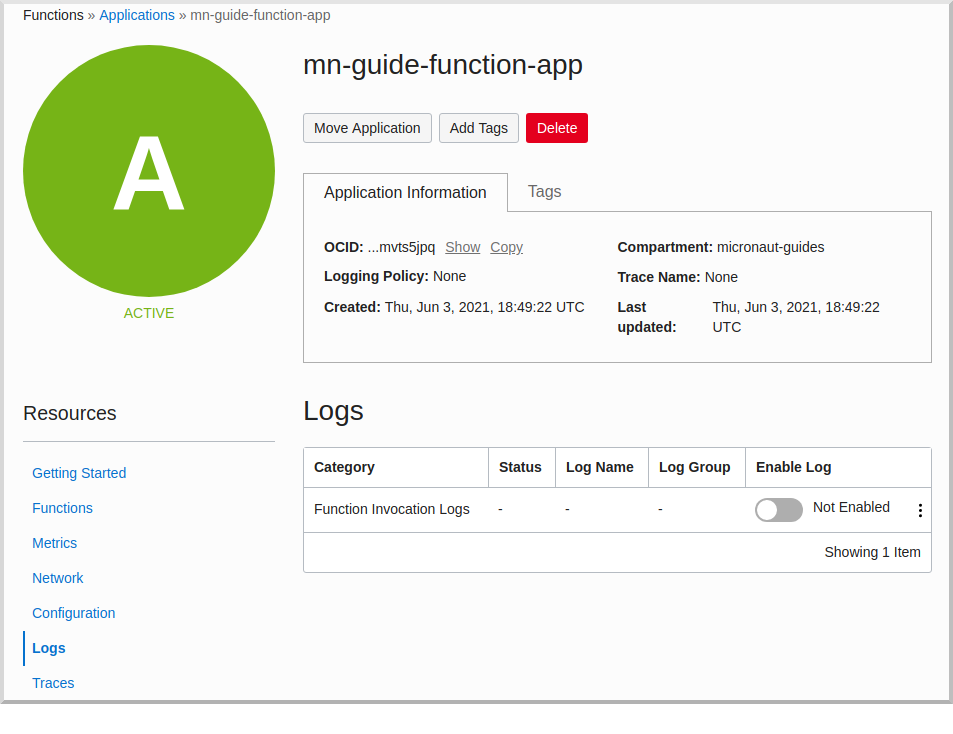
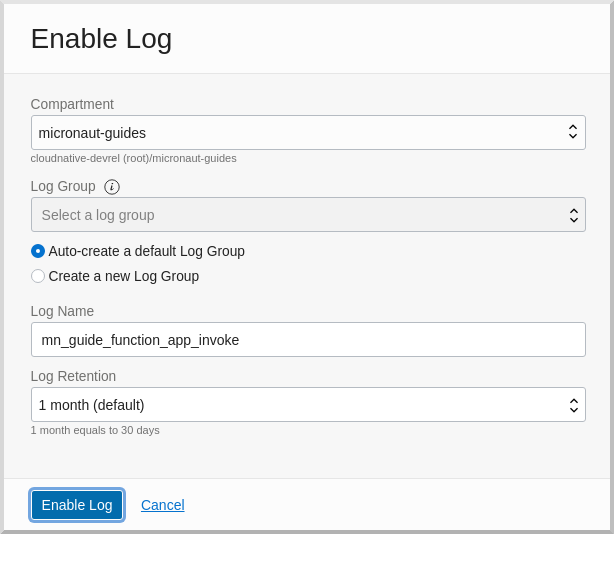
Click the slider to enable logs, then choose the compartment to store them in, a log group, a log name, and the retention policy, and click "Enable Log":
Next, click "Traces" in the lower left:
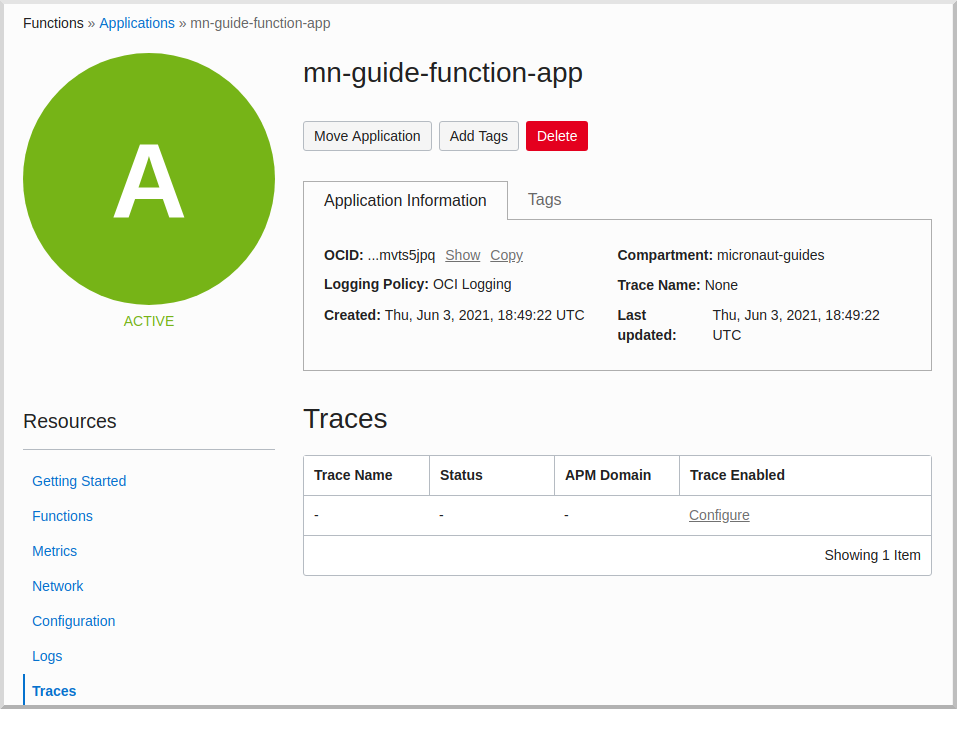
Click "Configure", then choose the compartment, and the APM domain created earlier, and click "Enable Trace":

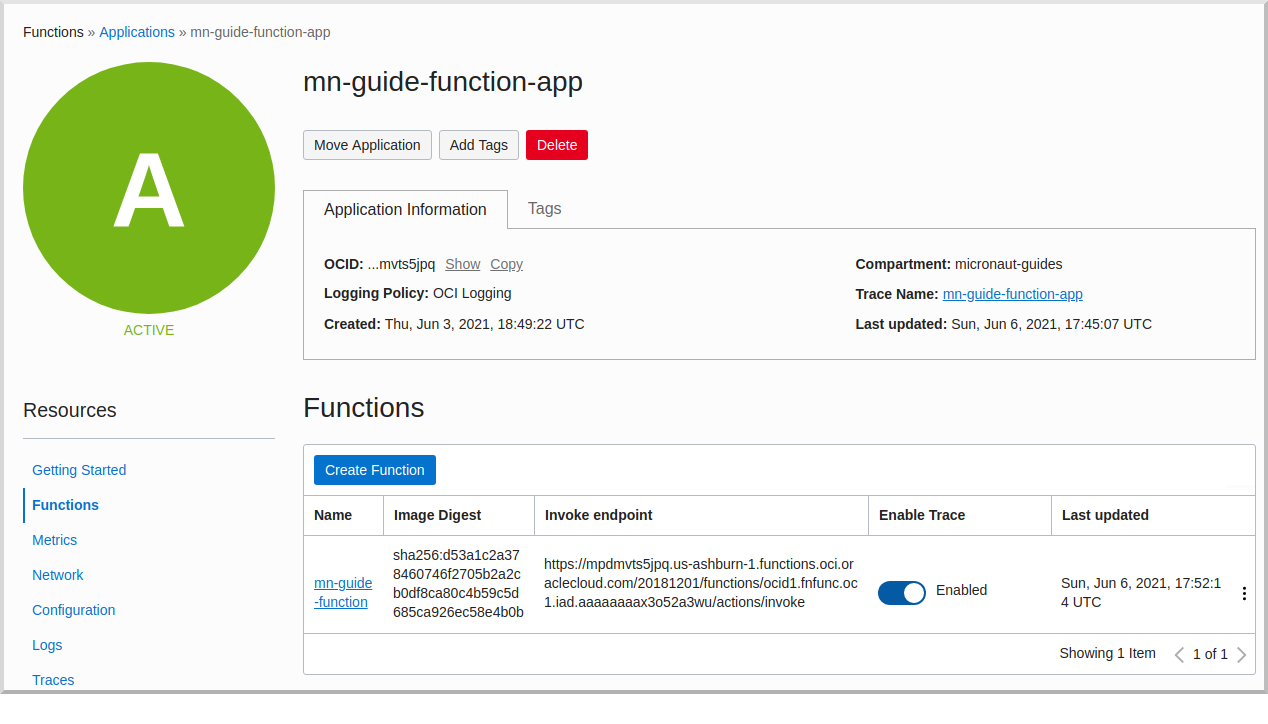
Finally, navigate to the application’s function page and click the button to enable function tracing:
9. Invoking the function
We’ll use the OCI command line to invoke the function. If you haven’t already, install the Oracle Cloud CLI and run oci setup config.
Run the following, replacing <OCID> with the OCID of the function you copied above:
oci fn function invoke --function-id <OCID> --file "-" --body ""The output should look something like:
Your tenancy is: ocid1.tenancy.oc1..aaaaaaaaud4g4e5ovjawn5cij7ke.................The first invocation ("cold start") will take a while as the infrastructure is configured, probably 10-20 seconds or more but subsequent invocations should return in 1-2 seconds.
10. Deploying as a Native Executable
10.1. Install GraalVM
We will use GraalVM, an advanced JDK with ahead-of-time Native Image compilation, to generate a native executable of this Micronaut application.
Compiling Micronaut applications ahead of time with GraalVM significantly improves startup time and reduces the memory footprint of JVM-based applications.
Only Java and Kotlin projects support using GraalVM’s native-image tool. Groovy relies heavily on reflection, which is only partially supported by GraalVM.
|
Java 21
sdk install java 21.0.5-graalFor installation on Windows, or for a manual installation on Linux or Mac, see the GraalVM Getting Started documentation.
The previous command installs Oracle GraalVM, which is free to use in production and free to redistribute, at no cost, under the GraalVM Free Terms and Conditions.
Alternatively, you can use the GraalVM Community Edition:
Java 21
sdk install java 21.0.2-graalce10.2. Building and deploying the native executable
Deploying the function as a native executable is similar to the earlier deployment above.
First you need to update your build script with the location to deploy the native executable Docker container.
Since it’s unlikely that you’ll be deploying both jar-based containers and native executable-based containers, you can use the same repo. If you wish to separate the native executable containers, edit pom.xml and update the jib.docker.image property, appending "-native" to the value:
pom.xml
<jib.docker.image>[REGION].ocir.io/[TENANCY]/[REPO]/${project.artifactId}-native</jib.docker.image>Next, update the version.
Edit pom.xml and increment the version to 0.2:
pom.xml
<version>0.2</version>Depending on the Micronaut version you’re using, you might also need to update some properties in your build script to update the Docker configuration.
In your pom.xml, if the nativeImageBuildArgs block in the configuration section of the micronaut-maven-plugin plugin includes an arg with value --static, replace it with -H:+StaticExecutableWithDynamicLibC.
pom.xml
<plugin>
  <groupId>io.micronaut.build</groupId>
  <artifactId>micronaut-maven-plugin</artifactId>
   <configuration>
      <nativeImageBuildArgs>
        <arg>-H:+StaticExecutableWithDynamicLibC</arg>
        <arg>-Dfn.handler=${function.entrypoint}</arg>
      </nativeImageBuildArgs>
      <appArguments>
        <arg>${function.entrypoint}</arg>
      </appArguments>
    </configuration>
</plugin>
Then from the demo project directory, run:
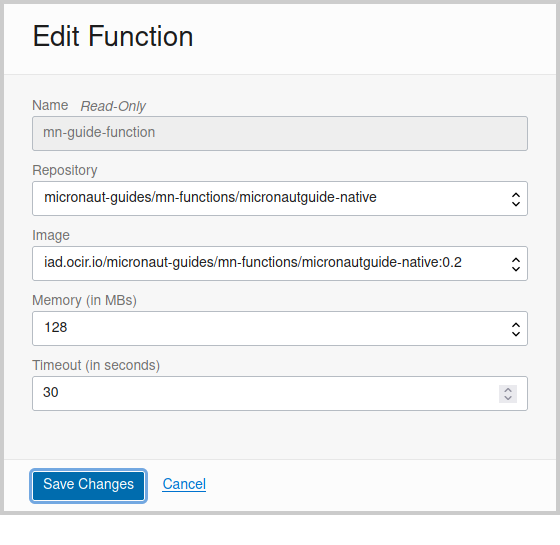
./mvnw deploy -Dpackaging=docker-nativeOnce you’ve pushed the Docker container, edit the function in the console to use the new container, and to reduce the memory to 128MB:
Use the same OCI command as before to invoke the function. No changes are needed because the function OCID doesn’t change when deploying new containers.
11. Next Steps
Explore more features with Micronaut Guides.
Read more about the Micronaut Oracle Cloud integration.
Also check out the Oracle Cloud Function documentation for more information on the available functionality.
12. License
| All guides are released with an Apache license 2.0 license for the code and a Creative Commons Attribution 4.0 license for the writing and media (images…). |