

Deploy a Micronaut application to AWS Elastic Beanstalk
Learn how easy it is to deploy a Micronaut application to Elastic Beanstalk.
On this guide
In this section
Getting Started
In this guide, we will create a Micronaut application written in Groovy.
You will learn how to deploy a Micronaut application to AWS Elastic Beanstalk.
AWS Elastic Beanstalk is an easy-to-use service for deploying and scaling web applications and services developed with Java.
What you will need
To complete this guide, you will need the following:
-
Some time on your hands
-
A decent text editor or IDE (e.g. IntelliJ IDEA)
-
JDK 21 or greater installed with
JAVA_HOMEconfigured appropriately
Solution
We recommend that you follow the instructions in the next sections and create the application step by step. However, you can go right to the completed example.
-
Download and unzip the source
Writing the Application
Create an application using the Micronaut Command Line Interface or with Micronaut Launch.
mn create-app example.micronaut.micronautguide --build=gradle --lang=groovy|
Note
|
If you don’t specify the --build argument, Gradle with the Kotlin DSL is used as the build tool. If you don’t specify the --lang argument, Java is used as the language.If you don’t specify the --test argument, JUnit is used for Java and Kotlin, and Spock is used for Groovy.
|
The previous command creates a Micronaut application with the default package example.micronaut in a directory named micronautguide.
The Micronaut management dependency adds support for monitoring your application via endpoints: special URIs that return details about the health and state of your application.
Add the management dependency:
implementation("io.micronaut:micronaut-management")Once you include the management dependency, a /health endpoint is exposed.
Create a test to verify it:
Testing the Application
To run the tests:
./gradlew testThen open build/reports/tests/test/index.html in a browser to see the results.
Deploy to Elastic Beanstalk
Create an executable jar including all dependencies:
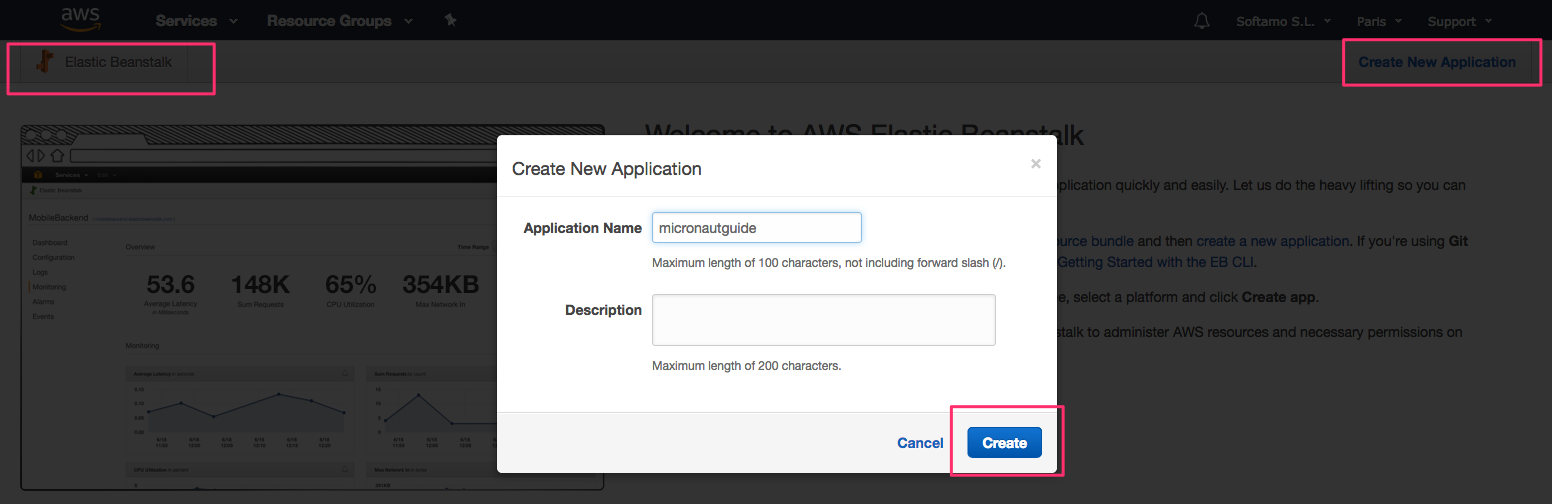
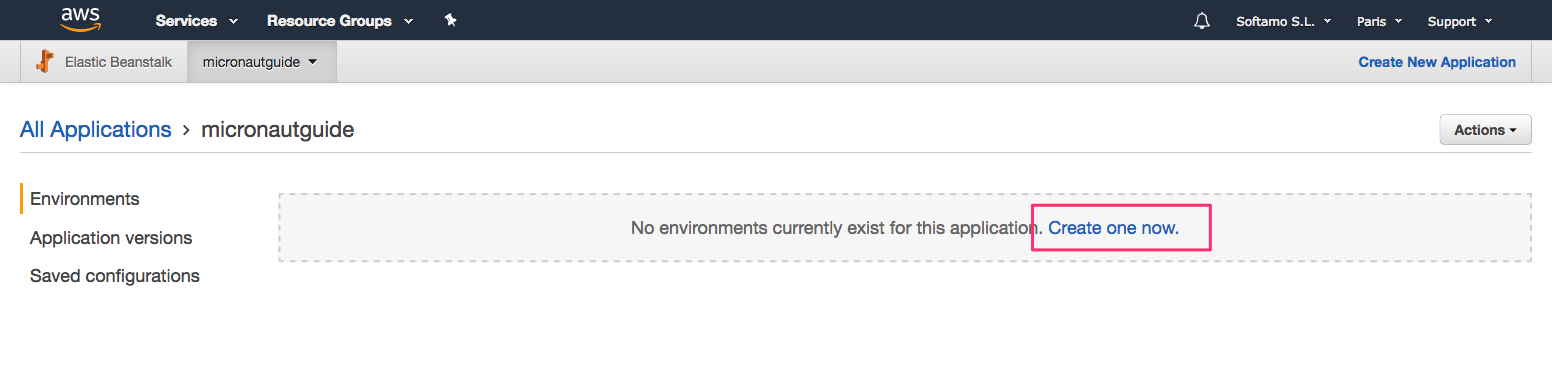
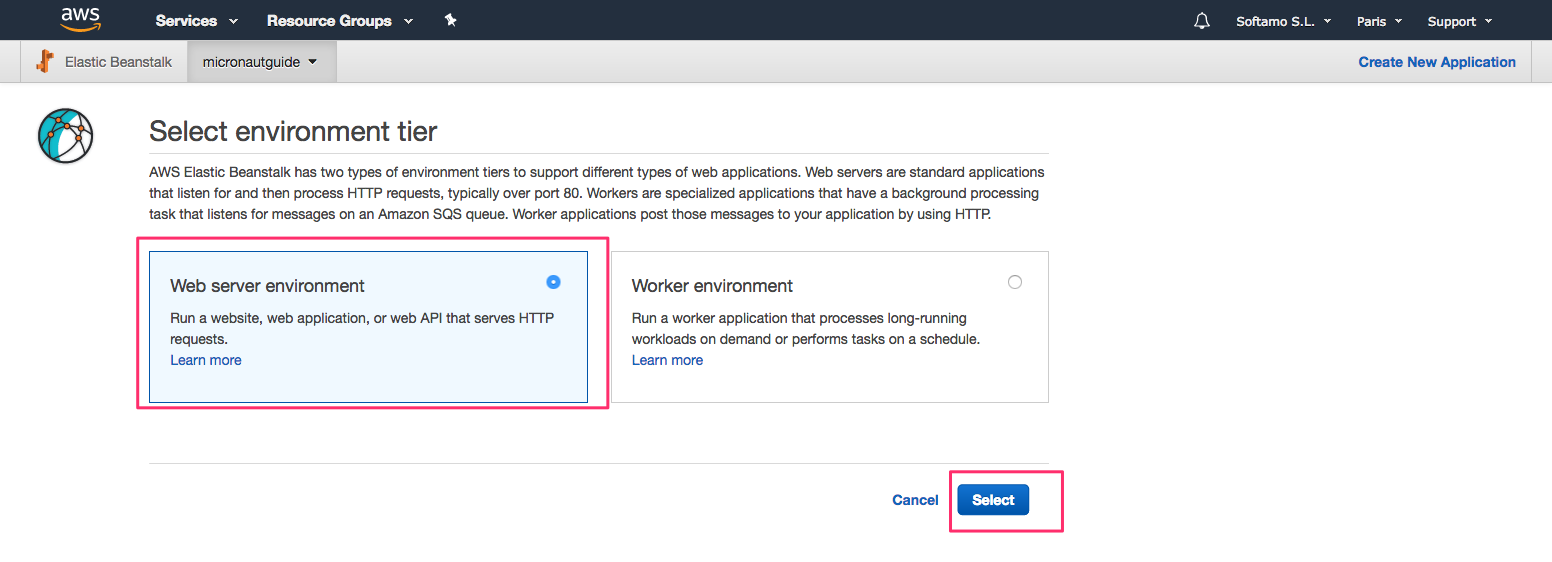
./gradlew shadowJarThe next screenshots illustrate the steps necessary to deploy a Micronaut application to AWS Elastic Beanstalk:
-
Select Java Platform.
-
Click the Upload button.
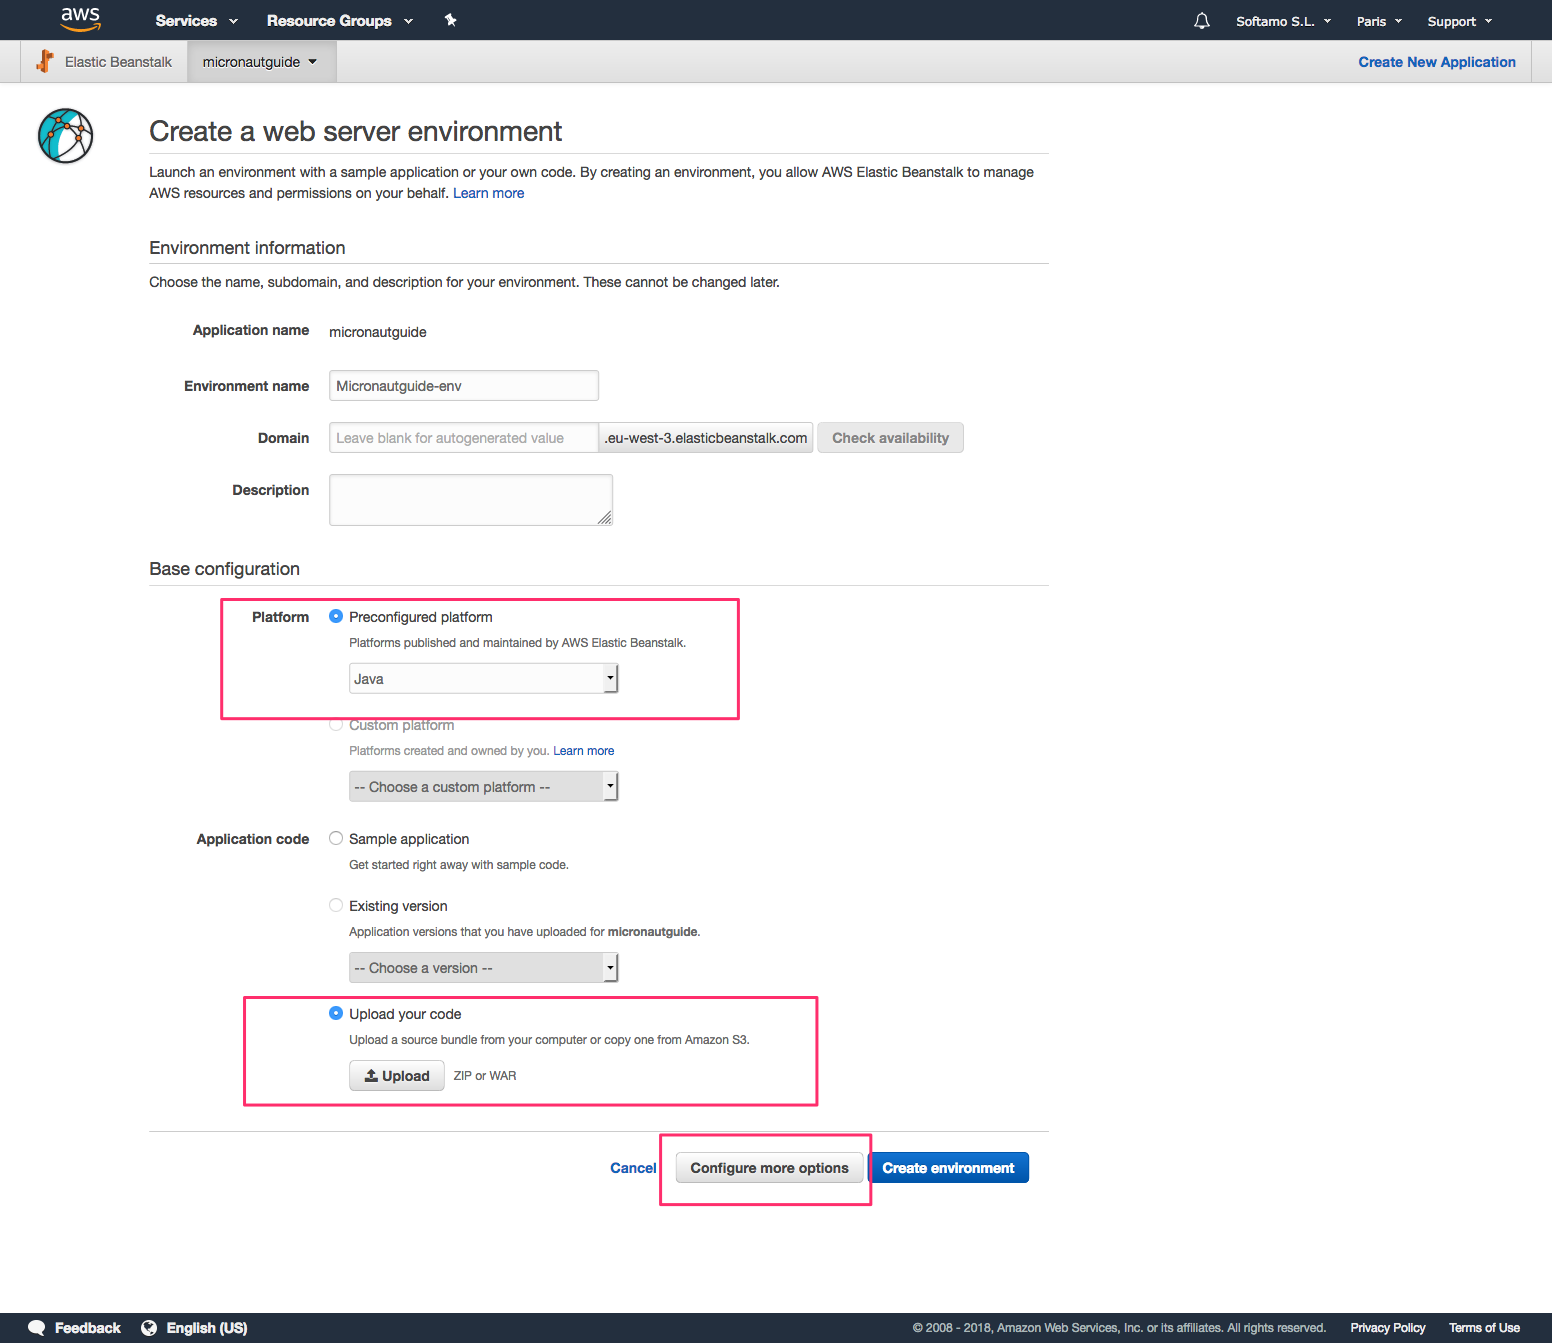
Upload your JAR.
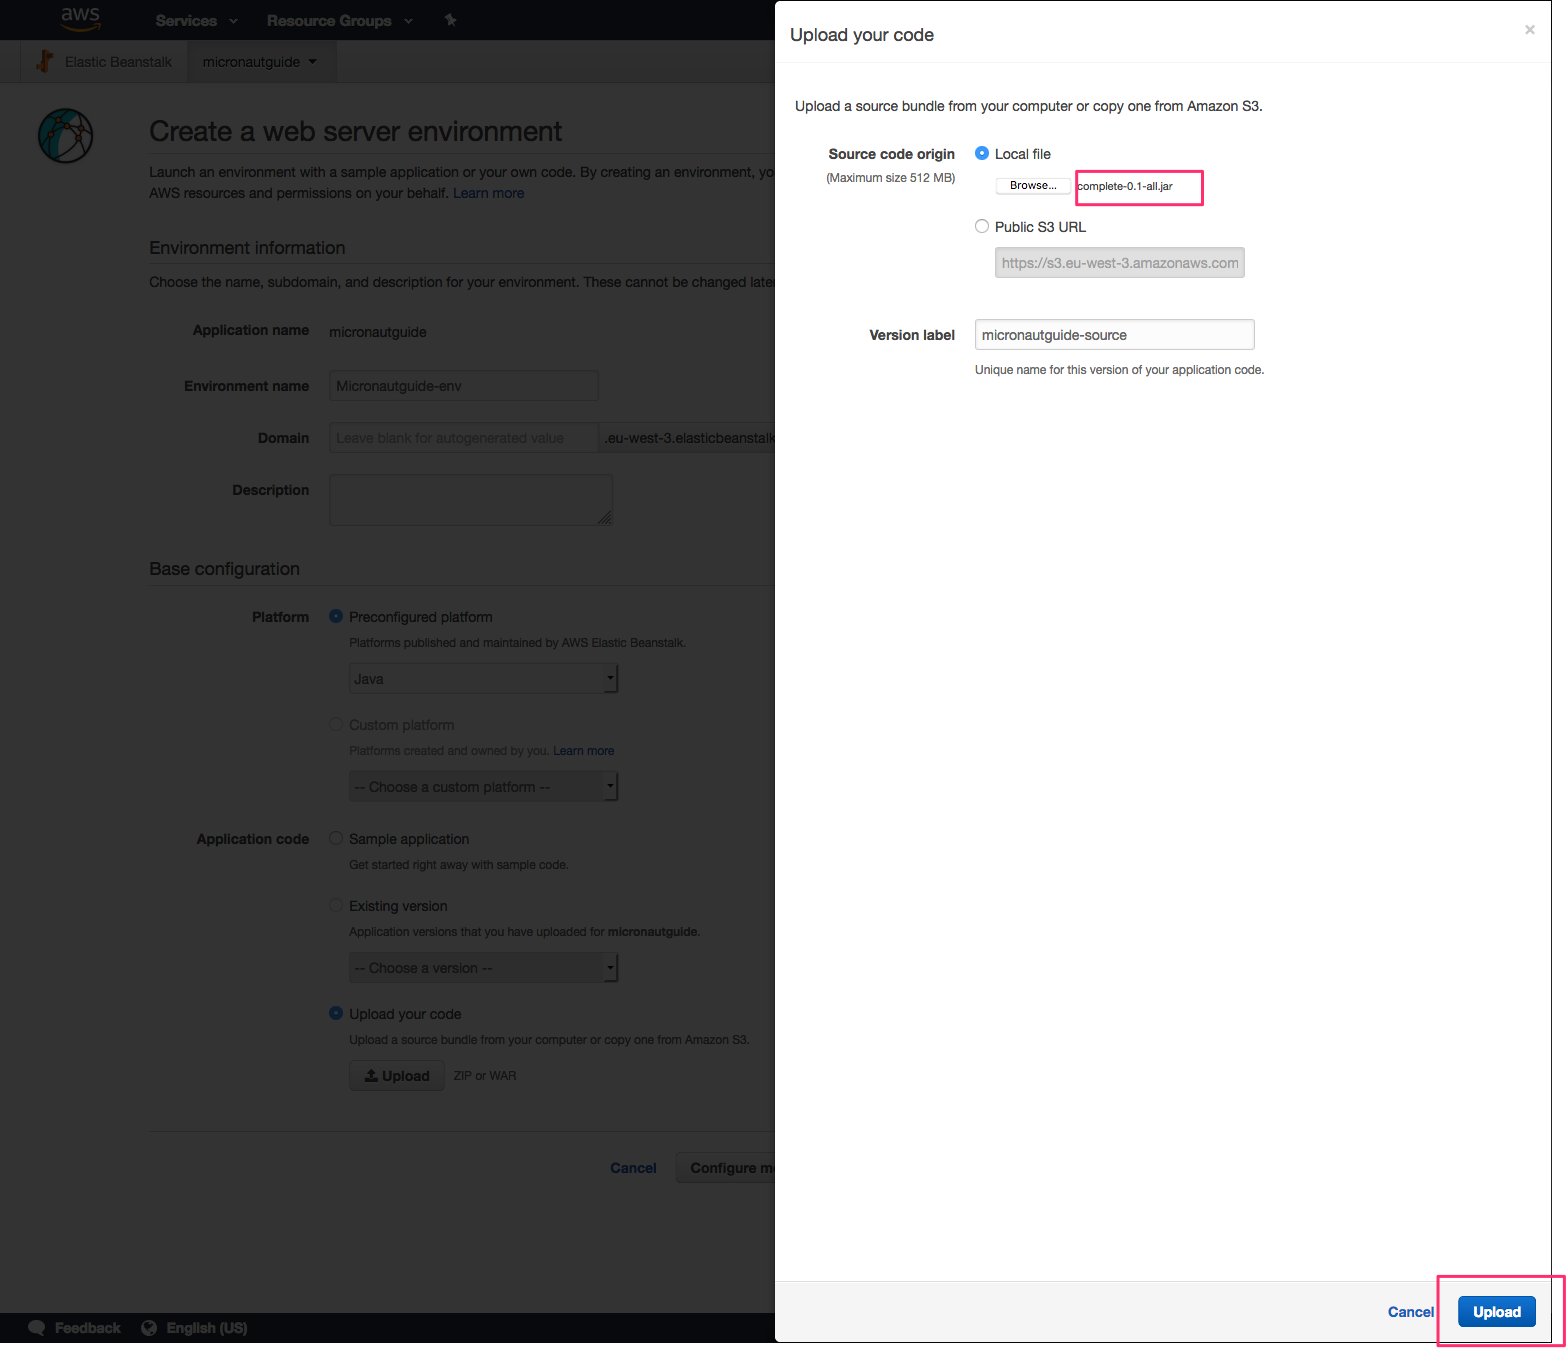
Before you create the environment, click "Configure more options". If you forget, you can change this after you create the environment.
By default, Micronaut applications listen on port 8080. Elastic Beanstalk assumes that the application listens on port 5000. There are two ways to fix this discrepancy: change the port Elastic Beanstalk is configured to use, or change the port the application listens on. For this post, we will change the application port.
The easiest way to do this is to specify the MICRONAUT_SERVER_PORT environment variable in the Elastic Beanstalk environment and set the value to 5000. (The configuration property name is micronaut.server.port, but the Micronaut framework lets you specify a more environment variable-friendly name).
On the Configuration page in your environment, under Software Configuration, click the settings icon.
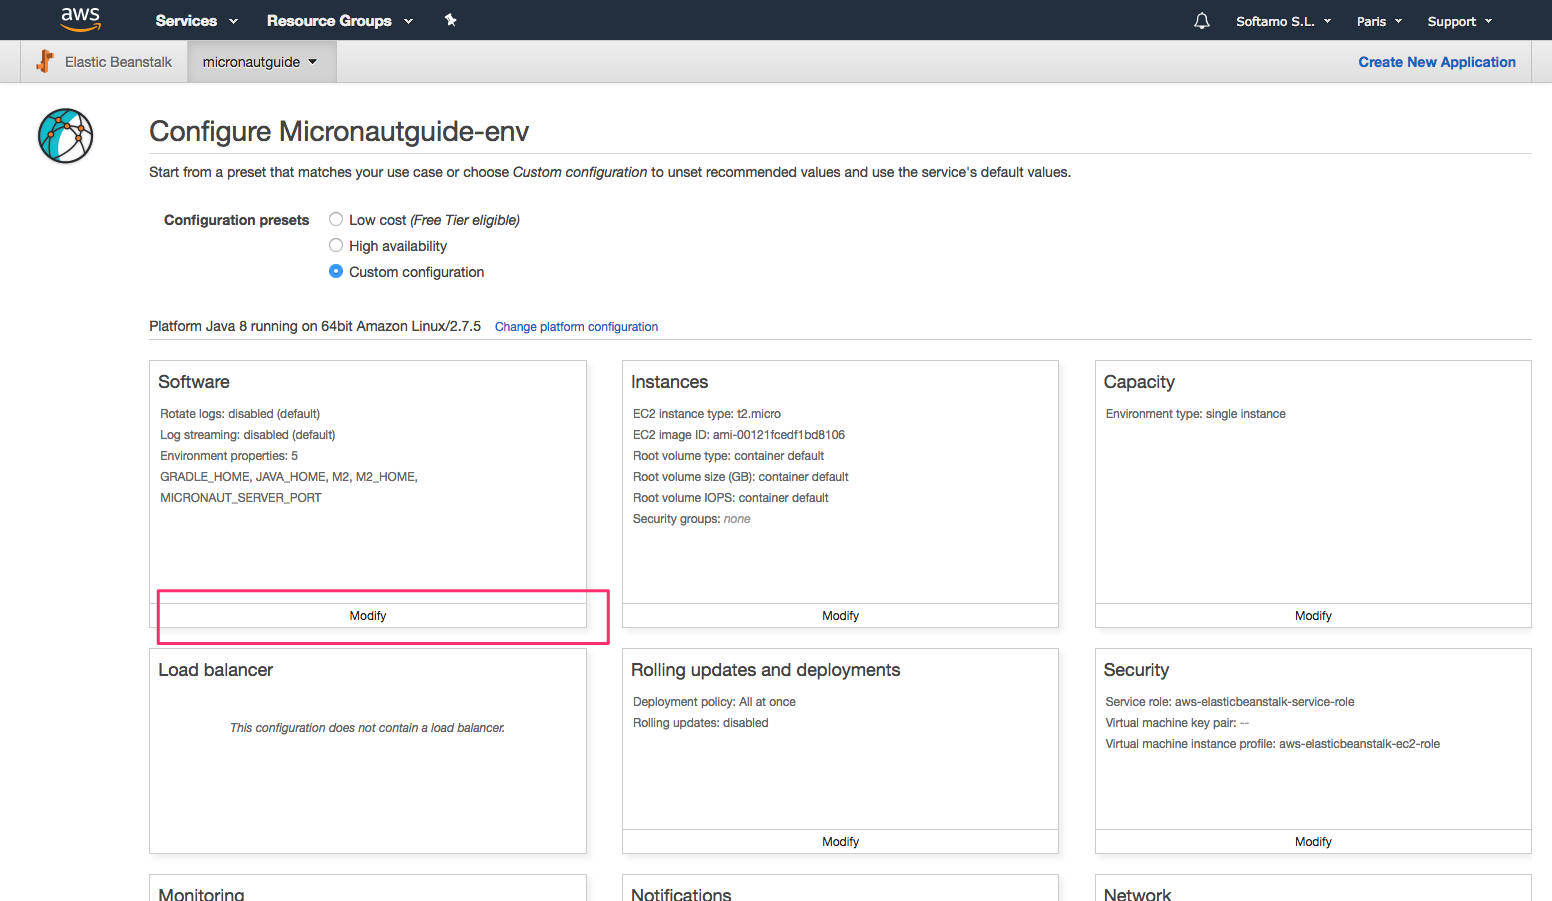
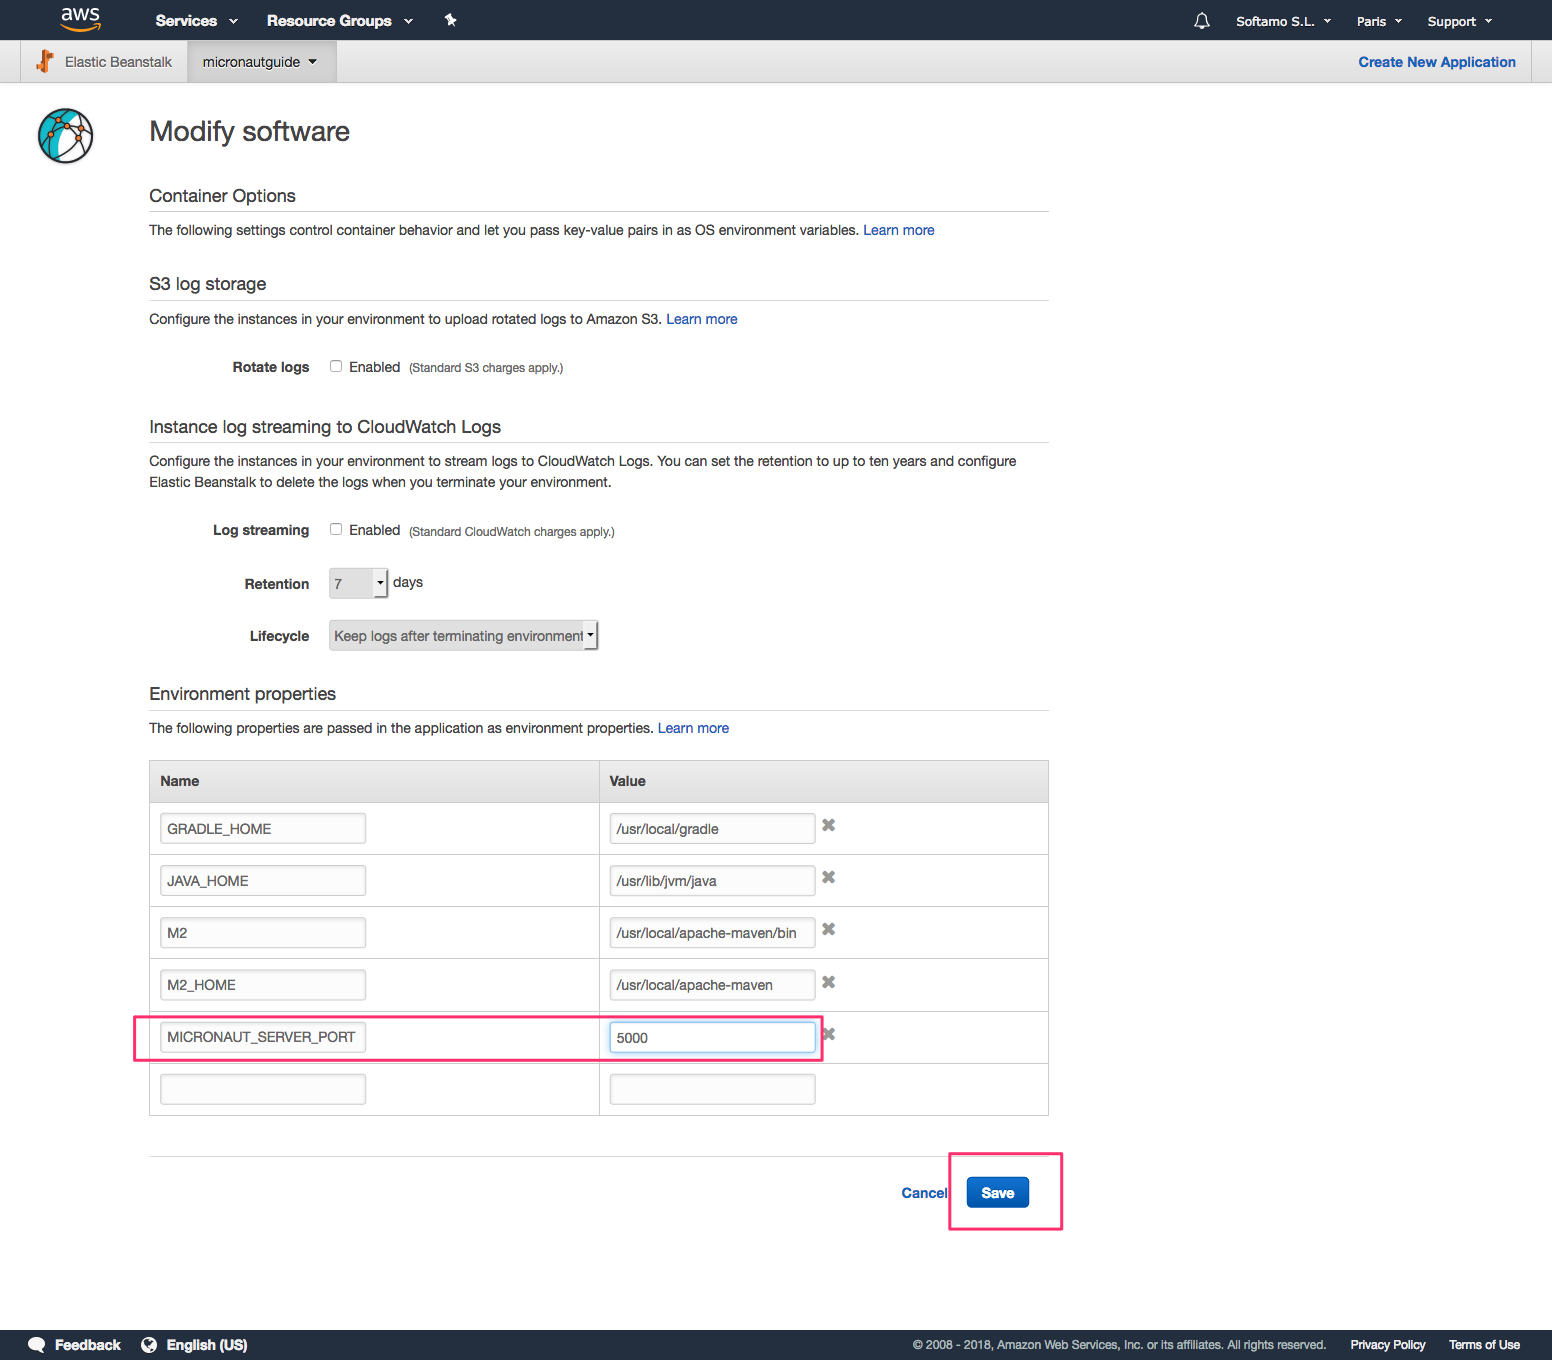
Now you are ready to click Create Environment.
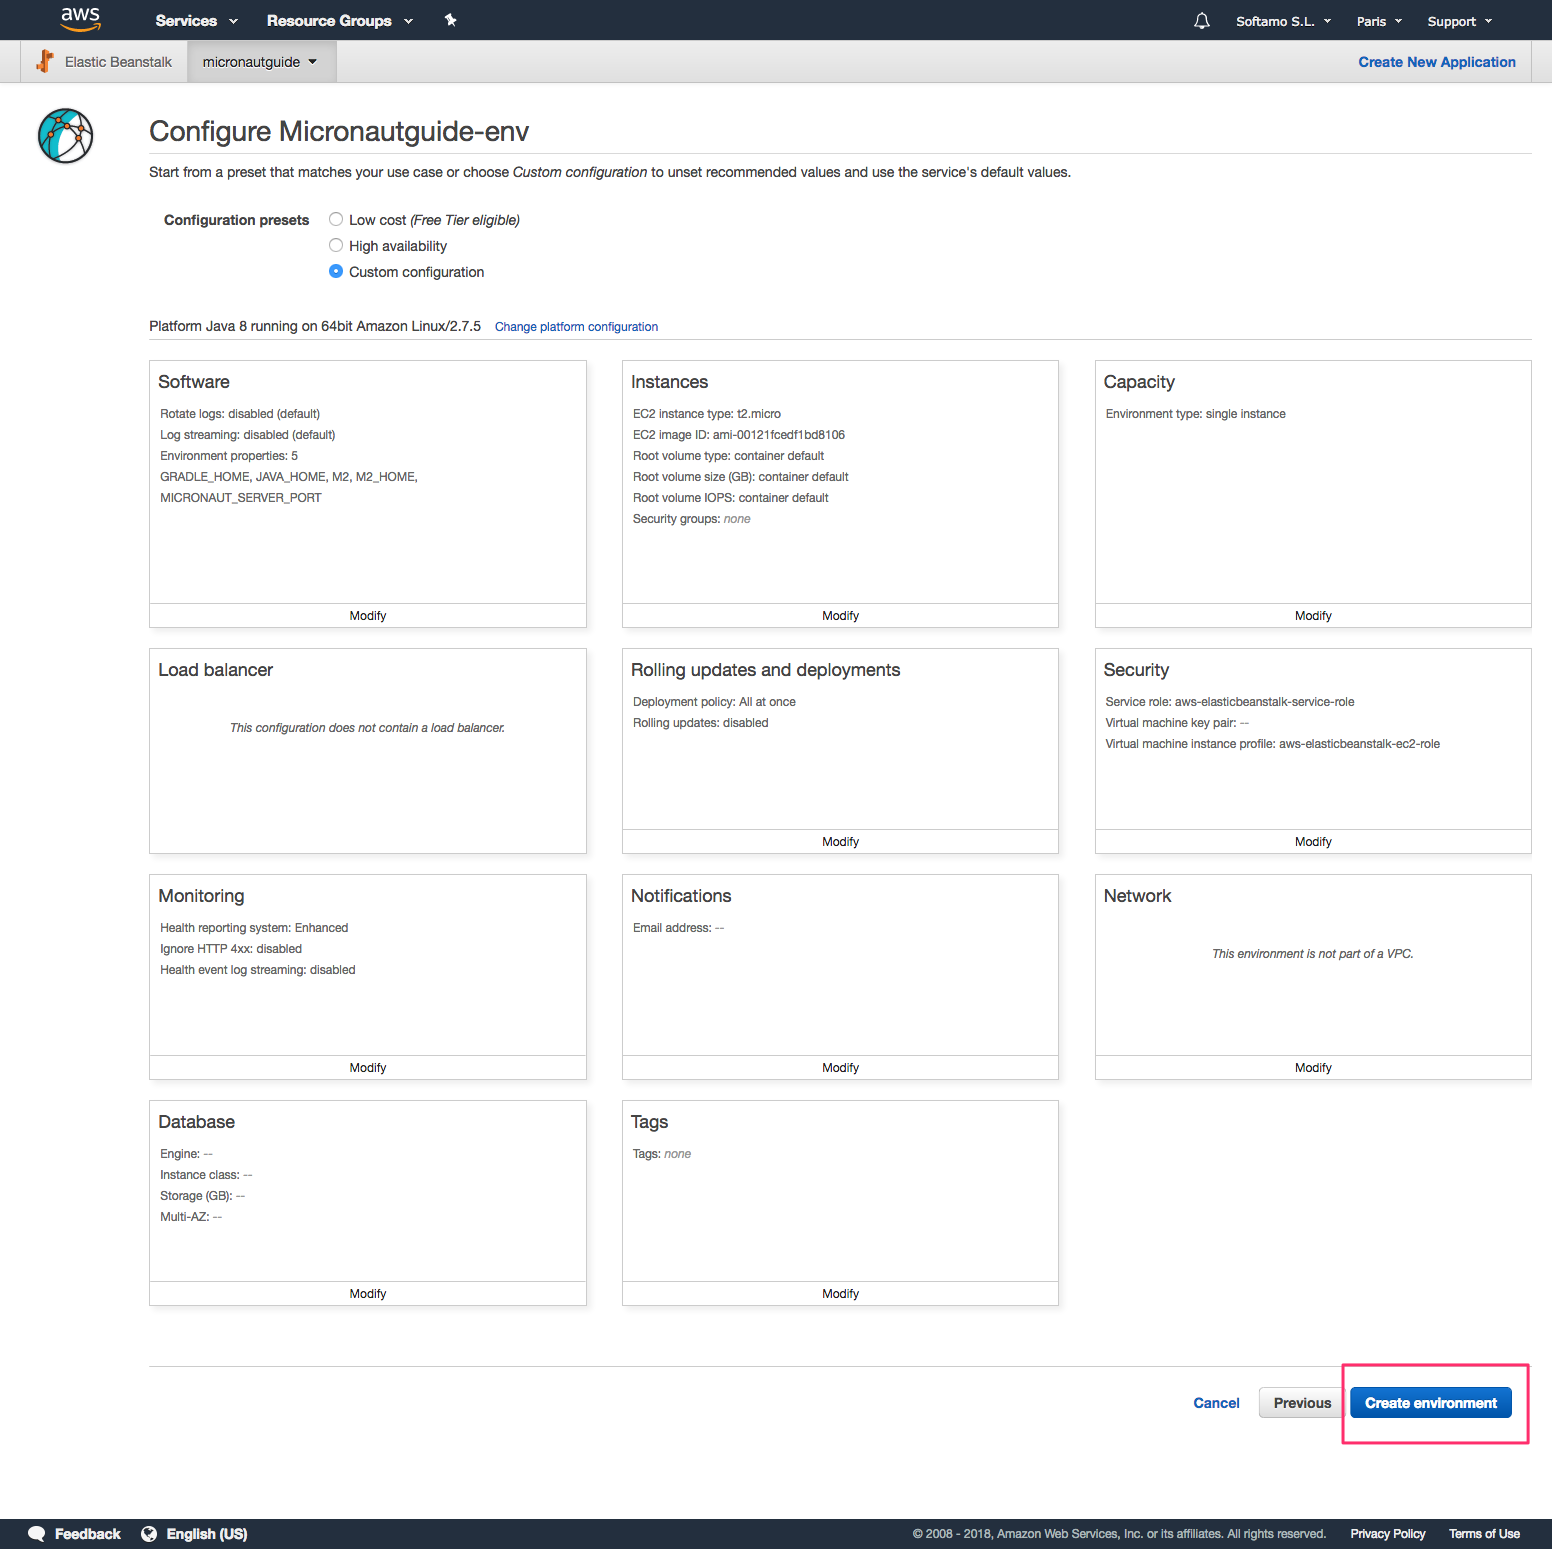
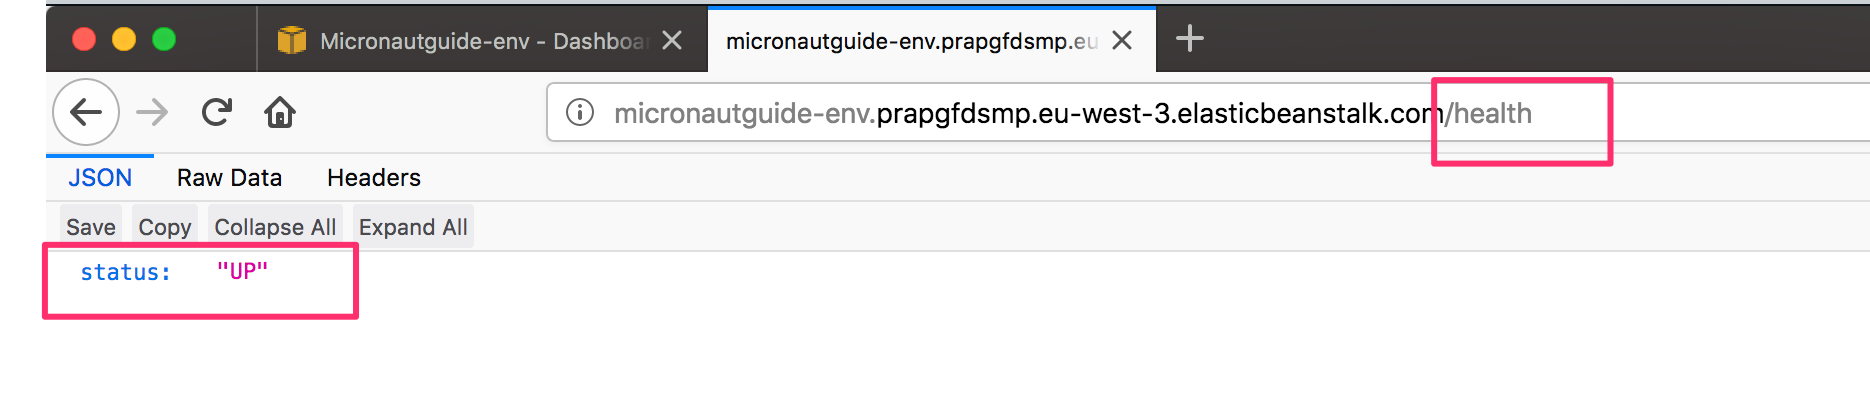
After a few minutes, you will be able to access the /health endpoint.
Next Steps
Explore more features with Micronaut Guides.
Learn more about AWS Elastic Beanstalk.
License
|
Note
|
All guides are released with an Apache License 2.0 for the code and a Creative Commons Attribution 4.0 license for the writing and media (images). |