

Access a database with JPA and Hibernate
Learn how to access a database with JPA and Hibernate using the Micronaut framework.
On this guide
In this section
Getting Started
In this guide, we will create a Micronaut application written in Java.
In this guide, we will write a Micronaut application that exposes some REST endpoints and stores data in a database using JPA and Hibernate.
What you will need
To complete this guide, you will need the following:
-
Some time on your hands
-
A decent text editor or IDE (e.g. IntelliJ IDEA)
-
JDK 21 or greater installed with
JAVA_HOMEconfigured appropriately
Solution
We recommend that you follow the instructions in the next sections and create the application step by step. However, you can go right to the completed example.
-
Download and unzip the source
Writing the Application
Create an application using the Micronaut Command Line Interface or with Micronaut Launch.
mn create-app example.micronaut.micronautguide --build=gradle --lang=java|
Note
|
If you don’t specify the --build argument, Gradle with the Kotlin DSL is used as the build tool. If you don’t specify the --lang argument, Java is used as the language.If you don’t specify the --test argument, JUnit is used for Java and Kotlin, and Spock is used for Groovy.
|
The previous command creates a Micronaut application with the default package example.micronaut in a directory named micronautguide.
Data Source Dependencies
Add the following dependencies:
Data Source Configuration
Define the data source in src/main/resources/application.properties.
datasources.default.password=${JDBC_PASSWORD:""}
datasources.default.url=${JDBC_URL:`jdbc:h2:mem:default;DB_CLOSE_DELAY=-1;DB_CLOSE_ON_EXIT=FALSE`}
datasources.default.username=${JDBC_USER:sa}
datasources.default.driver-class-name=${JDBC_DRIVER:org.h2.Driver}|
Note
|
This way of defining the datasource properties means that we can externalize the configuration, for example for production environment, and also provide a default value for development. If the environment variables are not defined the Micronaut framework will use the default values. Also keep in mind that it is necessary to escape the : in the connection URL using backticks `.
|
JPA configuration
Add the following snippet to src/main/resources/application.properties to configure JPA:
jpa.default.properties.hibernate.hbm2ddl.auto=update
jpa.default.properties.hibernate.show_sql=true
Domain
Create the domain entities:
imports
package example.micronaut.domain;

import com.fasterxml.jackson.annotation.JsonIgnore;

import io.micronaut.serde.annotation.Serdeable;

import jakarta.persistence.Column;
import jakarta.persistence.Entity;
import jakarta.persistence.GeneratedValue;
import jakarta.persistence.Id;
import jakarta.persistence.OneToMany;
import jakarta.persistence.Table;
import jakarta.validation.constraints.NotNull;
import java.util.HashSet;
import java.util.Set;

import static jakarta.persistence.GenerationType.AUTO;@Serdeable
@Entity
@Table(name = "genre")
public class Genre {
@Id
@GeneratedValue(strategy = AUTO)
private Long id;
@NotNull
@Column(name = "name", nullable = false, unique = true)
private String name;
@JsonIgnore
@OneToMany(mappedBy = "genre")
private Set<Book> books = new HashSet<>();
public Genre() {}
public Genre(@NotNull String name) {
this.name = name;
}
public Long getId() {
return id;
}
public void setId(Long id) {
this.id = id;
}
public String getName() {
return name;
}
public void setName(String name) {
this.name = name;
}
public Set<Book> getBooks() {
return books;
}
public void setBooks(Set<Book> books) {
this.books = books;
}
@Override
public String toString() {
return "Genre{" +
"id=" + id +
", name='" + name + '\'' +
'}';
}
}The previous domain has a OneToMany relationship with the domain Book.
imports
package example.micronaut.domain;

import io.micronaut.serde.annotation.Serdeable;

import jakarta.persistence.Column;
import jakarta.persistence.Entity;
import jakarta.persistence.GeneratedValue;
import jakarta.persistence.Id;
import jakarta.persistence.ManyToOne;
import jakarta.persistence.Table;
import jakarta.validation.constraints.NotNull;

import static jakarta.persistence.GenerationType.AUTO;@Serdeable
@Entity
@Table(name = "book")
public class Book {
@Id
@GeneratedValue(strategy = AUTO)
private Long id;
@NotNull
@Column(name = "name", nullable = false)
private String name;
@NotNull
@Column(name = "isbn", nullable = false)
private String isbn;
@ManyToOne
private Genre genre;
public Book() {}
public Book(@NotNull String isbn,
@NotNull String name,
Genre genre) {
this.isbn = isbn;
this.name = name;
this.genre = genre;
}
public Long getId() {
return id;
}
public void setId(Long id) {
this.id = id;
}
public String getName() {
return name;
}
public void setName(String name) {
this.name = name;
}
public String getIsbn() {
return isbn;
}
public void setIsbn(String isbn) {
this.isbn = isbn;
}
public Genre getGenre() {
return genre;
}
public void setGenre(Genre genre) {
this.genre = genre;
}
@Override
public String toString() {
return "Book{" +
"id=" + id +
", name='" + name + '\'' +
", isbn='" + isbn + '\'' +
", genre=" + genre +
'}';
}
}Application Configuration
Create an interface to encapsulate the application configuration settings:
imports
package example.micronaut;public interface ApplicationConfiguration {
int getMax();
}Like Spring Boot and Grails, in Micronaut applications you can create typesafe configuration by creating classes that are annotated with @ConfigurationProperties.
Create an ApplicationConfigurationProperties class:
You can override max if you add to your src/main/resources/application.properties:
application.max=50Validation
Micronaut validation is built on the standard framework – JSR 380, also known as Bean Validation 2.0. Micronaut Validation has built-in support for validation of beans that are annotated with jakarta.validation annotations.
To use Micronaut Validation, you need the following dependencies:
annotationProcessor("io.micronaut.validation:micronaut-validation-processor")
implementation("io.micronaut.validation:micronaut-validation")
Alternatively, you can use Micronaut Hibernate Validator, which uses Hibernate Validator; a reference implementation of the validation API.
Repository Access
Next, create a repository interface to define the operations to access the database.
imports
package example.micronaut;

import example.micronaut.domain.Genre;

import jakarta.validation.constraints.NotBlank;
import jakarta.validation.constraints.NotNull;
import java.util.List;
import java.util.Optional;
public interface GenreRepository {
Optional<Genre> findById(long id);
Genre save(@NotBlank String name);
Genre saveWithException(@NotBlank String name);
void deleteById(long id);
List<Genre> findAll(@NotNull SortingAndOrderArguments args);
int update(long id, @NotBlank String name);
}To mark the transaction demarcations, we use the Jakarta jakarta.transaction.Transactional annotation.
Write the implementation:
|
Note
|
When you use the Micronaut Data annotation processor, the framework maps the jakarta.transaction.Transactional annotation to io.micronaut.transaction.annotation.Transactional. In the previous code sample, we must use Micronaut @Transactional/@ReadOnly annotations, and we cannot use jakarta.transaction annotations since we don’t use Micronaut Data in this tutorial.
|
Controller
Create two classes to encapsulate Save and Update operations:
imports
package example.micronaut;

import io.micronaut.serde.annotation.Serdeable;

import jakarta.validation.constraints.NotBlank;@Serdeable
public class GenreUpdateCommand {
private long id;
@NotBlank
private String name;
public GenreUpdateCommand(long id, String name) {
this.id = id;
this.name = name;
}
public long getId() {
return id;
}
public void setId(long id) {
this.id = id;
}
public String getName() {
return name;
}
public void setName(String name) {
this.name = name;
}
}Create a POJO to encapsulate Sorting and Pagination:
Create GenreController, a controller which exposes a resource with the common CRUD operations:
Writing Tests
Create a test to verify the CRUD operations:
Testing the Application
To run the tests:
./gradlew testThen open build/reports/tests/test/index.html in a browser to see the results.
Running the Application
To run the application, use the ./gradlew run command, which starts the application on port 8080.
Using PostgreSQL
When running in production, you want to use a real database instead of using H2. Let’s explain how to use PostgreSQL.
After installing Docker, execute the following command to run a PostgreSQL container:
docker run -it --rm \
    -p 5432:5432 \
    -e POSTGRES_USER=dbuser \
    -e POSTGRES_PASSWORD=theSecretPassword \
    -e POSTGRES_DB=micronaut \
    postgres:11.5-alpine
Add PostgreSQL driver dependency:
runtimeOnly("org.postgresql:postgresql")To use PostgreSQL, set up several environment variables which match those defined in application.properties:
export JDBC_URL=jdbc:postgresql://localhost:5432/micronaut
export JDBC_USER=dbuser
export JDBC_PASSWORD=theSecretPassword
export JDBC_DRIVER=org.postgresql.Driver
Run the application again. If you look at the output you can see that the application uses PostgreSQL:
..
...
08:40:02.746 [main] INFO  org.hibernate.dialect.Dialect - HHH000400: Using dialect: org.hibernate.dialect.PostgreSQL10Dialect
....
Connect to your PostgreSQL database, and you will see both genre and book tables.
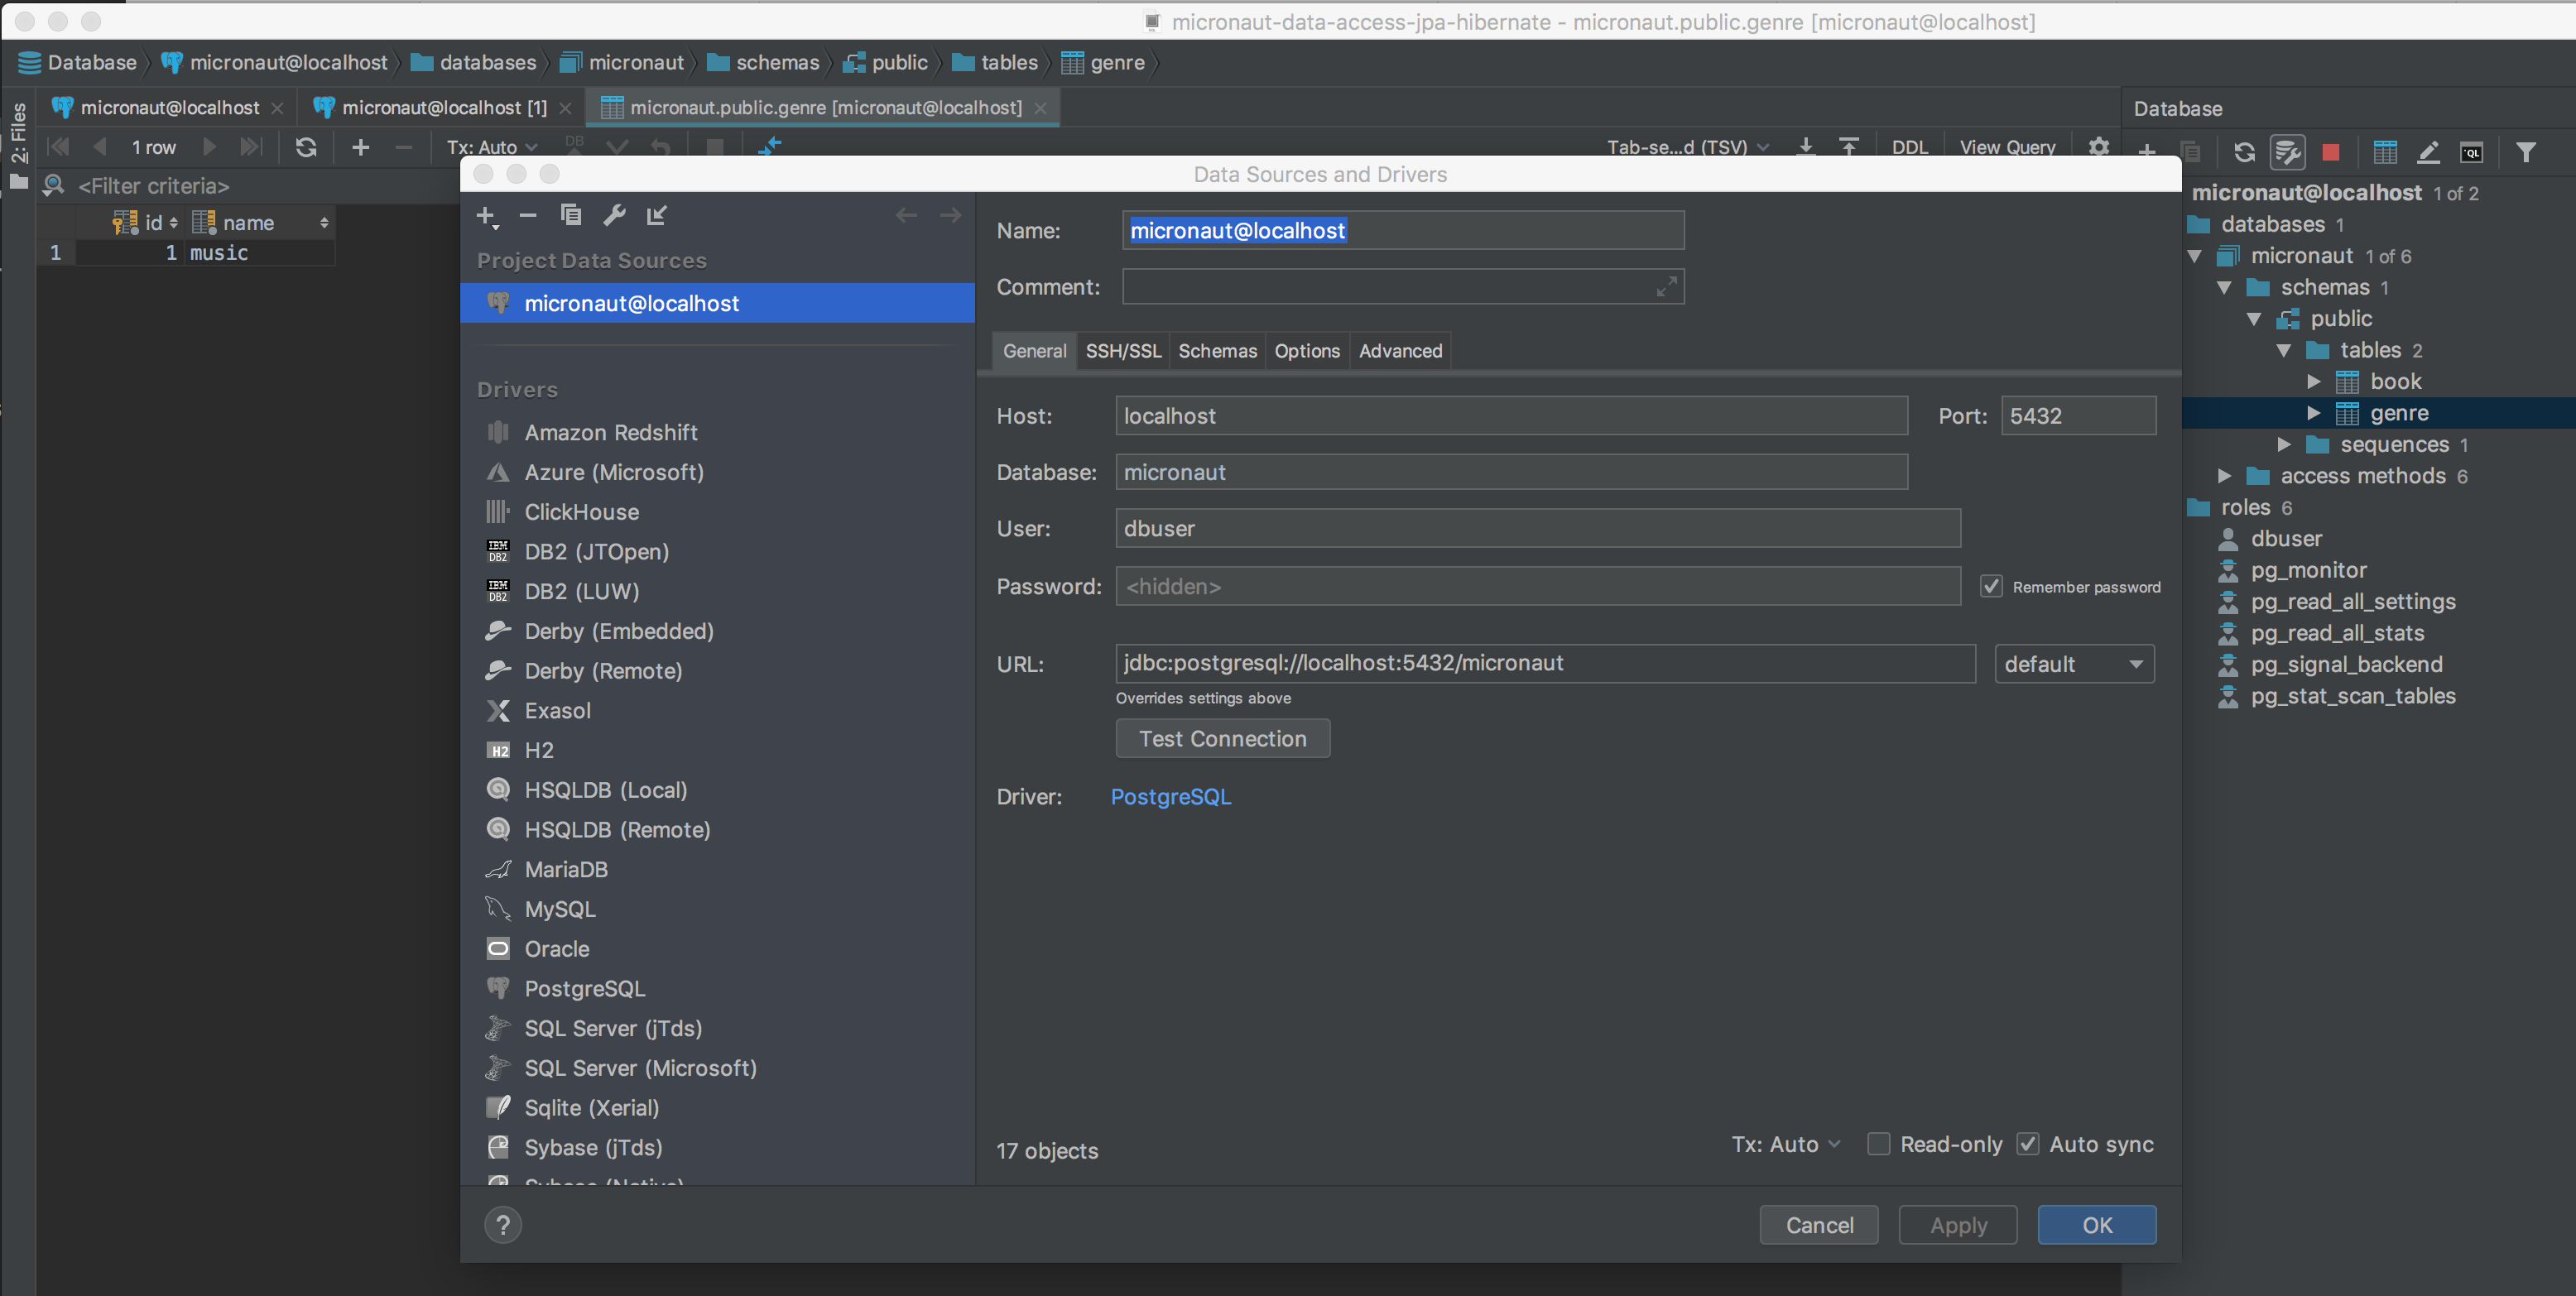
Save one genre, and your genre table will now contain an entry.
curl -X "POST" "http://localhost:8080/genres" \
     -H 'Content-Type: application/json; charset=utf-8' \
     -d $'{ "name": "music" }'
Next Steps
Read more about the Configurations for Data Access section in the Micronaut documentation.
License
|
Note
|
All guides are released with an Apache License 2.0 for the code and a Creative Commons Attribution 4.0 license for the writing and media (images). |