

Secure a Micronaut application with Google
Learn how to create a Micronaut application, secure it with Google, and provide authentication with OpenID Connect.
On this guide
In this section
Getting Started
In this guide, we will create a Micronaut application written in Java.
What you will need
To complete this guide, you will need the following:
-
Some time on your hands
-
A decent text editor or IDE (e.g. IntelliJ IDEA)
-
JDK 21 or greater installed with
JAVA_HOMEconfigured appropriately
Solution
We recommend that you follow the instructions in the next sections and create the application step by step. However, you can go right to the completed example.
-
Download and unzip the source
Writing the Application
Create an application using the Micronaut Command Line Interface or with Micronaut Launch.
mn create-app example.micronaut.micronautguide --build=maven --lang=java|
Note
|
If you don’t specify the --build argument, Gradle with the Kotlin DSL is used as the build tool. If you don’t specify the --lang argument, Java is used as the language.If you don’t specify the --test argument, JUnit is used for Java and Kotlin, and Spock is used for Groovy.
|
The previous command creates a Micronaut application with the default package example.micronaut in a directory named micronautguide.
Views
To use the Thymeleaf Java template engine to render views in a Micronaut application, add the following dependency on your classpath.
<dependency>
    <groupId>io.micronaut.views</groupId>
    <artifactId>micronaut-views-thymeleaf</artifactId>
    <scope>compile</scope>
</dependency>
OAuth 2.0
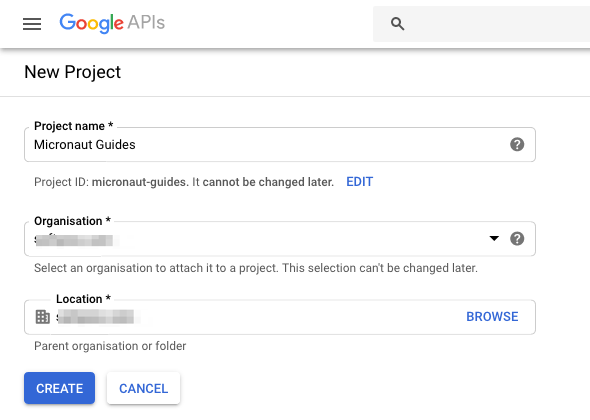
Visit https://console.developers.google.com and create a new project:
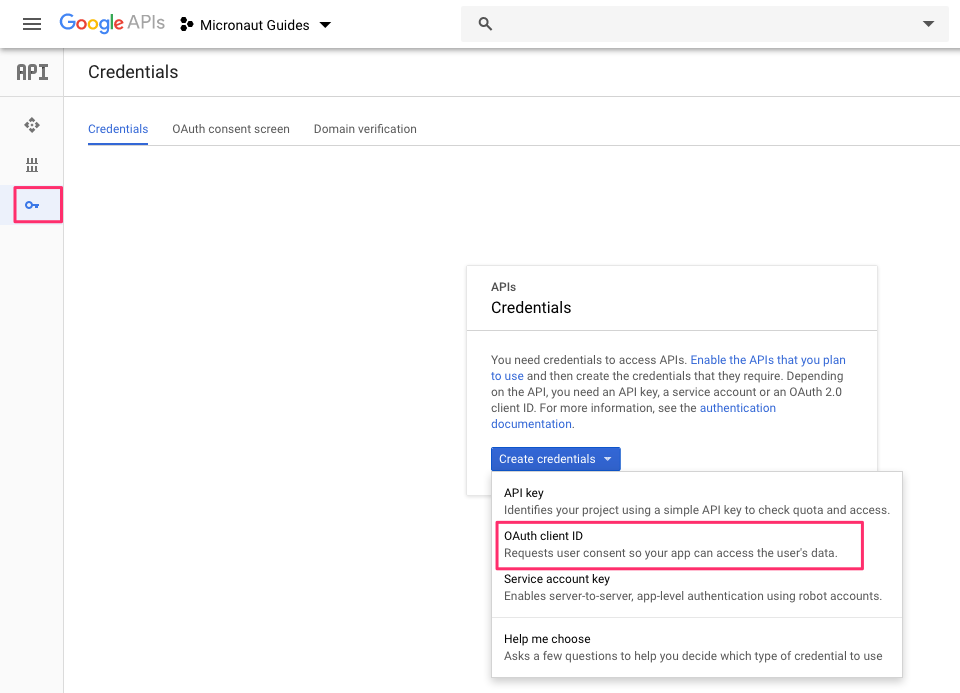
You will also need to create OAuth 2.0 credentials for the project since Google does not do that automatically. From the sidebar, click the Credentials tab, then click Create credentials and choose OAuth client ID from the dropdown.
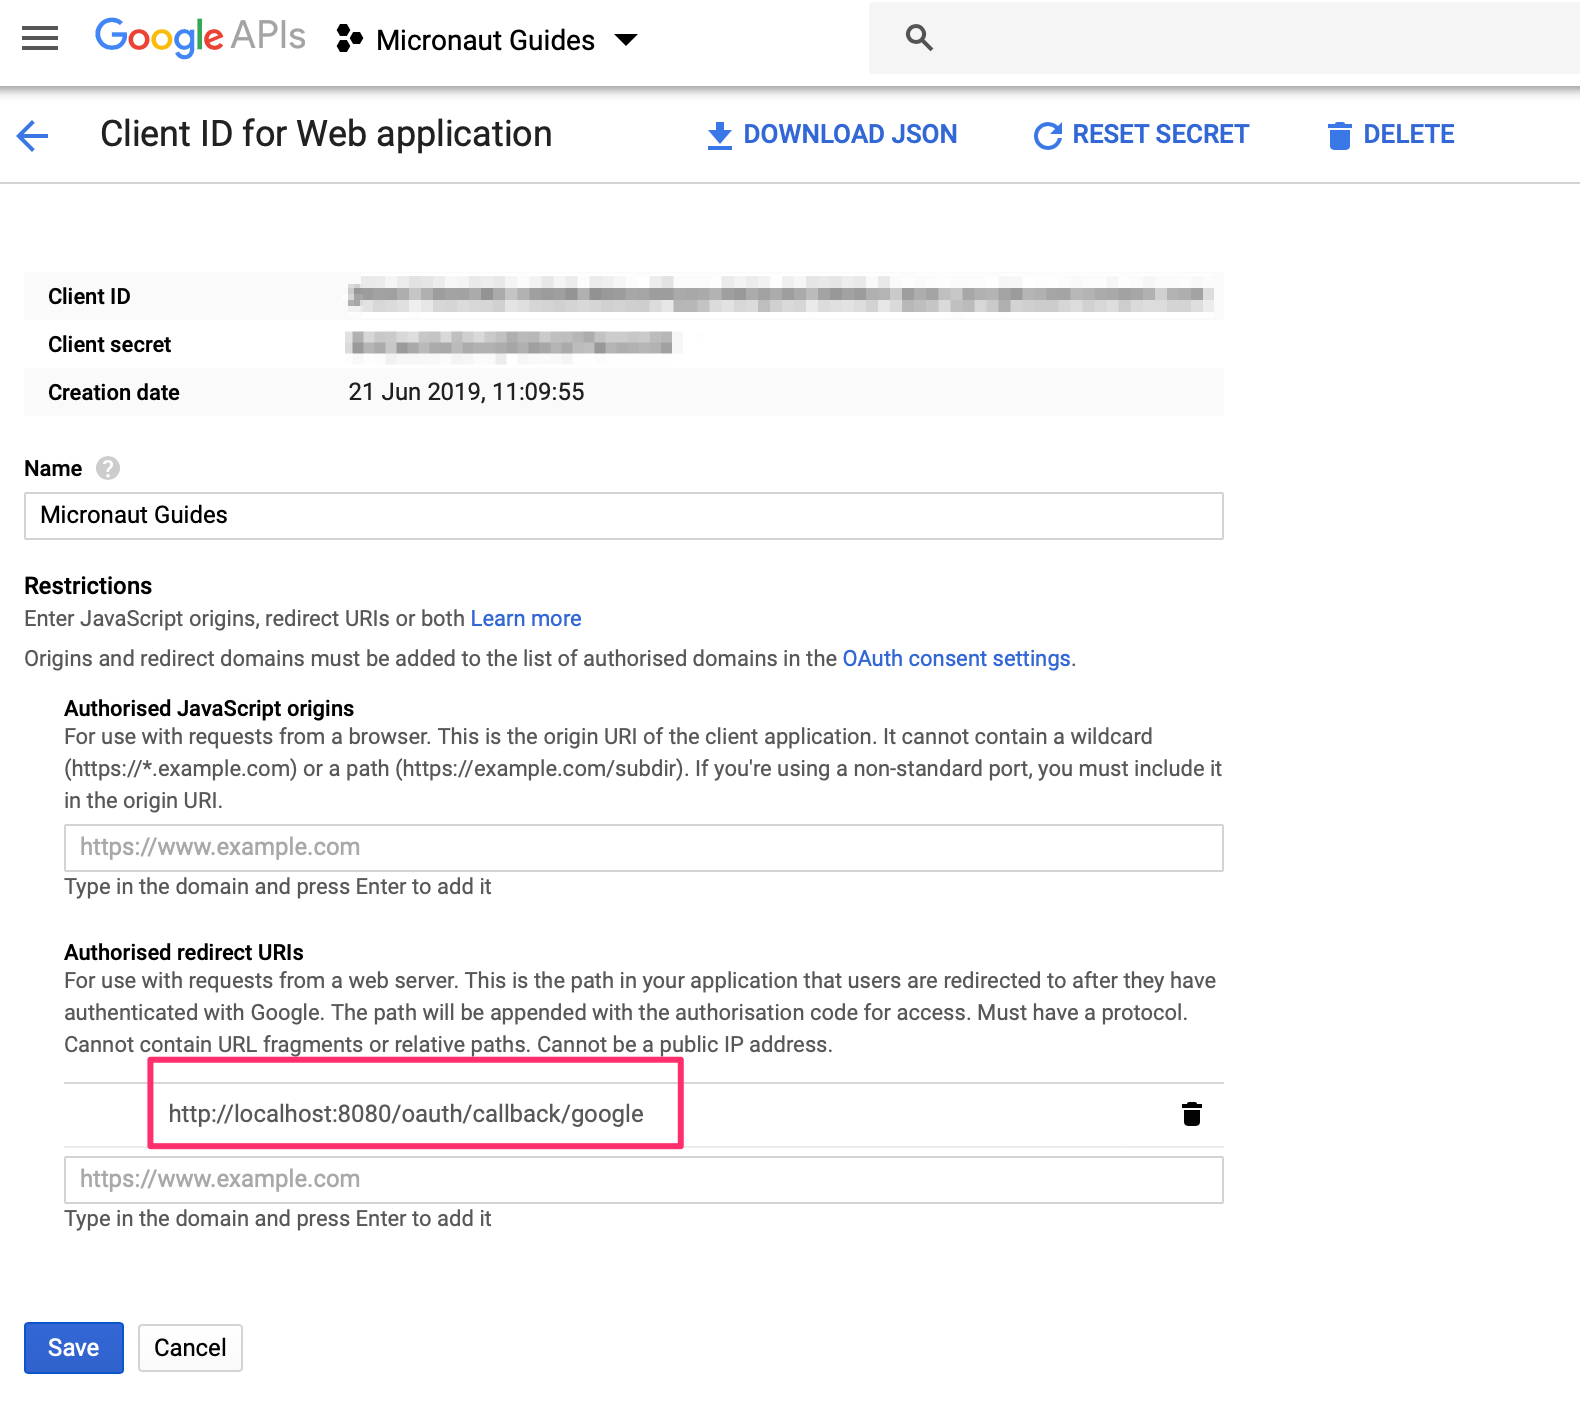
The Google Console will prompt for some information about your application such as the product name, a home page, and a logo. On the next page, select Web Application type, and enter the redirect URL where the Micronaut application we will build next will wait for the callback.
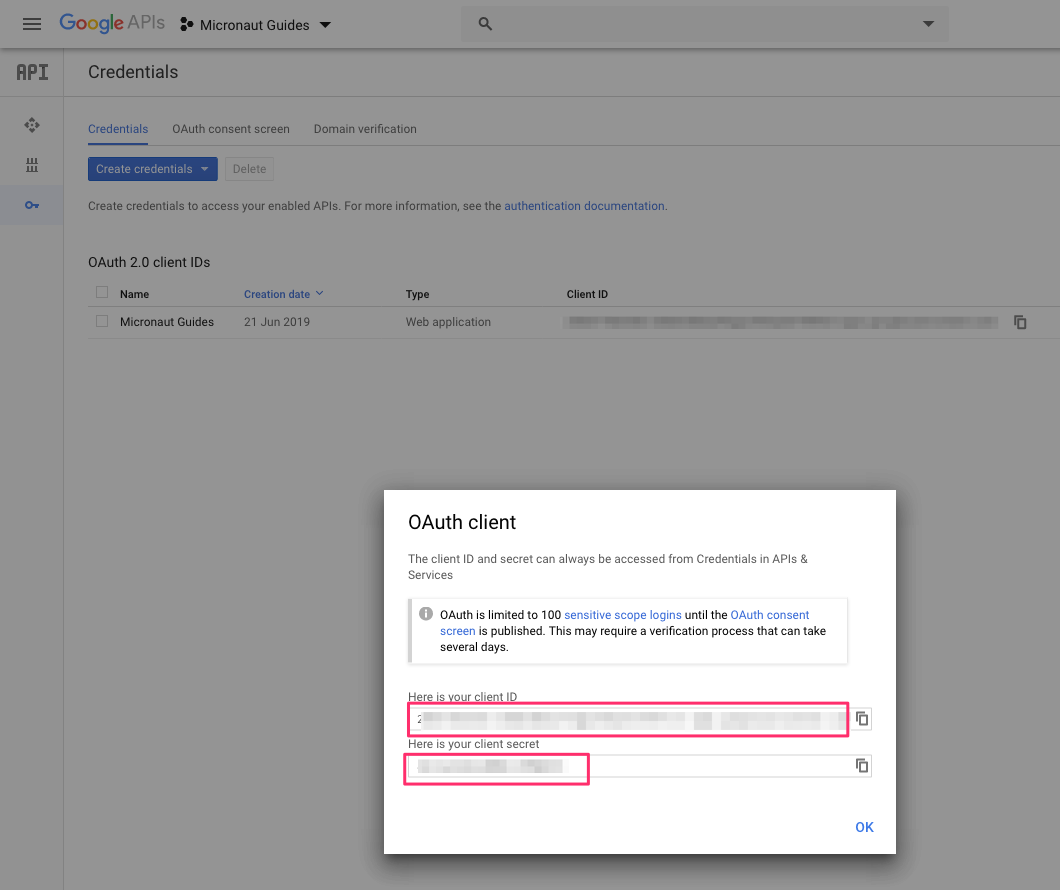
You will then receive a client ID and secret.
To use OAuth 2.0 integration in your Micronaut application, add the following dependency:
<dependency>
    <groupId>io.micronaut.security</groupId>
    <artifactId>micronaut-security-oauth2</artifactId>
    <scope>compile</scope>
</dependency>
Also add Micronaut JWT support dependencies:
<dependency>
    <groupId>io.micronaut.security</groupId>
    <artifactId>micronaut-security-jwt</artifactId>
    <scope>compile</scope>
</dependency>
Add the following OAuth 2.0 configuration:
The previous configuration uses several placeholders. You will need to set up the OAUTH_CLIENT_ID and OAUTH_CLIENT_SECRET environment variables.
export OAUTH_CLIENT_ID=XXXXXXXXXX
export OAUTH_CLIENT_SECRET=YYYYYYYYYY
Check Google .well-known/openid-configuration documentation.
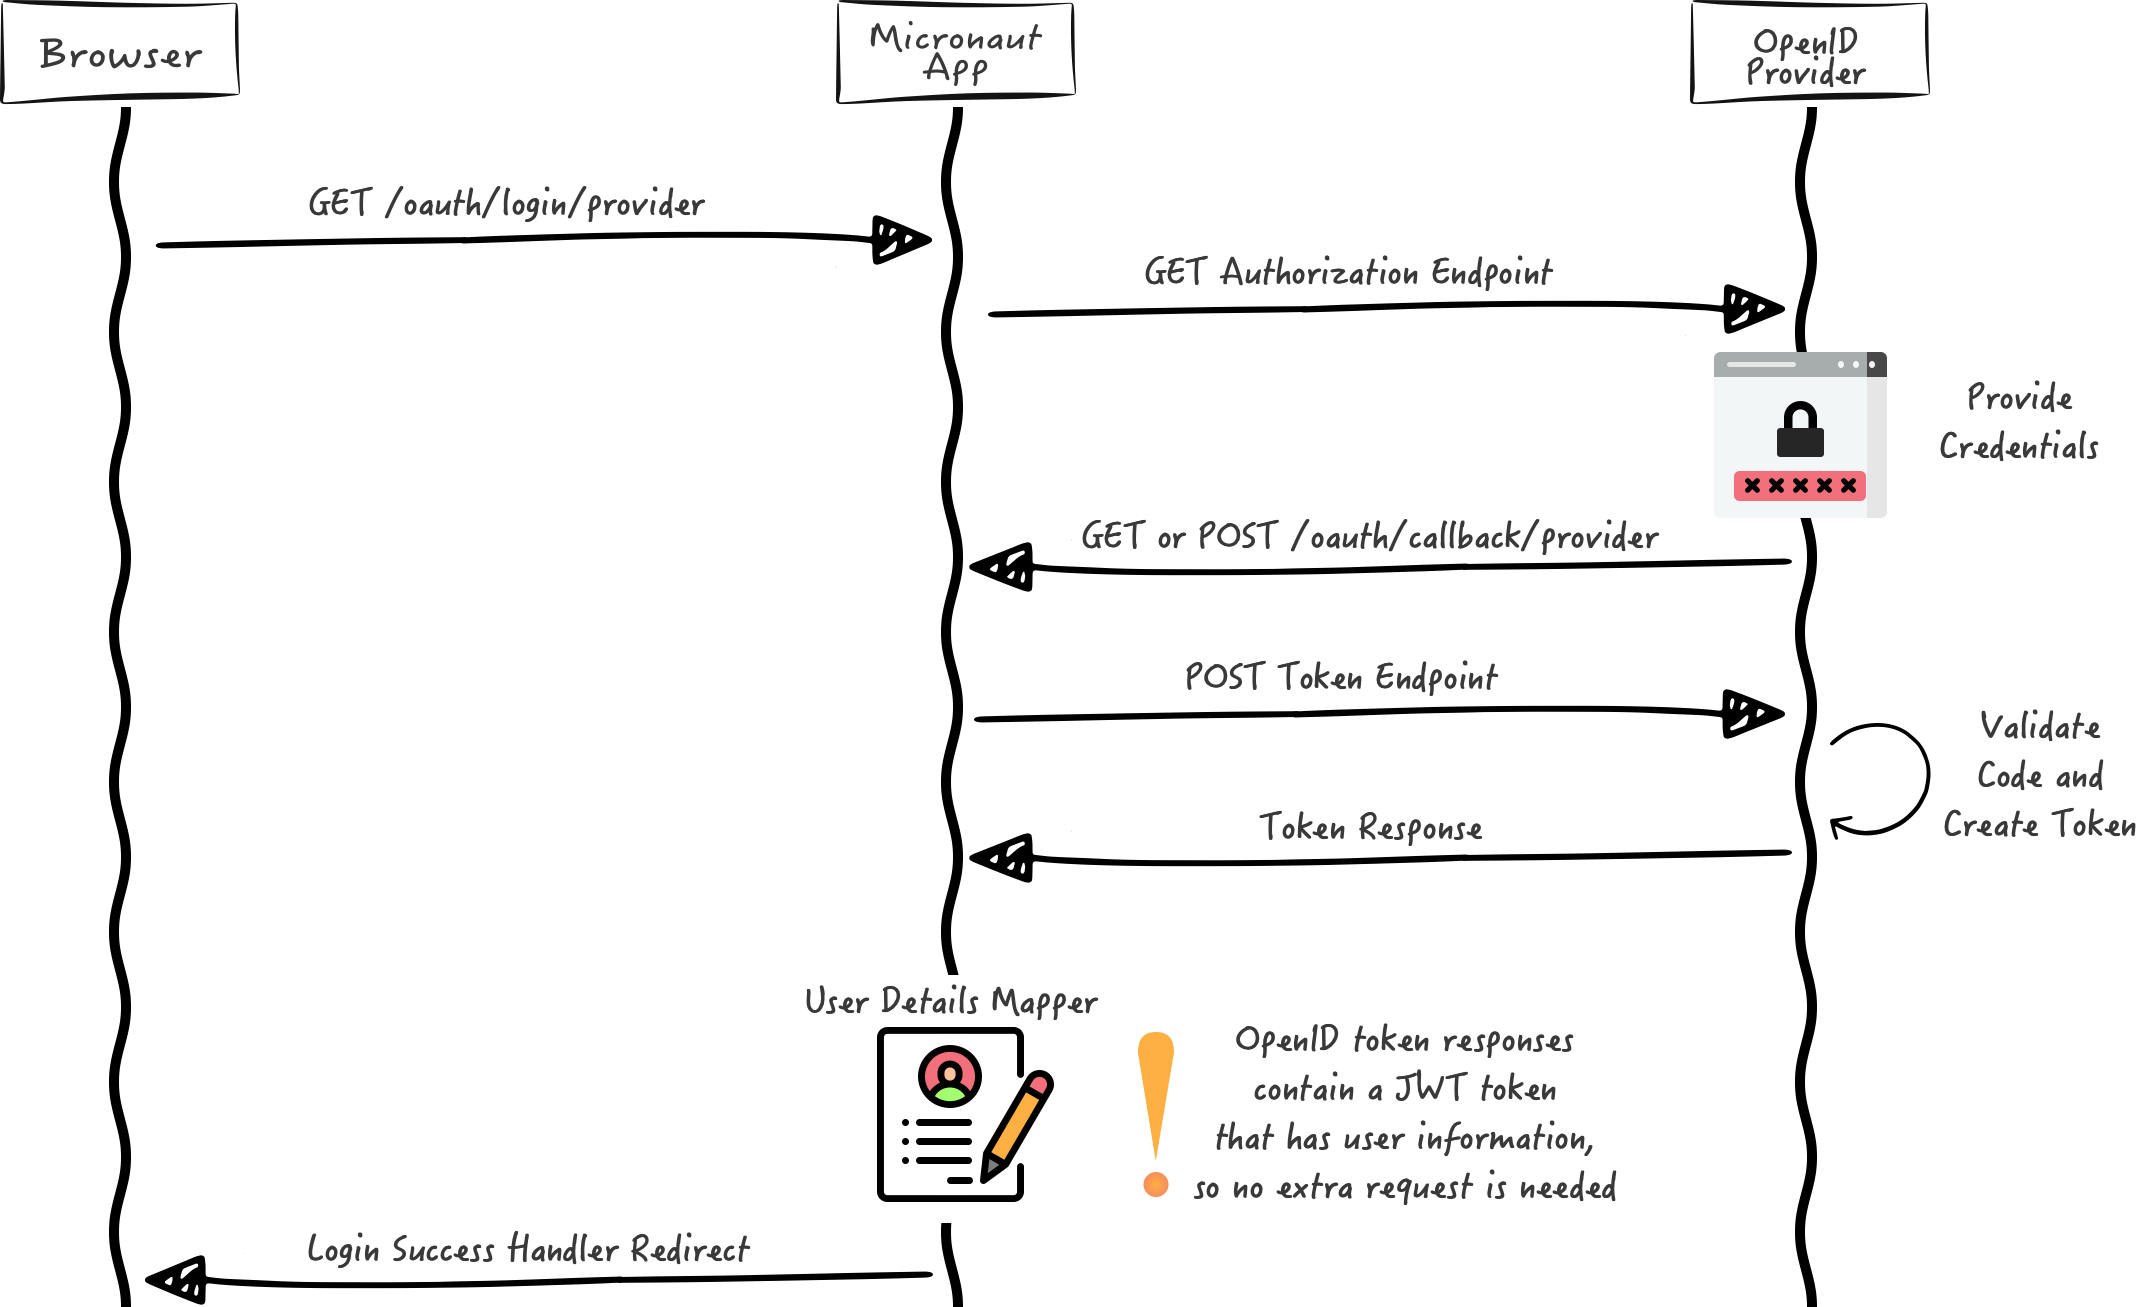
We want to use an Authorization Code grant type flow, which is described in the following diagram:
Home
Create a controller to handle the requests to /. You will display the email of the authenticated person if any. Annotate the controller endpoint with @View since we will use a Thymeleaf template.
Create a Thymeleaf template:
<!DOCTYPE html>
<html xmlns:th="http://www.thymeleaf.org">
<head>
    <title>Home</title>
</head>
<body>
<h1>Micronaut - Google example</h1>

<h2 th:if="${security}">username: <span th:text="${security.attributes.get('email')}"></span></h2>
<h2 th:unless="${security}">username: Anonymous</h2>

<nav>
    <ul>
        <li th:unless="${security}"><a href="/oauth/login/google">Enter</a></li>
        <li th:if="${security}"><a href="/logout">Logout</a></li>
    </ul>
</nav>
</body>
</html>
Also, note that we return an empty model in the controller. However, we are accessing security in the thymeleaf template.
-
The SecurityViewModelProcessor injects into the model a
securitymap with the authenticated user. See User in a view documentation.
Running the Application
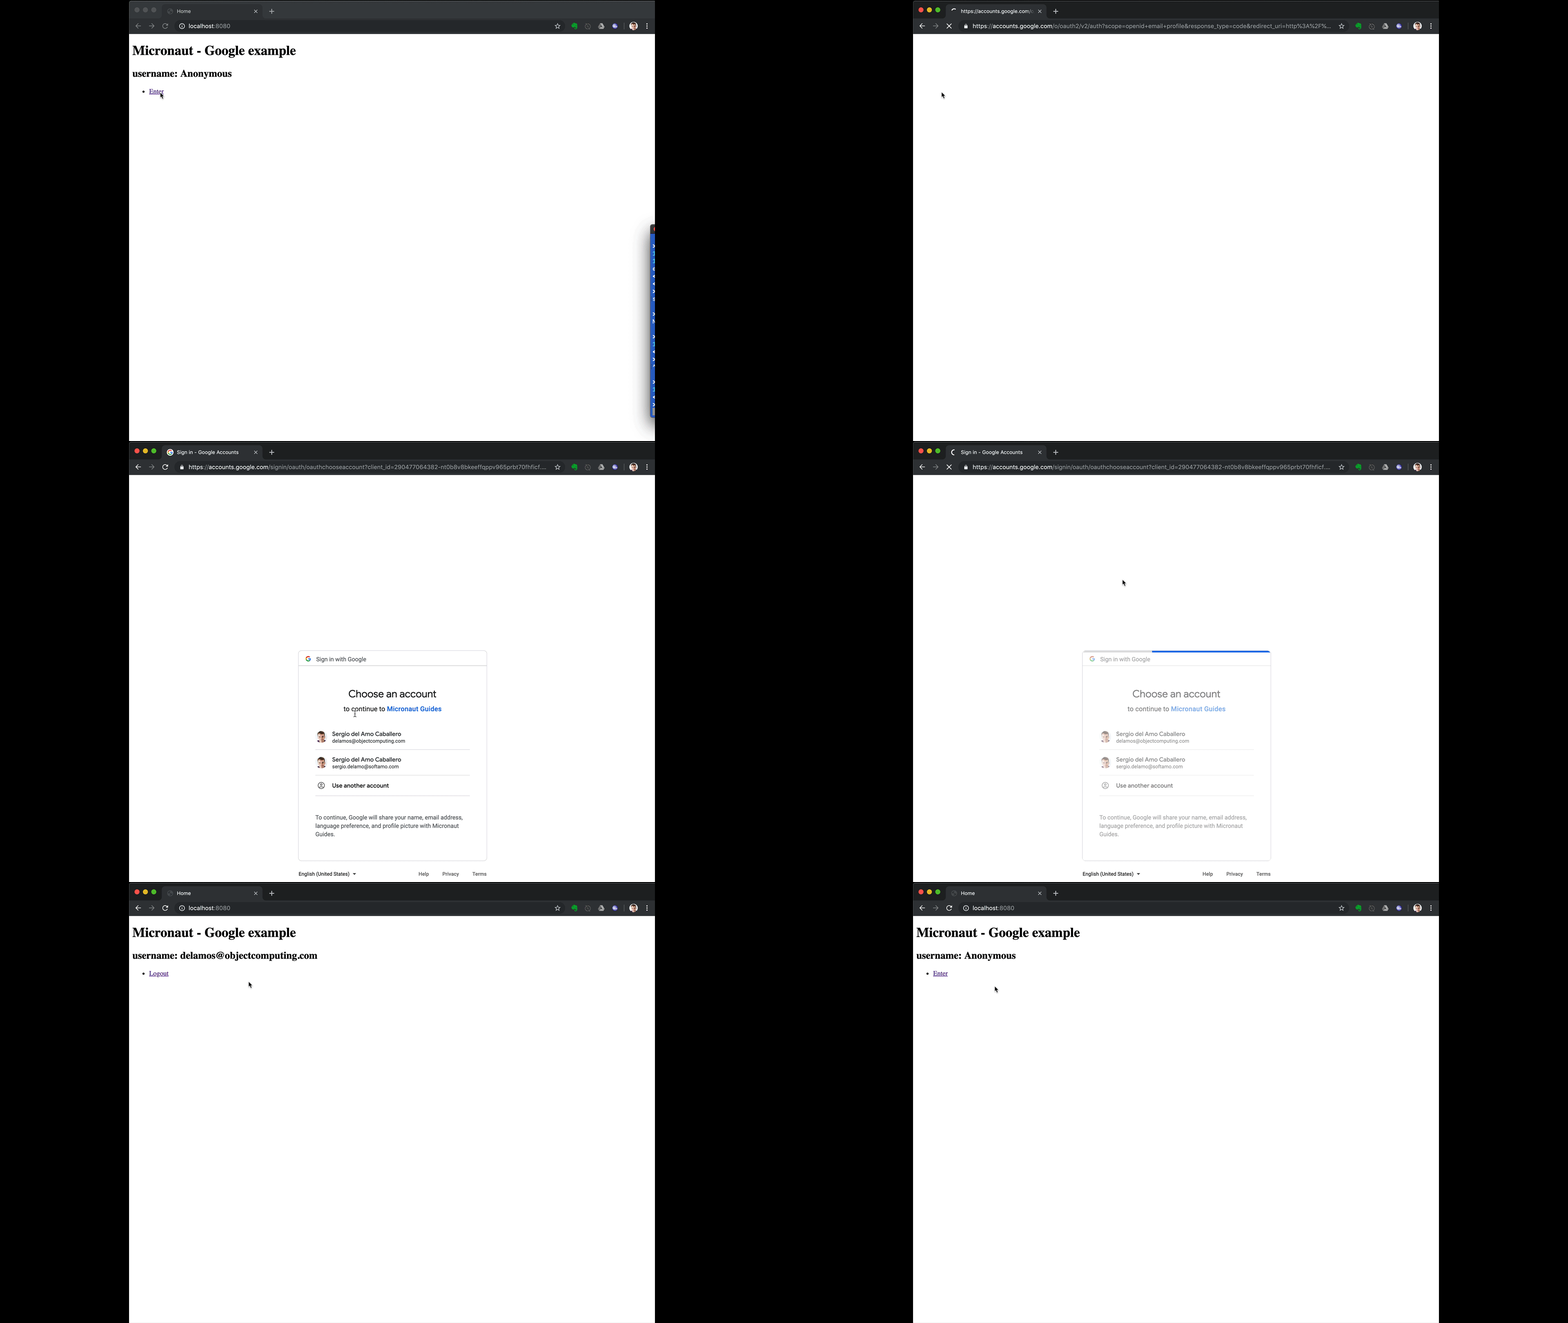
To run the application, use the ./mvnw mn:run command, which starts the application on port 8080.
Custom ID token claims validation
Imagine you want to allow sign-in with Google only for users in your organization.
Google OAuth consent screen settings allow you to do that:
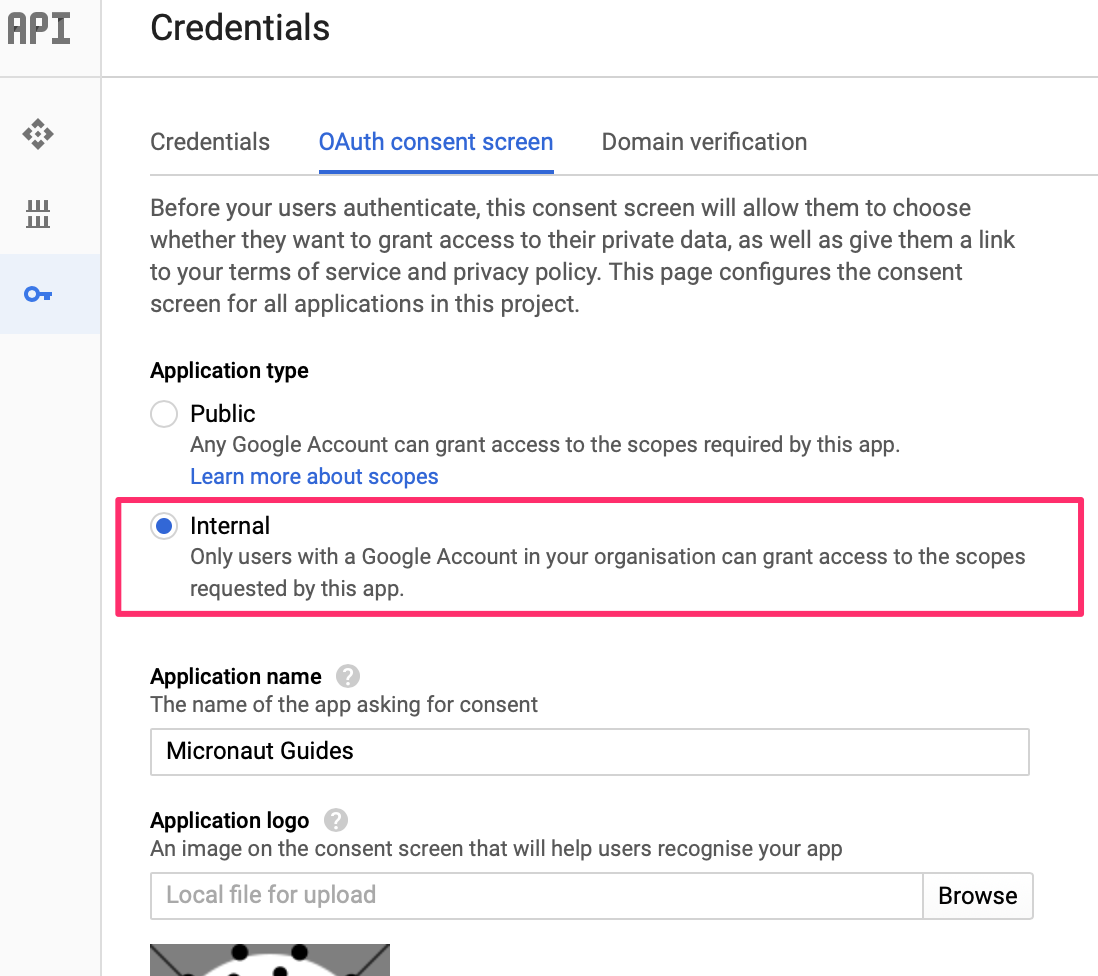
However, we could also achieve this programmatically. Google’s ID token contains a claim named hd, which stands for hosted domain.
We can create a configuration object:
imports
package example.micronaut;

import io.micronaut.core.annotation.NonNull;
public interface ApplicationConfiguration {
@NonNull
String getHostedDomain();
}Backed by a @ConfigurationProperties annotated class:
imports
package example.micronaut;

import io.micronaut.context.annotation.ConfigurationProperties;
import io.micronaut.context.annotation.Requires;
import io.micronaut.core.annotation.NonNull;@Requires(property = "app.hosted-domain")
@ConfigurationProperties("app")
public class ApplicationConfigurationProperties implements ApplicationConfiguration {
@NonNull
private String hostedDomain;
public void setHostedDomain(@NonNull String hostedDomain) {
this.hostedDomain = hostedDomain;
}
@Override
@NonNull
public String getHostedDomain() {
return hostedDomain;
}
}and then implement an OpenIdClaimsValidator bean. The Micronaut framework validates the ID token against every bean of type OpenIdClaimsValidator. If the ID token hd claim does not match the value configured, it is considered invalid.
imports
package example.micronaut;

import io.micronaut.context.annotation.Requires;
import io.micronaut.security.oauth2.client.OpenIdProviderMetadata;
import io.micronaut.security.oauth2.configuration.OauthClientConfiguration;
import io.micronaut.security.oauth2.endpoint.token.response.OpenIdClaims;
import io.micronaut.security.oauth2.endpoint.token.response.validation.OpenIdClaimsValidator;

import jakarta.inject.Singleton;@Requires(beans = ApplicationConfiguration.class)
@Singleton
public class HostedDomainClaimValidator implements OpenIdClaimsValidator {
public static final String HOSTED_DOMAIN_CLAIM = "hd";
private final String hostedDomain;
public HostedDomainClaimValidator(ApplicationConfiguration applicationConfiguration) {
this.hostedDomain = applicationConfiguration.getHostedDomain();
}
@Override
public boolean validate(OpenIdClaims claims,
OauthClientConfiguration clientConfiguration,
OpenIdProviderMetadata providerMetadata) {
Object hd = claims.get(HOSTED_DOMAIN_CLAIM);
return hd instanceof String && ((String) hd).equalsIgnoreCase(hostedDomain);
}
}Add to src/main/resources/application.properties
app.hosted-domain=objectcomputing.comIf you start the application, you will only be able to sign in with a Google Account within the OCI organization.
Generate a Micronaut Application Native Executable with GraalVM
We will use GraalVM, an advanced JDK with ahead-of-time Native Image compilation, to generate a native executable of this Micronaut application.
Compiling Micronaut applications ahead of time with GraalVM significantly improves startup time and reduces the memory footprint of JVM-based applications.
|
Note
|
Only Java and Kotlin projects support using GraalVM’s native-image tool. Groovy relies heavily on reflection, which is only partially supported by GraalVM.
|
GraalVM Installation
sdk install java 25.0.2-graalFor installation on Windows, or for a manual installation on Linux or Mac, see the GraalVM Getting Started documentation.
The previous command installs Oracle GraalVM, which is free to use in production and free to redistribute, at no cost, under the GraalVM Free Terms and Conditions.
Alternatively, you can use the GraalVM Community Edition:
sdk install java 25.0.2-graalceNative Executable Generation
To generate a native executable using Maven, run:
./mvnw package -Dpackaging=native-imageThe native executable is created in the target directory and can be run with target/micronautguide.
It is possible to customize the name of the native executable or pass additional build arguments using the Maven plugin for GraalVM Native Image building. Declare the plugin as follows:
After you execute the native executable, navigate to localhost:8080 and authenticate with Google.
Next Steps
Read Micronaut OAuth 2.0 documentation to learn more.
License
|
Note
|
All guides are released with an Apache License 2.0 for the code and a Creative Commons Attribution 4.0 license for the writing and media (images). |