

Deploy a Micronaut application to Oracle Cloud
Learn how to deploy a Micronaut application to Oracle Cloud.
On this guide
In this section
Getting Started
In this guide, we will create a Micronaut application written in Java.
What you will need
To complete this guide, you will need the following:
-
Some time on your hands
-
A decent text editor or IDE
-
JDK 25 or greater installed with
JAVA_HOMEconfigured appropriately -
An Oracle Cloud account (create a free trial account at signup.oraclecloud.com)
Solution
We recommend that you follow the instructions in the next sections and create the application step by step. However, you can go right to the completed example.
-
Download and unzip the source
Writing the Application
Create an application using the Micronaut Command Line Interface or with Micronaut Launch.
mn create-app example.micronaut.micronautguide --build=gradle --lang=java|
Note
|
If you don’t specify the --build argument, Gradle with the Kotlin DSL is used as the build tool. If you don’t specify the --lang argument, Java is used as the language.If you don’t specify the --test argument, JUnit is used for Java and Kotlin, and Spock is used for Groovy.
|
The previous command creates a Micronaut application with the default package example.micronaut in a directory named micronautguide.
Sample Controller
Next we’ll create a simple controller that we can use to access the application once it’s deployed.
imports
package example.micronaut;

import io.micronaut.http.MediaType;
import io.micronaut.http.annotation.Controller;
import io.micronaut.http.annotation.Get;@Controller
public class HelloController {
@Get(produces = MediaType.TEXT_PLAIN)
public String index() {
return "the Micronaut framework on Oracle Cloud";
}
}Create an Oracle Cloud Compute Instance
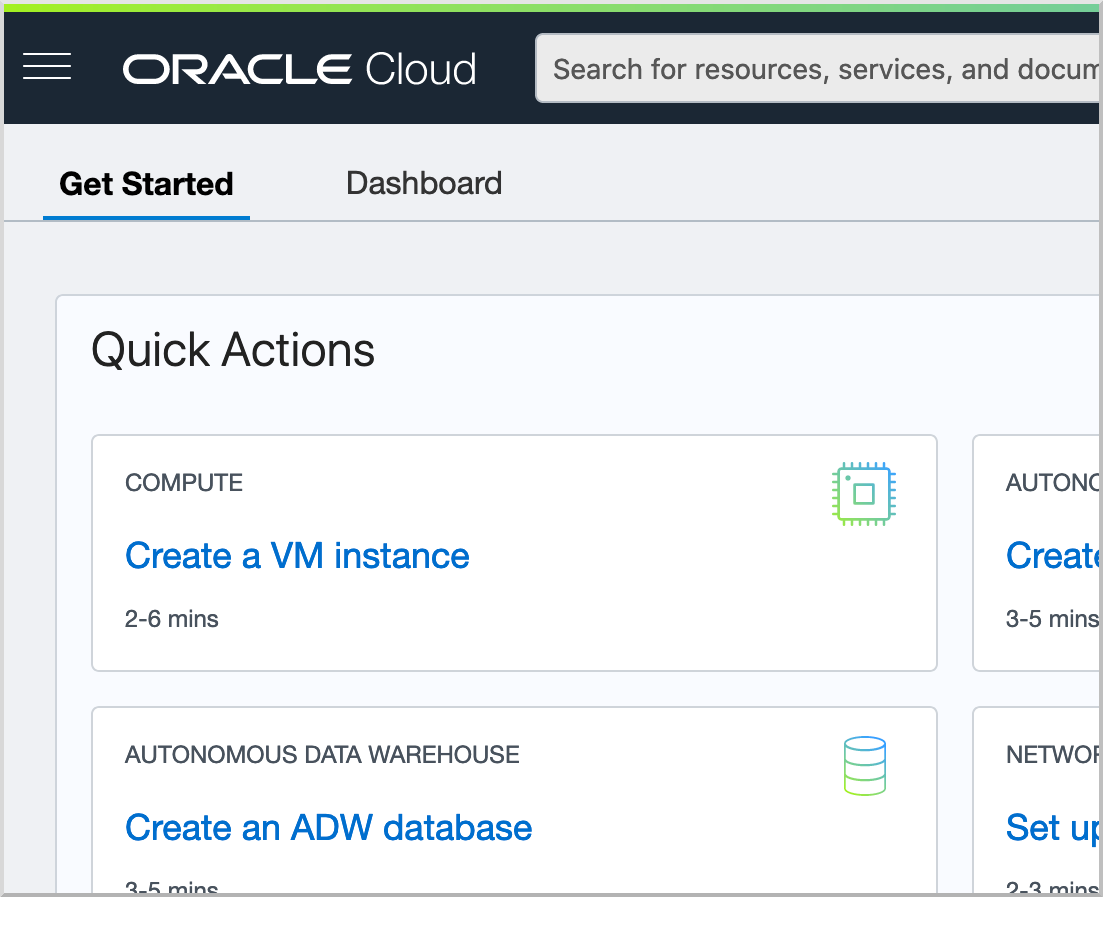
Log in to your Oracle Cloud tenancy, and from the Oracle Cloud Home Page select "Create a VM Instance":
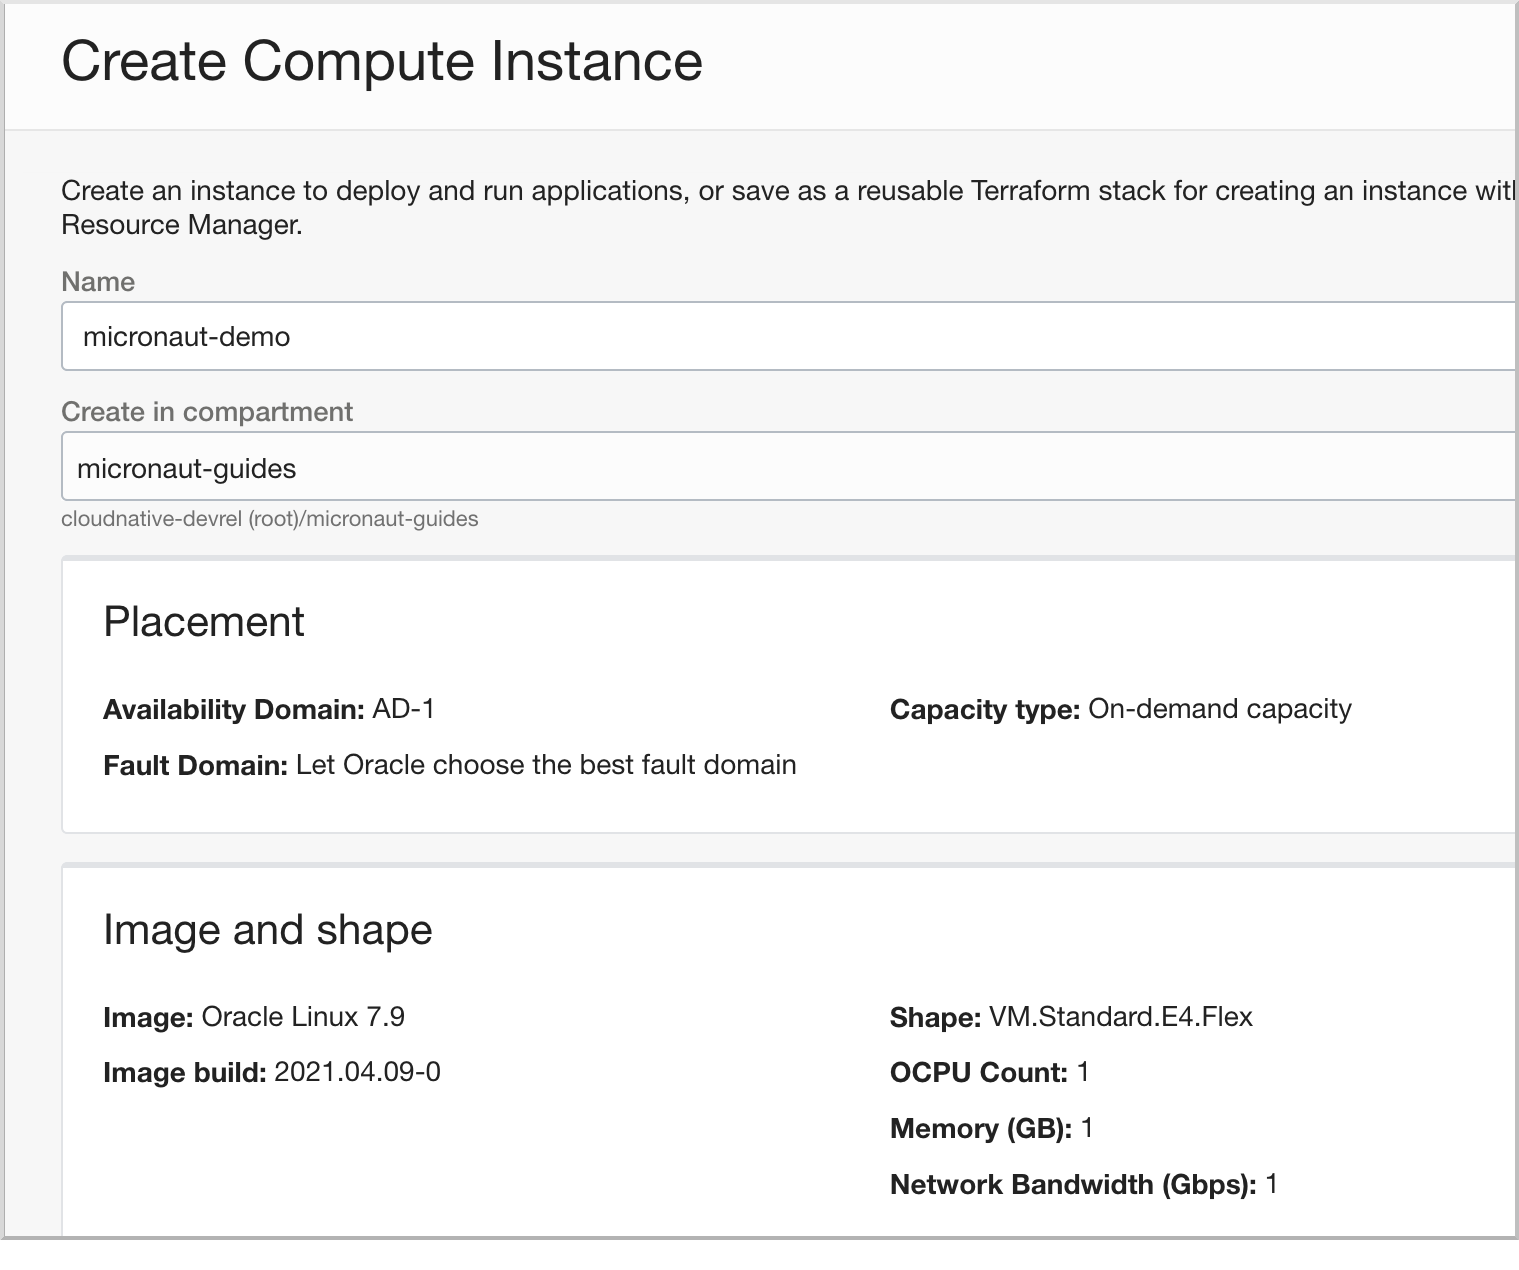
Enter "micronaut-demo" as the name of the instance, leaving the "Placement" and "Shape" as "Always Free Eligible" (or any small image shape):
Under "Add SSH keys" choose "Generate SSH key pair" and then click "Save Private Key" to save the private key locally on disk:
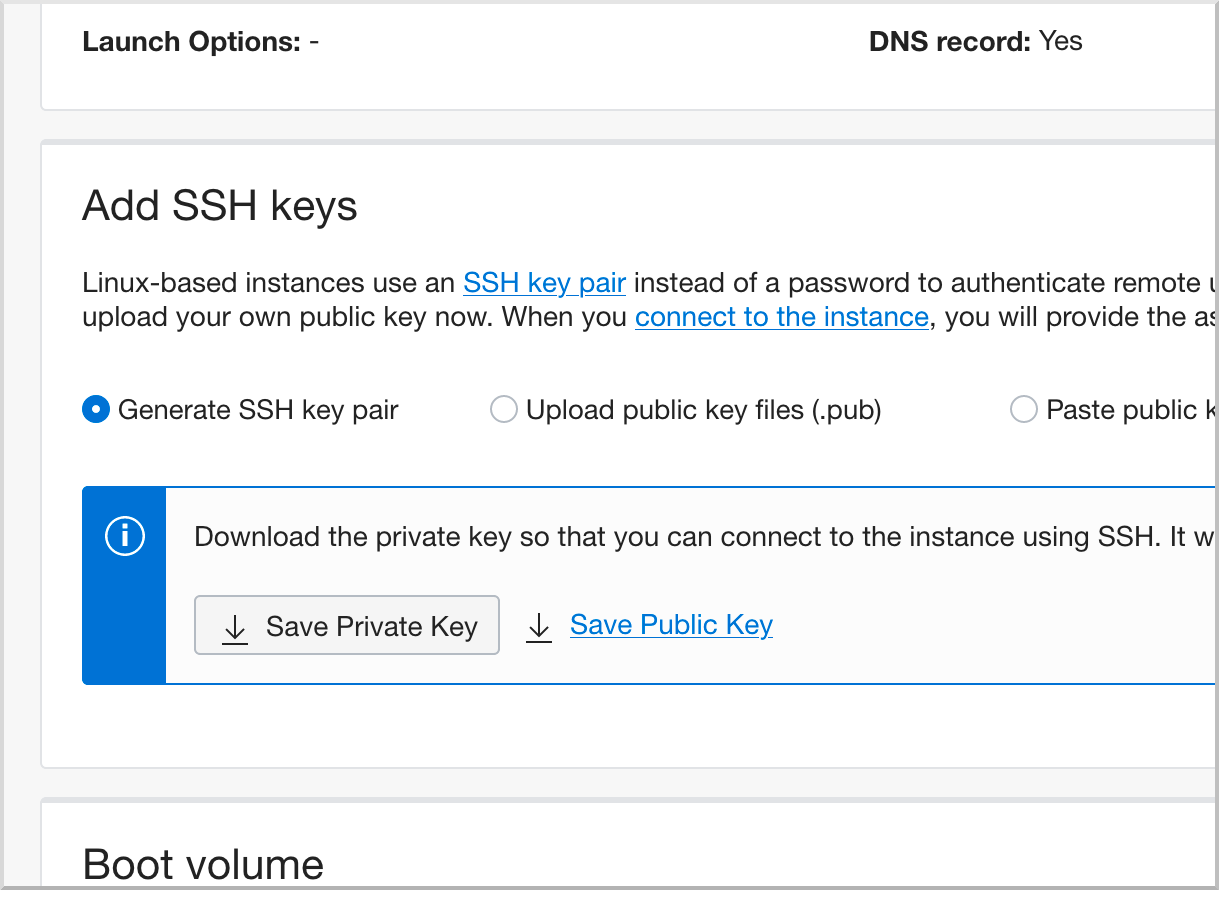
The private key will download as a file named "ssh-key-(date).key".
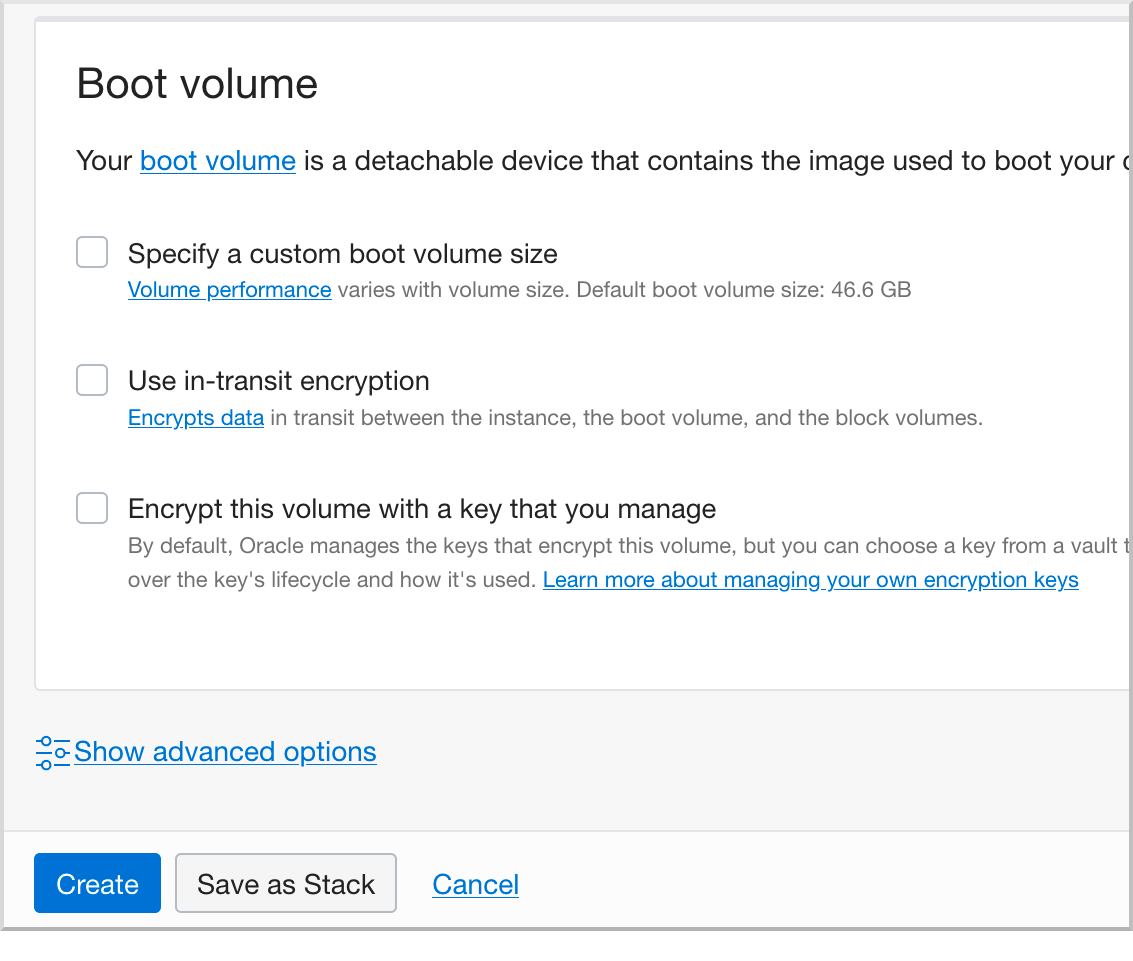
Leave the remaining settings as their defaults and click the "Create" button:
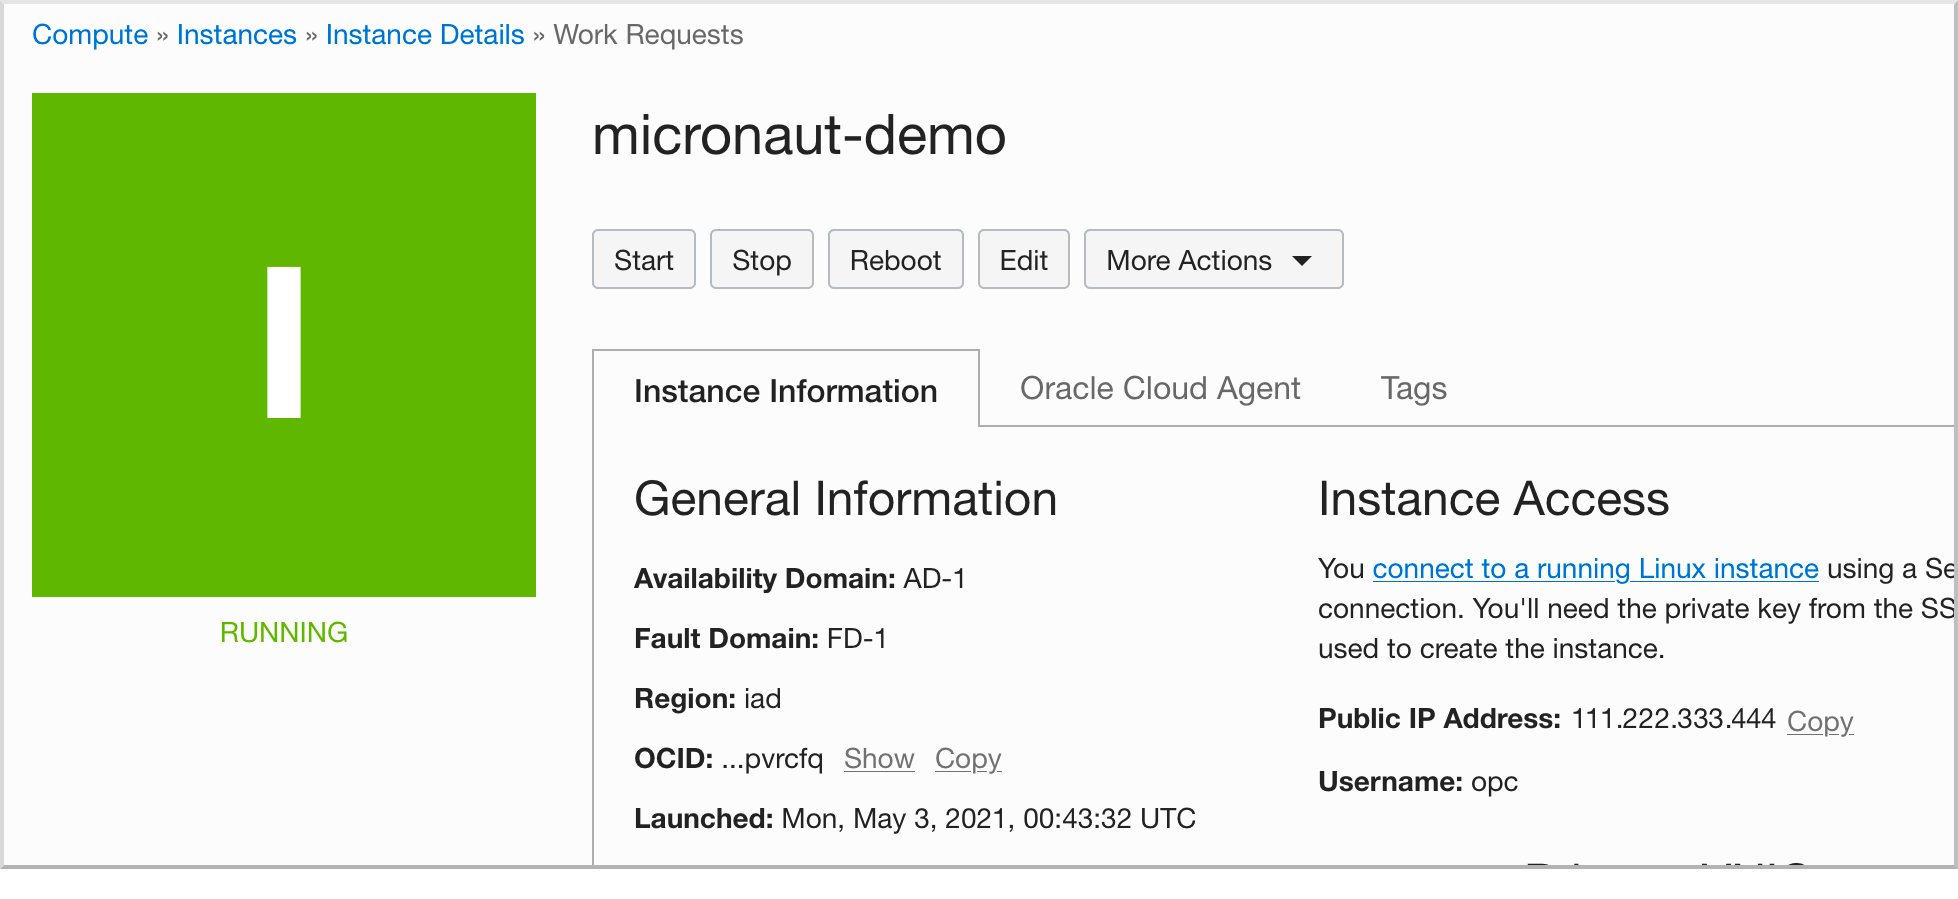
Take note of the IP address of your instance: click the "Copy" link next to "Public IP Address".
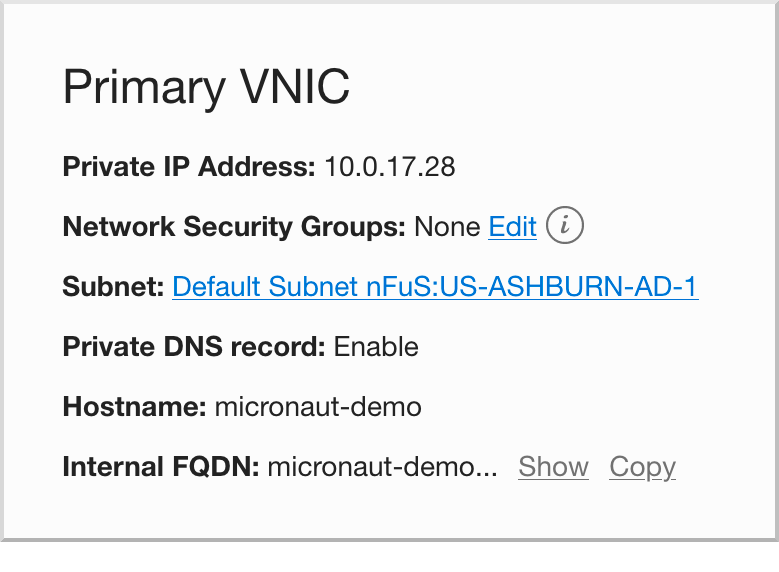
Click on the "Subnet" link ("Default Subnet …"):
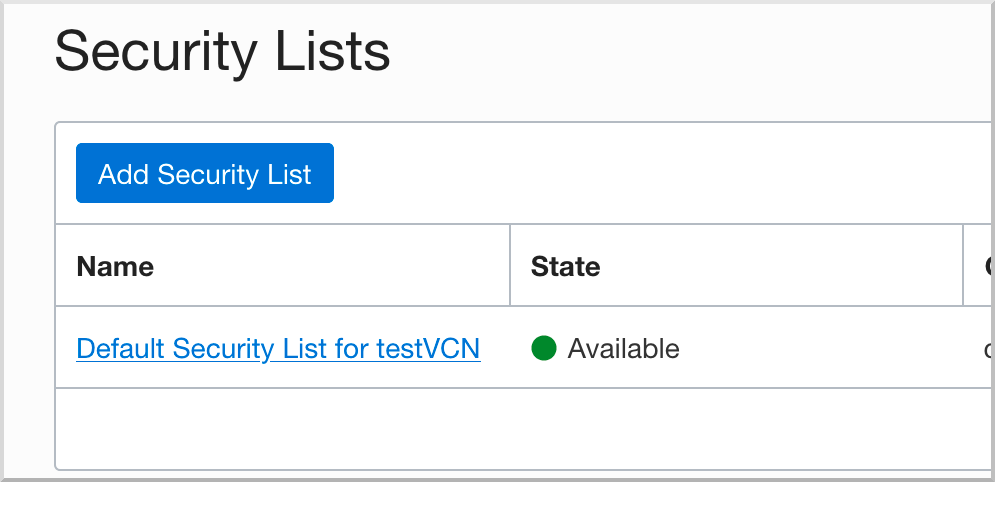
Under "Security Lists" click on the "Default Security List":
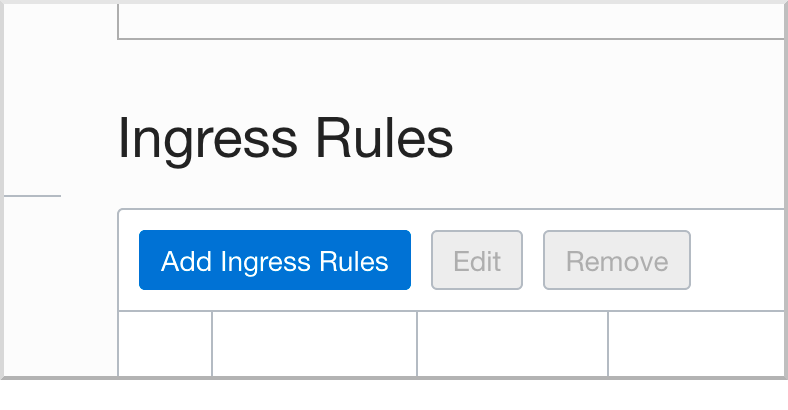
Click "Add Ingress Rules":
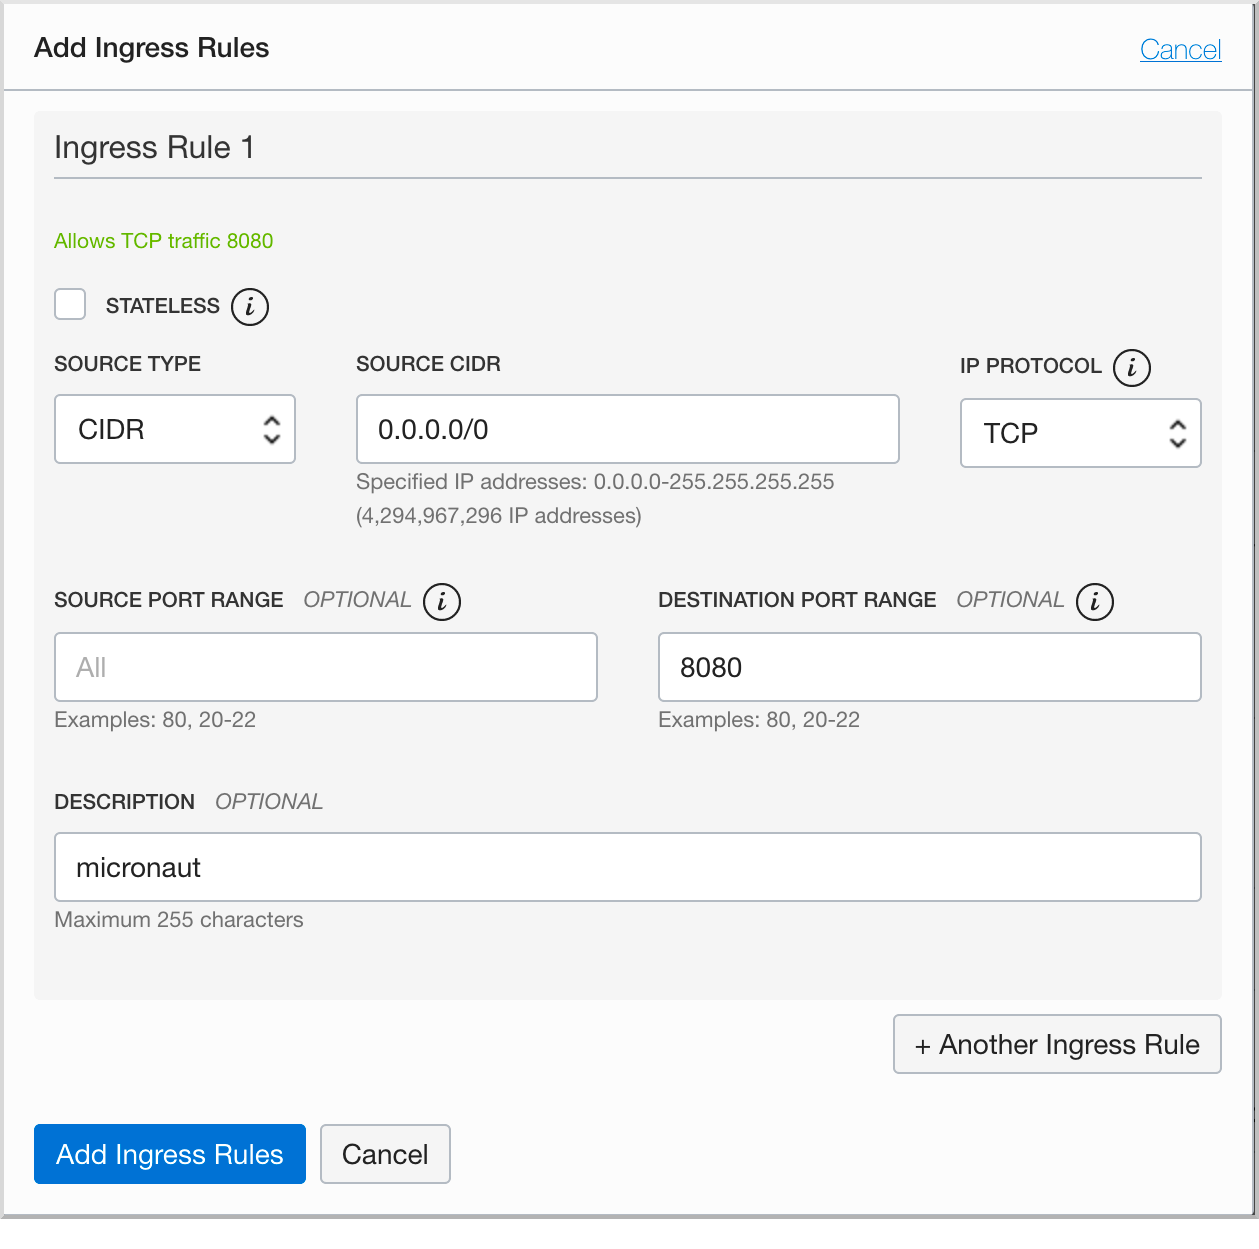
Enter "0.0.0.0/0" as the "Source CIDR", 8080 as the "Destination Port Range", and "micronaut" as the Description, and click "Add Ingress Rules".
Deploy to Oracle Cloud
First, ensure that the private key you downloaded has the correct permissions:
chmod 400 /path/to/ssh-key-*.keyCreate an executable jar including all dependencies:
./gradlew shadowJarPush the JAR file to your VM:
scp -i /path/to/ssh-key-*.key build/libs/micronautguide-0.1-all.jar opc@[VM IP Address]:/home/opc/application.jarTo run on the VM, first SSH in:
ssh -i /path/to/ssh-key-*.key opc@[YOUR IP]Then install Java:
yum check-update
sudo yum install graalvm22-ee-11.x86_64
Open up the firewall to port 8080:
sudo firewall-cmd --permanent --zone=public --add-port=8080/tcp
sudo firewall-cmd --reload
Finally, start the application:
java -jar application.jarVerify that the application is running by invoking the controller at http://[VM IP Address]:8080 in a browser or using cURL:
curl -i http://[VM IP Address]:8080HTTP/1.1 200 OK
Date: Mon, 3 May 2021 02:40:37 GMT
content-type: text/plain
content-length: 25
connection: keep-alive
the Micronaut framework on Oracle CloudCleaning up
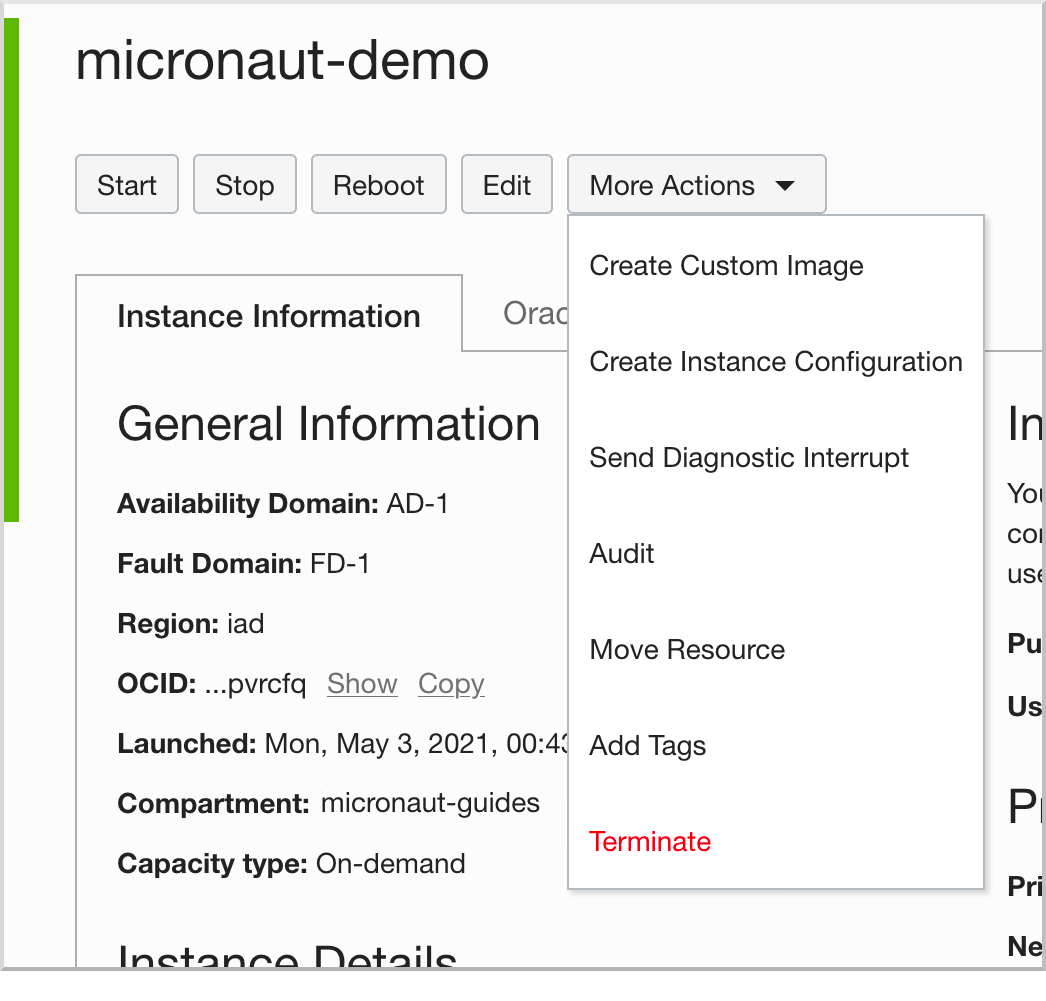
To shut down the VM instance, click "More Actions" on the "Instance Details" page, then click "Terminate".
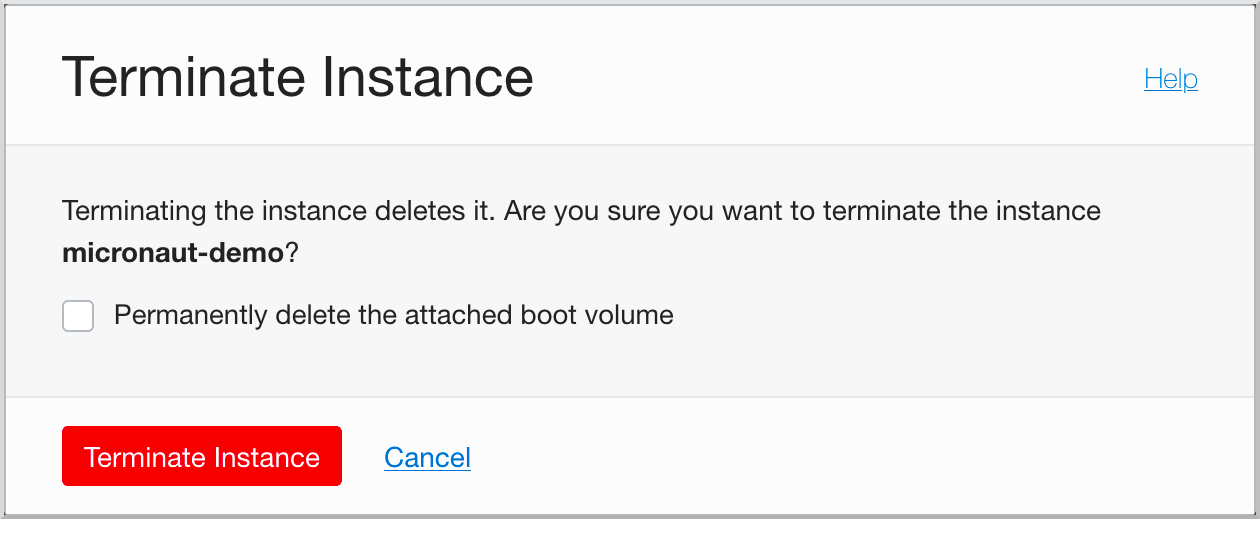
Click "Terminate Instance" to confirm termination:
Next Steps
Explore more features with Micronaut Guides.
License
|
Note
|
All guides are released with an Apache License 2.0 for the code and a Creative Commons Attribution 4.0 license for the writing and media (images). |