

Secure a Micronaut application with LinkedIn
Learn how to create a Micronaut application and authenticate with LinkedIn.
On this guide
In this section
Getting Started
In this guide, we will create a Micronaut application written in Groovy.
What you will need
To complete this guide, you will need the following:
-
Some time on your hands
-
A decent text editor or IDE (e.g. IntelliJ IDEA)
-
JDK 21 or greater installed with
JAVA_HOMEconfigured appropriately
Solution
We recommend that you follow the instructions in the next sections and create the application step by step. However, you can go right to the completed example.
-
Download and unzip the source
OAuth 2.0
To provide Sign in with LinkedIn with Authorization Code Flow, you need to visit linkedin.com/developers/ and:
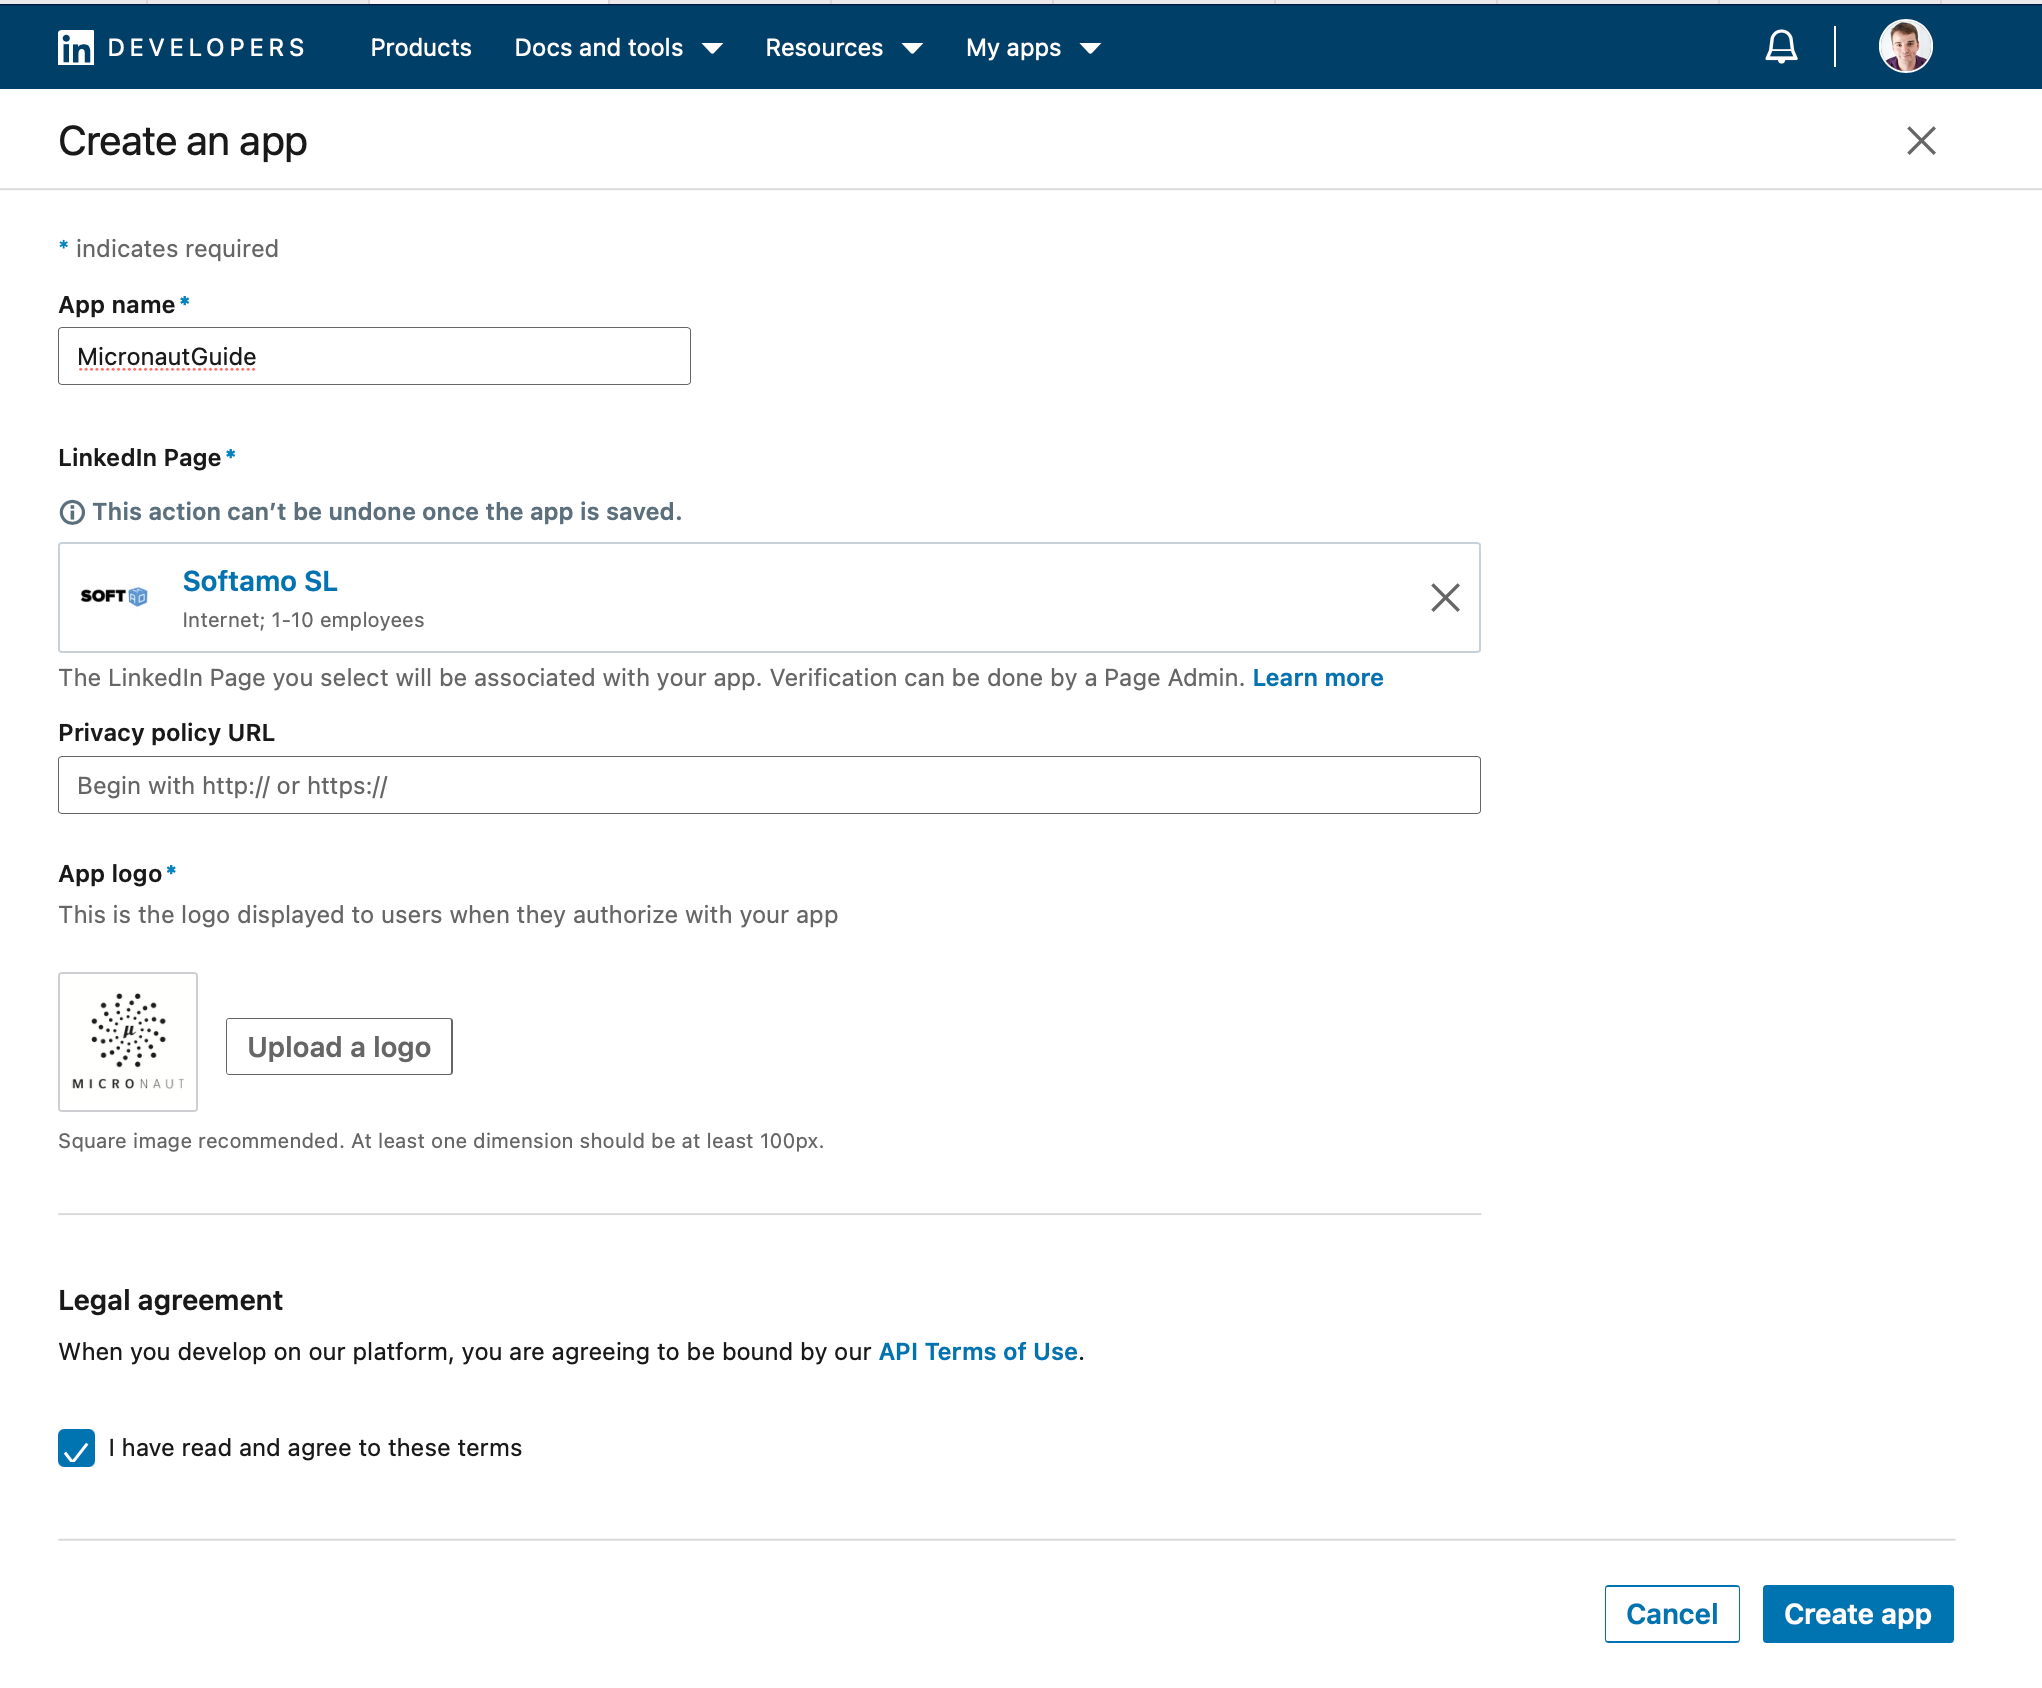
Create a LinkedIn App
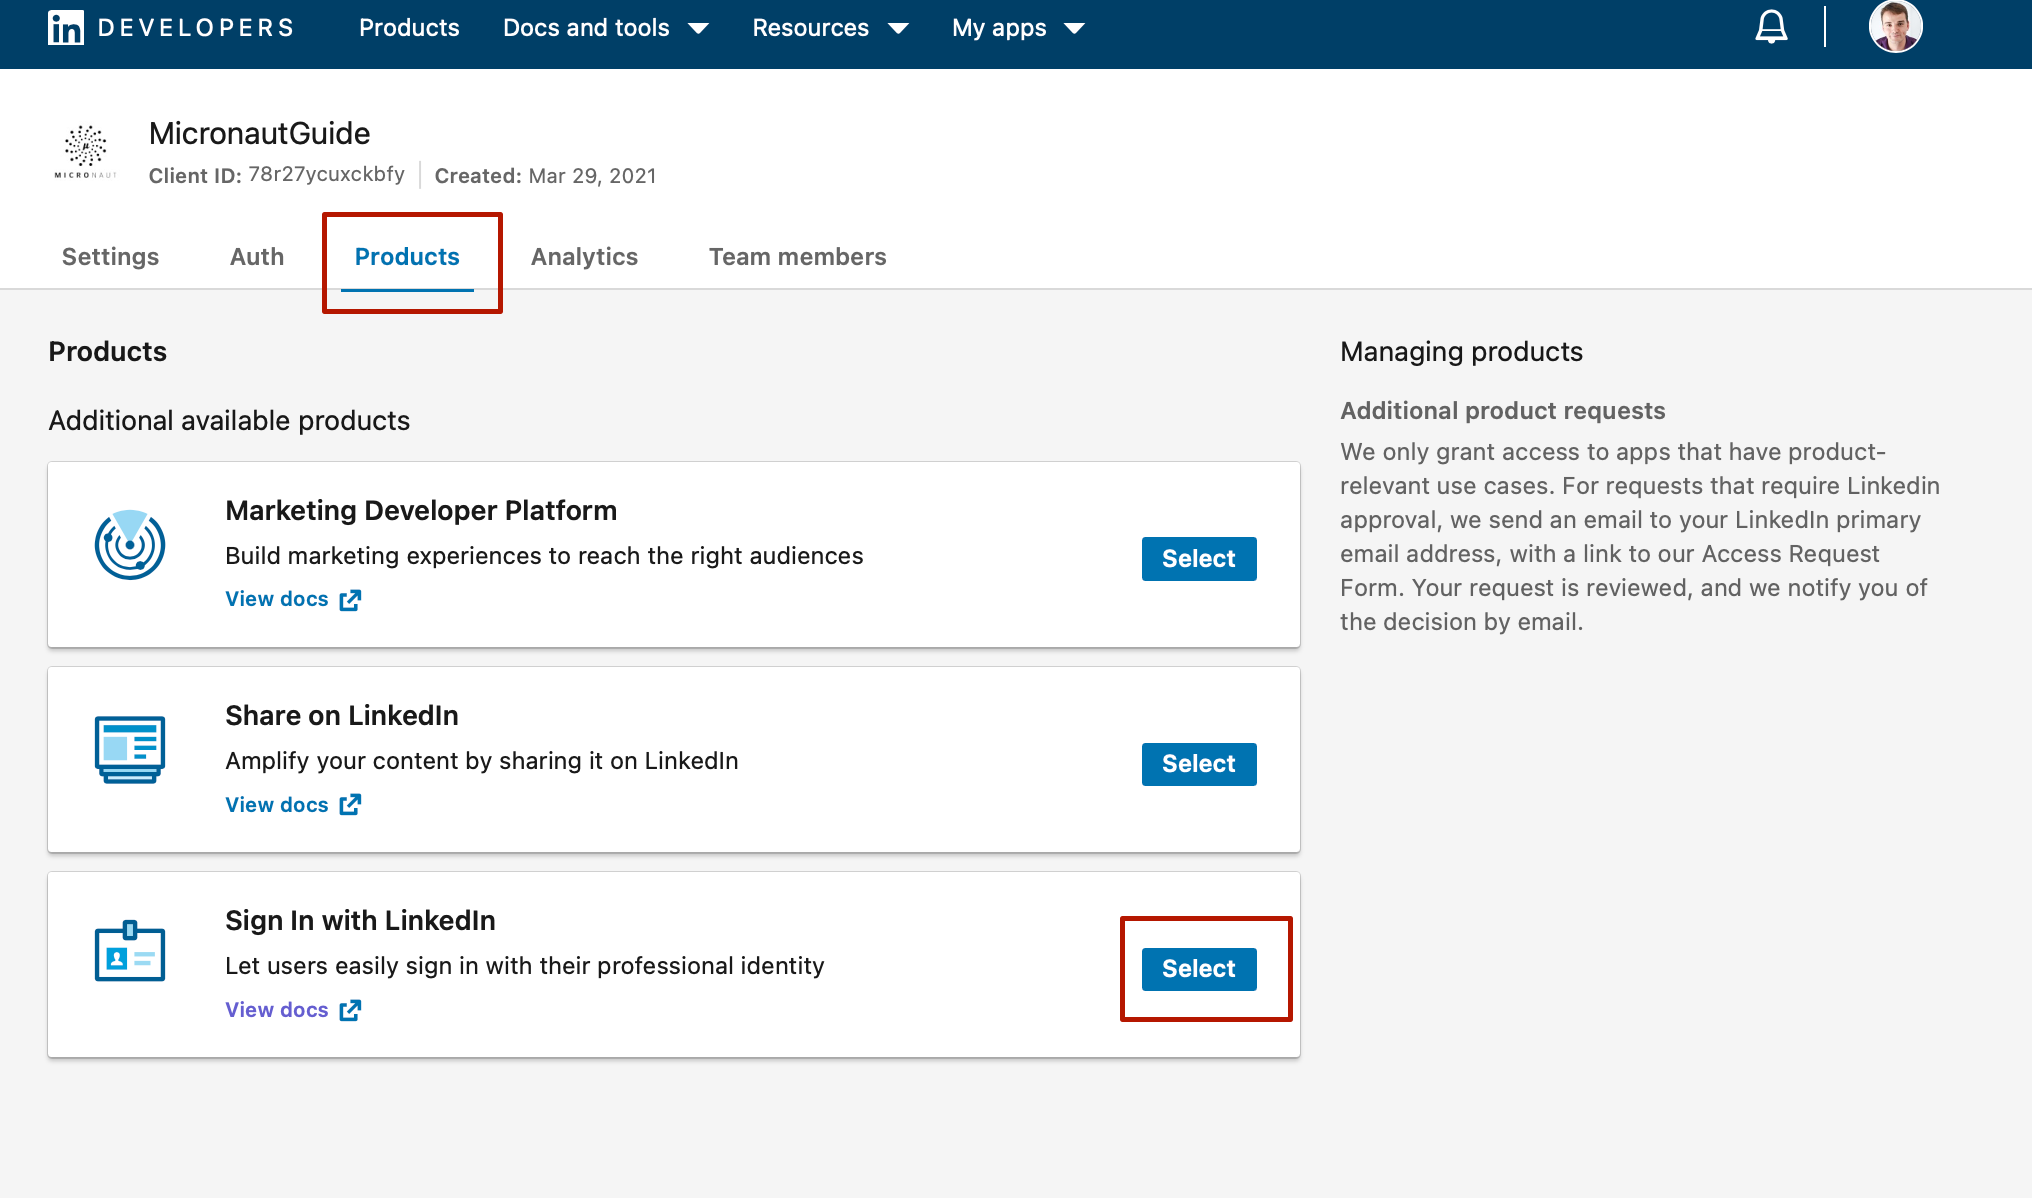
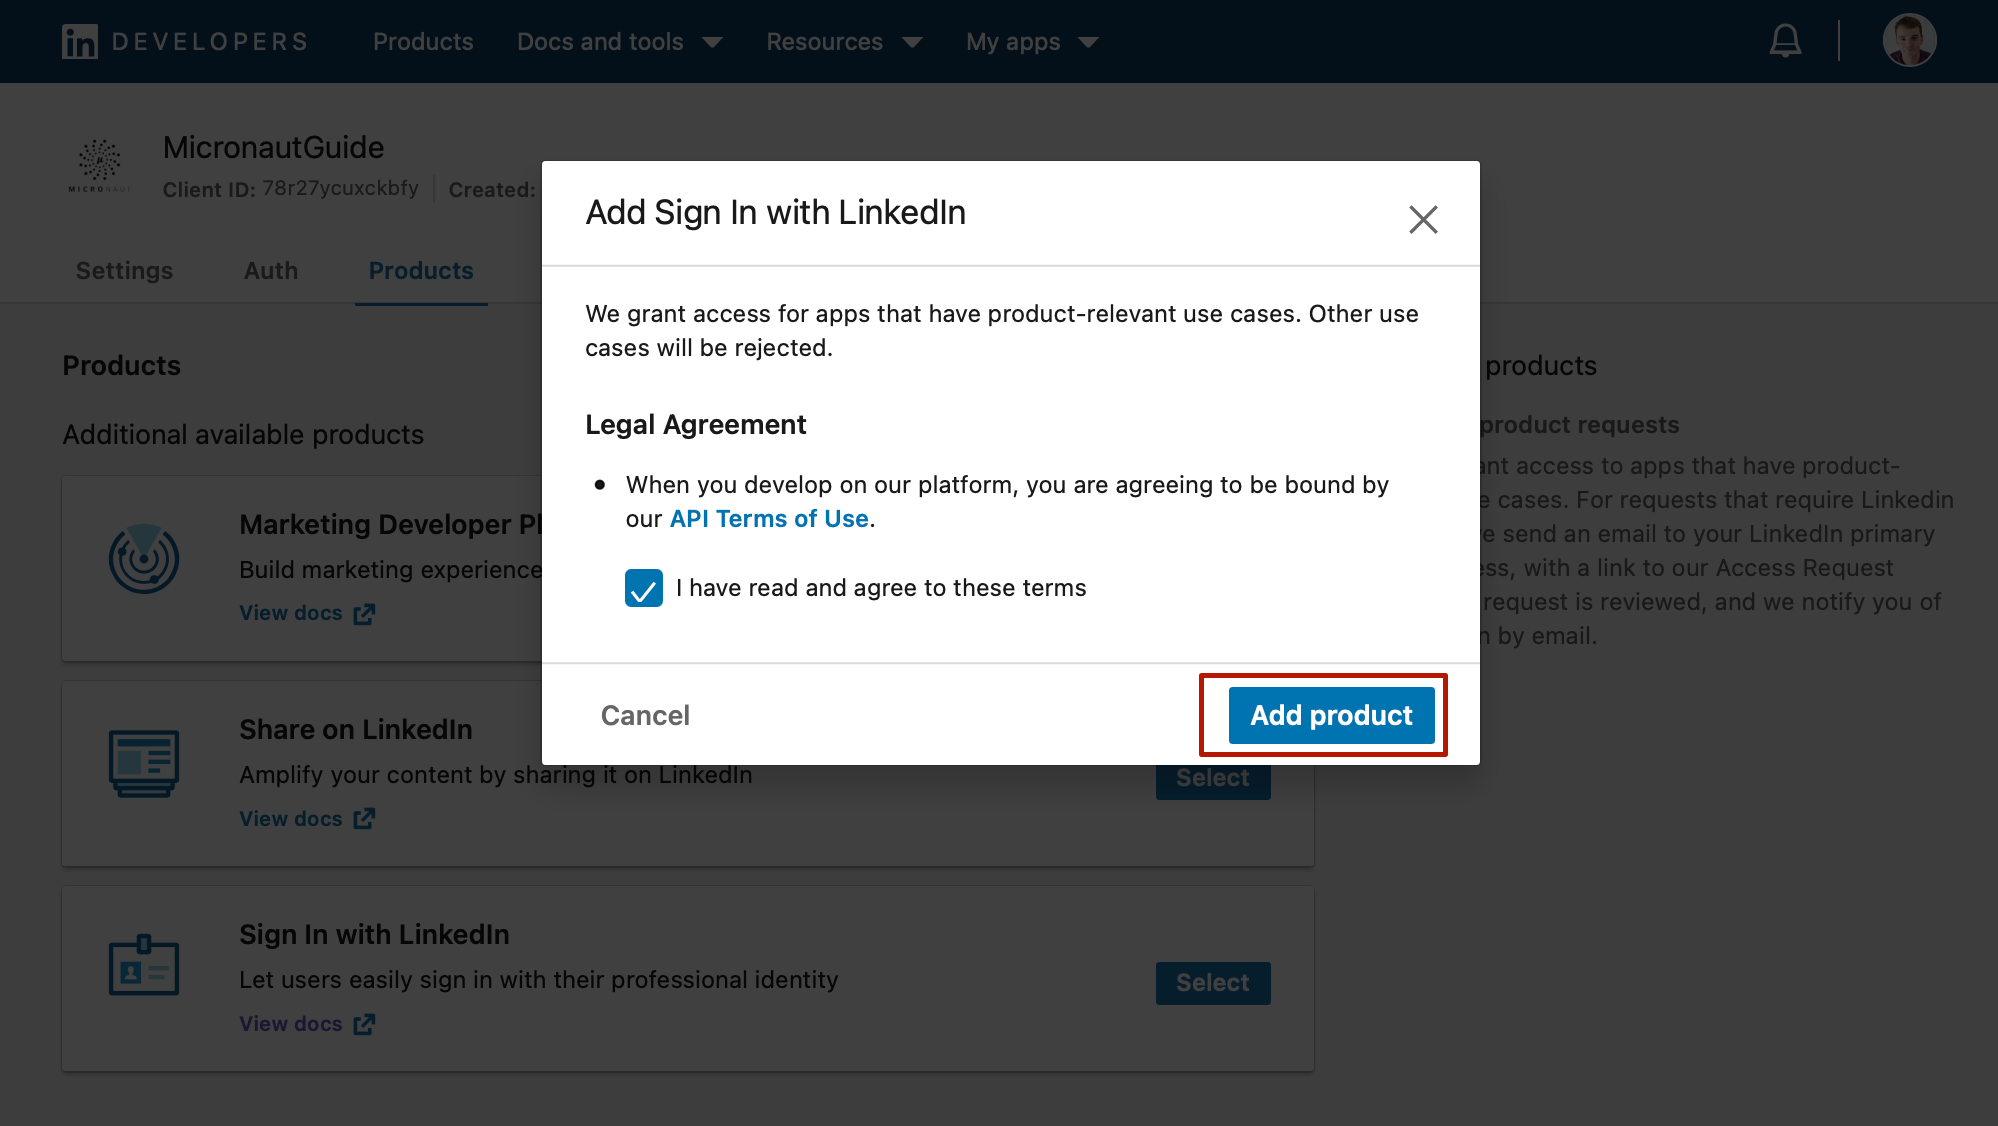
Add Sign in with LinkedIn Product
Configure Authorized Redirect URL
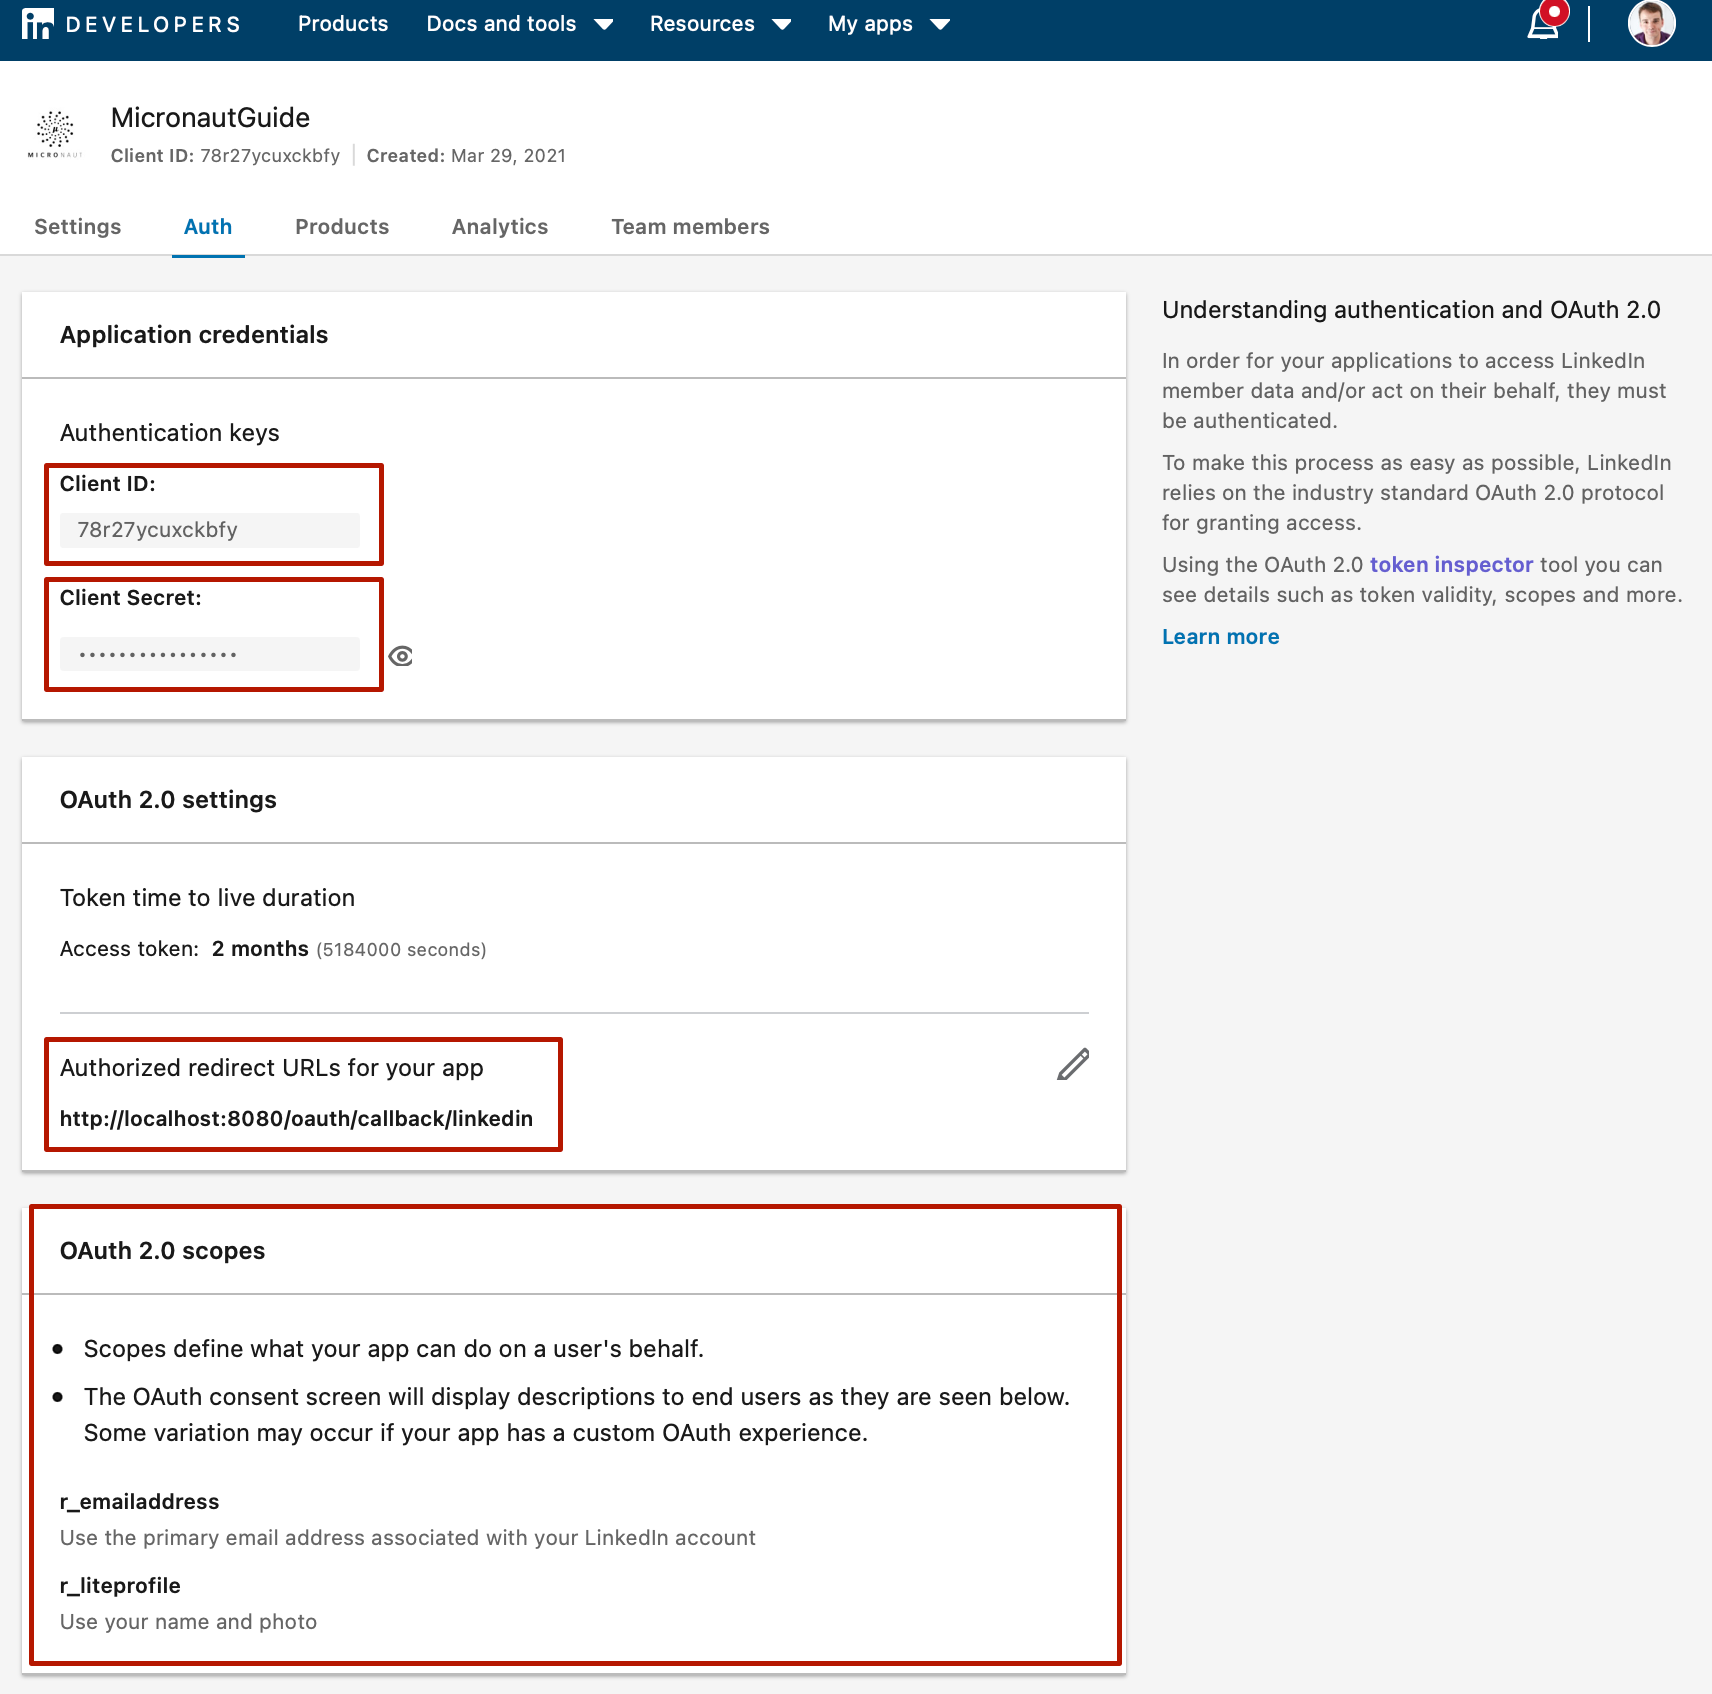
Go to the Auth tab.
-
Save your client ID and client secret. You will need them to configure your Micronaut application.
-
Register
http://localhost:8080/oauth/callback/linkedin. By creating a client namedlinkedinin the Micronaut application, the route/oauth/callback/linkedinis registered. -
After you add
Add Sign in with LinkedIn, the scopesr_liteprofileandr_emailaddresswill appear. We will configure the Micronaut application to request ther_liteprofilescope.
Writing the Application
Create an application using the Micronaut Command Line Interface or with Micronaut Launch.
mn create-app example.micronaut.micronautguide \
    --features=security-oauth2,security-jwt,views-thymeleaf,reactor,serialization-jackson,http-client \
    --build=maven \
    --lang=groovy \
--test=spock|
Note
|
If you don’t specify the --build argument, Gradle with the Kotlin DSL is used as the build tool. If you don’t specify the --lang argument, Java is used as the language.If you don’t specify the --test argument, JUnit is used for Java and Kotlin, and Spock is used for Groovy.
|
The previous command creates a Micronaut application with the default package example.micronaut in a directory named micronautguide.
If you use Micronaut Launch, select Micronaut Application as application type and add security-oauth2, security-jwt, views-thymeleaf, reactor, serialization-jackson, and http-client features.
|
Note
|
If you have an existing Micronaut application and want to add the functionality described here, you can view the dependency and configuration changes from the specified features, and apply those changes to your application. |
Views
Although the Micronaut framework is primarily designed around message encoding / decoding, there are occasions where it is convenient to render a view on the server side.
We’ll use the Thymeleaf Java template engine to render views.
Home
Create a controller to handle the requests to /. You will display the email of the authenticated person if any. Annotate the controller endpoint with @View since we will use a Thymeleaf template.
Create a Thymeleaf template:
<!DOCTYPE html>
<html xmlns:th="http://www.thymeleaf.org">
<head>
    <title>Home</title>
</head>
<body>
<h1>Micronaut - LinkedIn example</h1>

<h2 th:if="${security}">username: <span th:text="${security.name}"></span></h2>
<h2 th:unless="${security}">username: Anonymous</h2>

<nav>
    <ul>
        <li th:unless="${security}"><a href="/oauth/login/linkedin">Enter</a></li>
        <li th:if="${security}"><a href="/logout">Logout</a></li>
    </ul>
</nav>
</body>
</html>
Also, note that we return an empty model in the controller. However, we are accessing security in the Thymeleaf template.
-
The SecurityViewModelProcessor injects into the model a
securitymap with the authenticated user. See User in a view documentation.
OAuth 2.0 authorization code grant flow
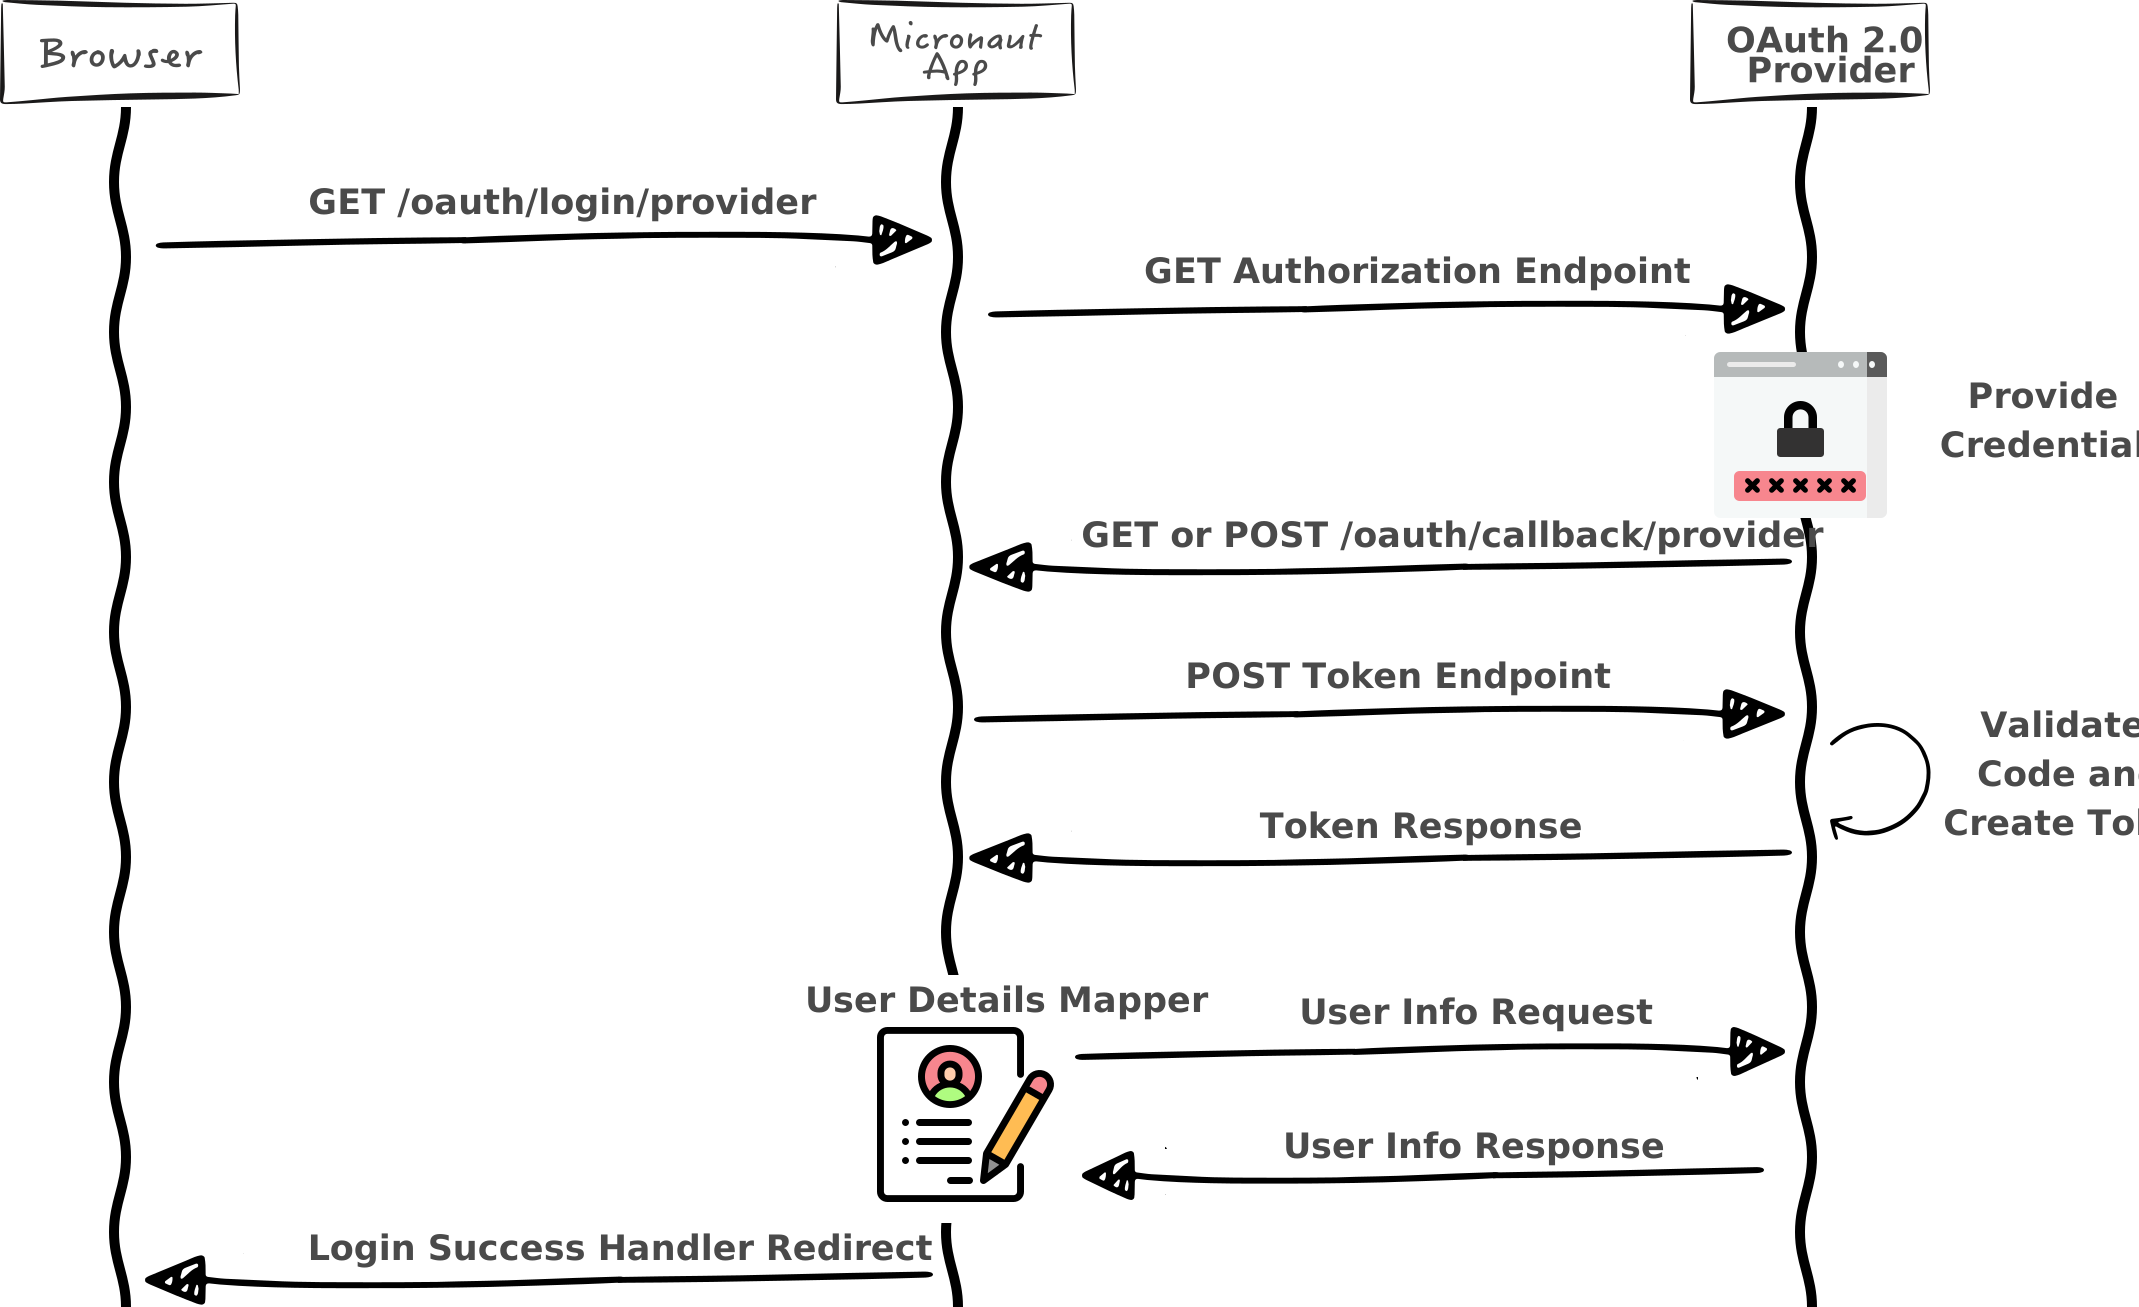
Here is a high level diagram of how the authorization code grant flow works with an OAuth 2.0 provider such as LinkedIn.
OAuth 2.0 Configuration
Add the following OAuth 2.0 configuration:
The previous configuration uses several placeholders. You will need to set up the OAUTH_CLIENT_ID and OAUTH_CLIENT_SECRET environment variables.
export OAUTH_CLIENT_ID=XXXXXXXXXX
export OAUTH_CLIENT_SECRET=YYYYYYYYYY
OAuth 2.0 Details Mapper
We need an HTTP Client to retrieve the user info. Create a POJO to represent a LinkedIn user:
imports
package example.micronaut

import groovy.transform.CompileStatic
import io.micronaut.core.annotation.NonNull
import io.micronaut.serde.annotation.Serdeable

import jakarta.validation.constraints.NotBlank
@CompileStatic
@Serdeable
class LinkedInMe {
@NonNull
@NotBlank
final String id
@NonNull
@NotBlank
final String localizedFirstName
@NonNull
@NotBlank
final String localizedLastName
LinkedInMe(@NonNull String id,
@NonNull String localizedFirstName,
@NonNull String localizedLastName) {
this.id = id
this.localizedFirstName = localizedFirstName
this.localizedLastName = localizedLastName
}
}Then, create a Micronaut Declarative HTTP Client to consume LinkedIn Profile endpoint
Specify the URL for the linkedin service.
micronaut.http.services.linkedin.url=https://api.linkedin.comCreate an implementation of OauthAuthenticationMapper. The implementation must be qualified by a name that matches the name present in the client configuration. The value specified in the client configuration is linkedin.
Running the Application
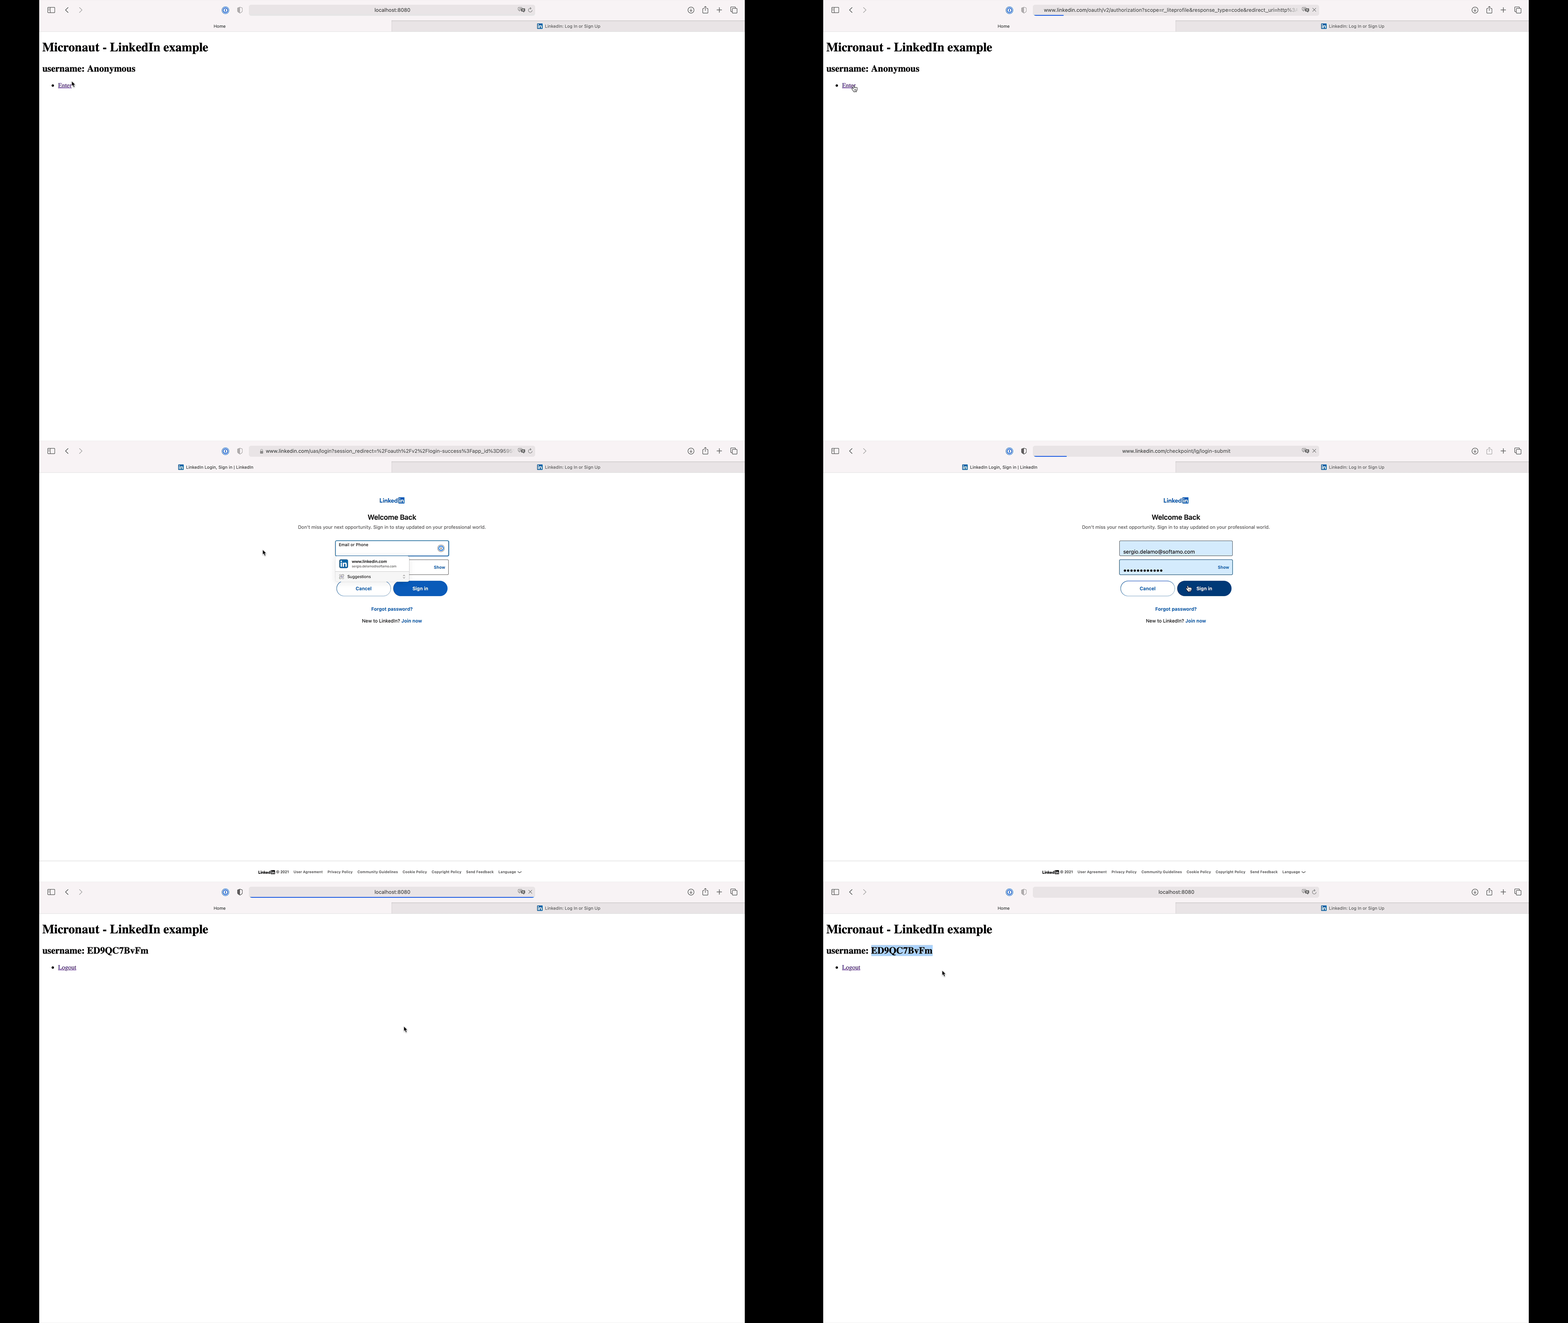
To run the application, use the ./mvnw mn:run command, which starts the application on port 8080.
Next Steps
Read Micronaut OAuth 2.0 documentation to learn more.
License
|
Note
|
All guides are released with an Apache License 2.0 for the code and a Creative Commons Attribution 4.0 license for the writing and media (images). |