

Deploy a Micronaut function as a GraalVM Native Executable to AWS Lambda
Learn how to distribute a Micronaut function built as a GraalVM native executable to an AWS Lambda custom runtime
On this guide
In this section
Introduction
Please read about Micronaut AWS Lambda Support to learn more about different Lambda runtimes, triggers, and handlers, and how to integrate them with a Micronaut application.
The biggest problem with Java applications and Lambda is how to mitigate cold startups. Executing GraalVM native executables of a Micronaut function in a Lambda custom runtime is a solution to this problem.
If you want to respond to triggers such as queue events, S3 events, or single endpoints, you should code your Micronaut functions as serverless functions.
Getting Started
In this guide, we will deploy a Micronaut function written in Java as a GraalVM native executable to an AWS Lambda custom runtime.
What you will need
To complete this guide, you will need the following:
-
Some time on your hands
-
A decent text editor or IDE (e.g. IntelliJ IDEA)
-
JDK 21 or greater installed with
JAVA_HOMEconfigured appropriately
Solution
We recommend that you follow the instructions in the next sections and create the application step by step. However, you can go right to the completed example.
-
Download and unzip the source
Writing the Application
Create an application using the Micronaut Command Line Interface or with Micronaut Launch.
mn create-function-app example.micronaut.micronautguide --features=graalvm,aws-lambda --build=maven --lang=java|
Note
|
If you don’t specify the --build argument, Gradle with the Kotlin DSL is used as the build tool. If you don’t specify the --lang argument, Java is used as the language.If you don’t specify the --test argument, JUnit is used for Java and Kotlin, and Spock is used for Groovy.
|
The previous command creates a Micronaut application with the default package example.micronaut in a directory named micronautguide.
|
Note
|
If you use Micronaut Launch, select Serverless function as application type and add the graalvm and aws-lambda features.
|
Code
The generated project contains sample code. Let’s explore it.
The application contains a class extending MicronautRequestHandler
imports
package example.micronaut;

import io.micronaut.function.aws.MicronautRequestHandler;
import java.io.IOException;
import java.nio.charset.StandardCharsets;
import io.micronaut.json.JsonMapper;
import com.amazonaws.services.lambda.runtime.events.APIGatewayProxyRequestEvent;
import com.amazonaws.services.lambda.runtime.events.APIGatewayProxyResponseEvent;
import jakarta.inject.Inject;
import java.util.Collections;
public class FunctionRequestHandler extends MicronautRequestHandler<APIGatewayProxyRequestEvent, APIGatewayProxyResponseEvent> {
@Inject
JsonMapper objectMapper;
@Override
public APIGatewayProxyResponseEvent execute(APIGatewayProxyRequestEvent input) {
APIGatewayProxyResponseEvent response = new APIGatewayProxyResponseEvent();
try {
String json = new String(objectMapper.writeValueAsBytes(Collections.singletonMap("message", "Hello World")));
response.setStatusCode(200);
response.setBody(json);
} catch (IOException e) {
response.setStatusCode(500);
}
return response;
}
}-
The class extends MicronautRequestHandler and defines input and output types.
The generated test shows how to verify the function behavior:
imports
package example.micronaut;

import com.amazonaws.services.lambda.runtime.events.APIGatewayProxyRequestEvent;
import com.amazonaws.services.lambda.runtime.events.APIGatewayProxyResponseEvent;
import org.junit.jupiter.api.AfterAll;
import org.junit.jupiter.api.BeforeAll;
import org.junit.jupiter.api.Test;

import static org.junit.jupiter.api.Assertions.assertEquals;
public class FunctionRequestHandlerTest {
private static FunctionRequestHandler handler;
@BeforeAll
public static void setupServer() {
handler = new FunctionRequestHandler();
}
@AfterAll
public static void stopServer() {
if (handler != null) {
handler.getApplicationContext().close();
}
}
@Test
public void testHandler() {
APIGatewayProxyRequestEvent request = new APIGatewayProxyRequestEvent();
request.setHttpMethod("GET");
request.setPath("/");
APIGatewayProxyResponseEvent response = handler.execute(request);
assertEquals(200, response.getStatusCode().intValue());
assertEquals("{\"message\":\"Hello World\"}", response.getBody());
}
}-
When you instantiate the Handler, the application context starts.
-
Remember to close your application context when you end your test. You can use your handler to obtain it.
-
Invoke the
executemethod of the handler.
Testing the Application
To run the tests:
./mvnw testLambda
Create a Lambda function. For the runtime, select Custom Runtime. Select the x86_64 or arm64 architecture to match the computer you use to build the GraalVM Native Image.
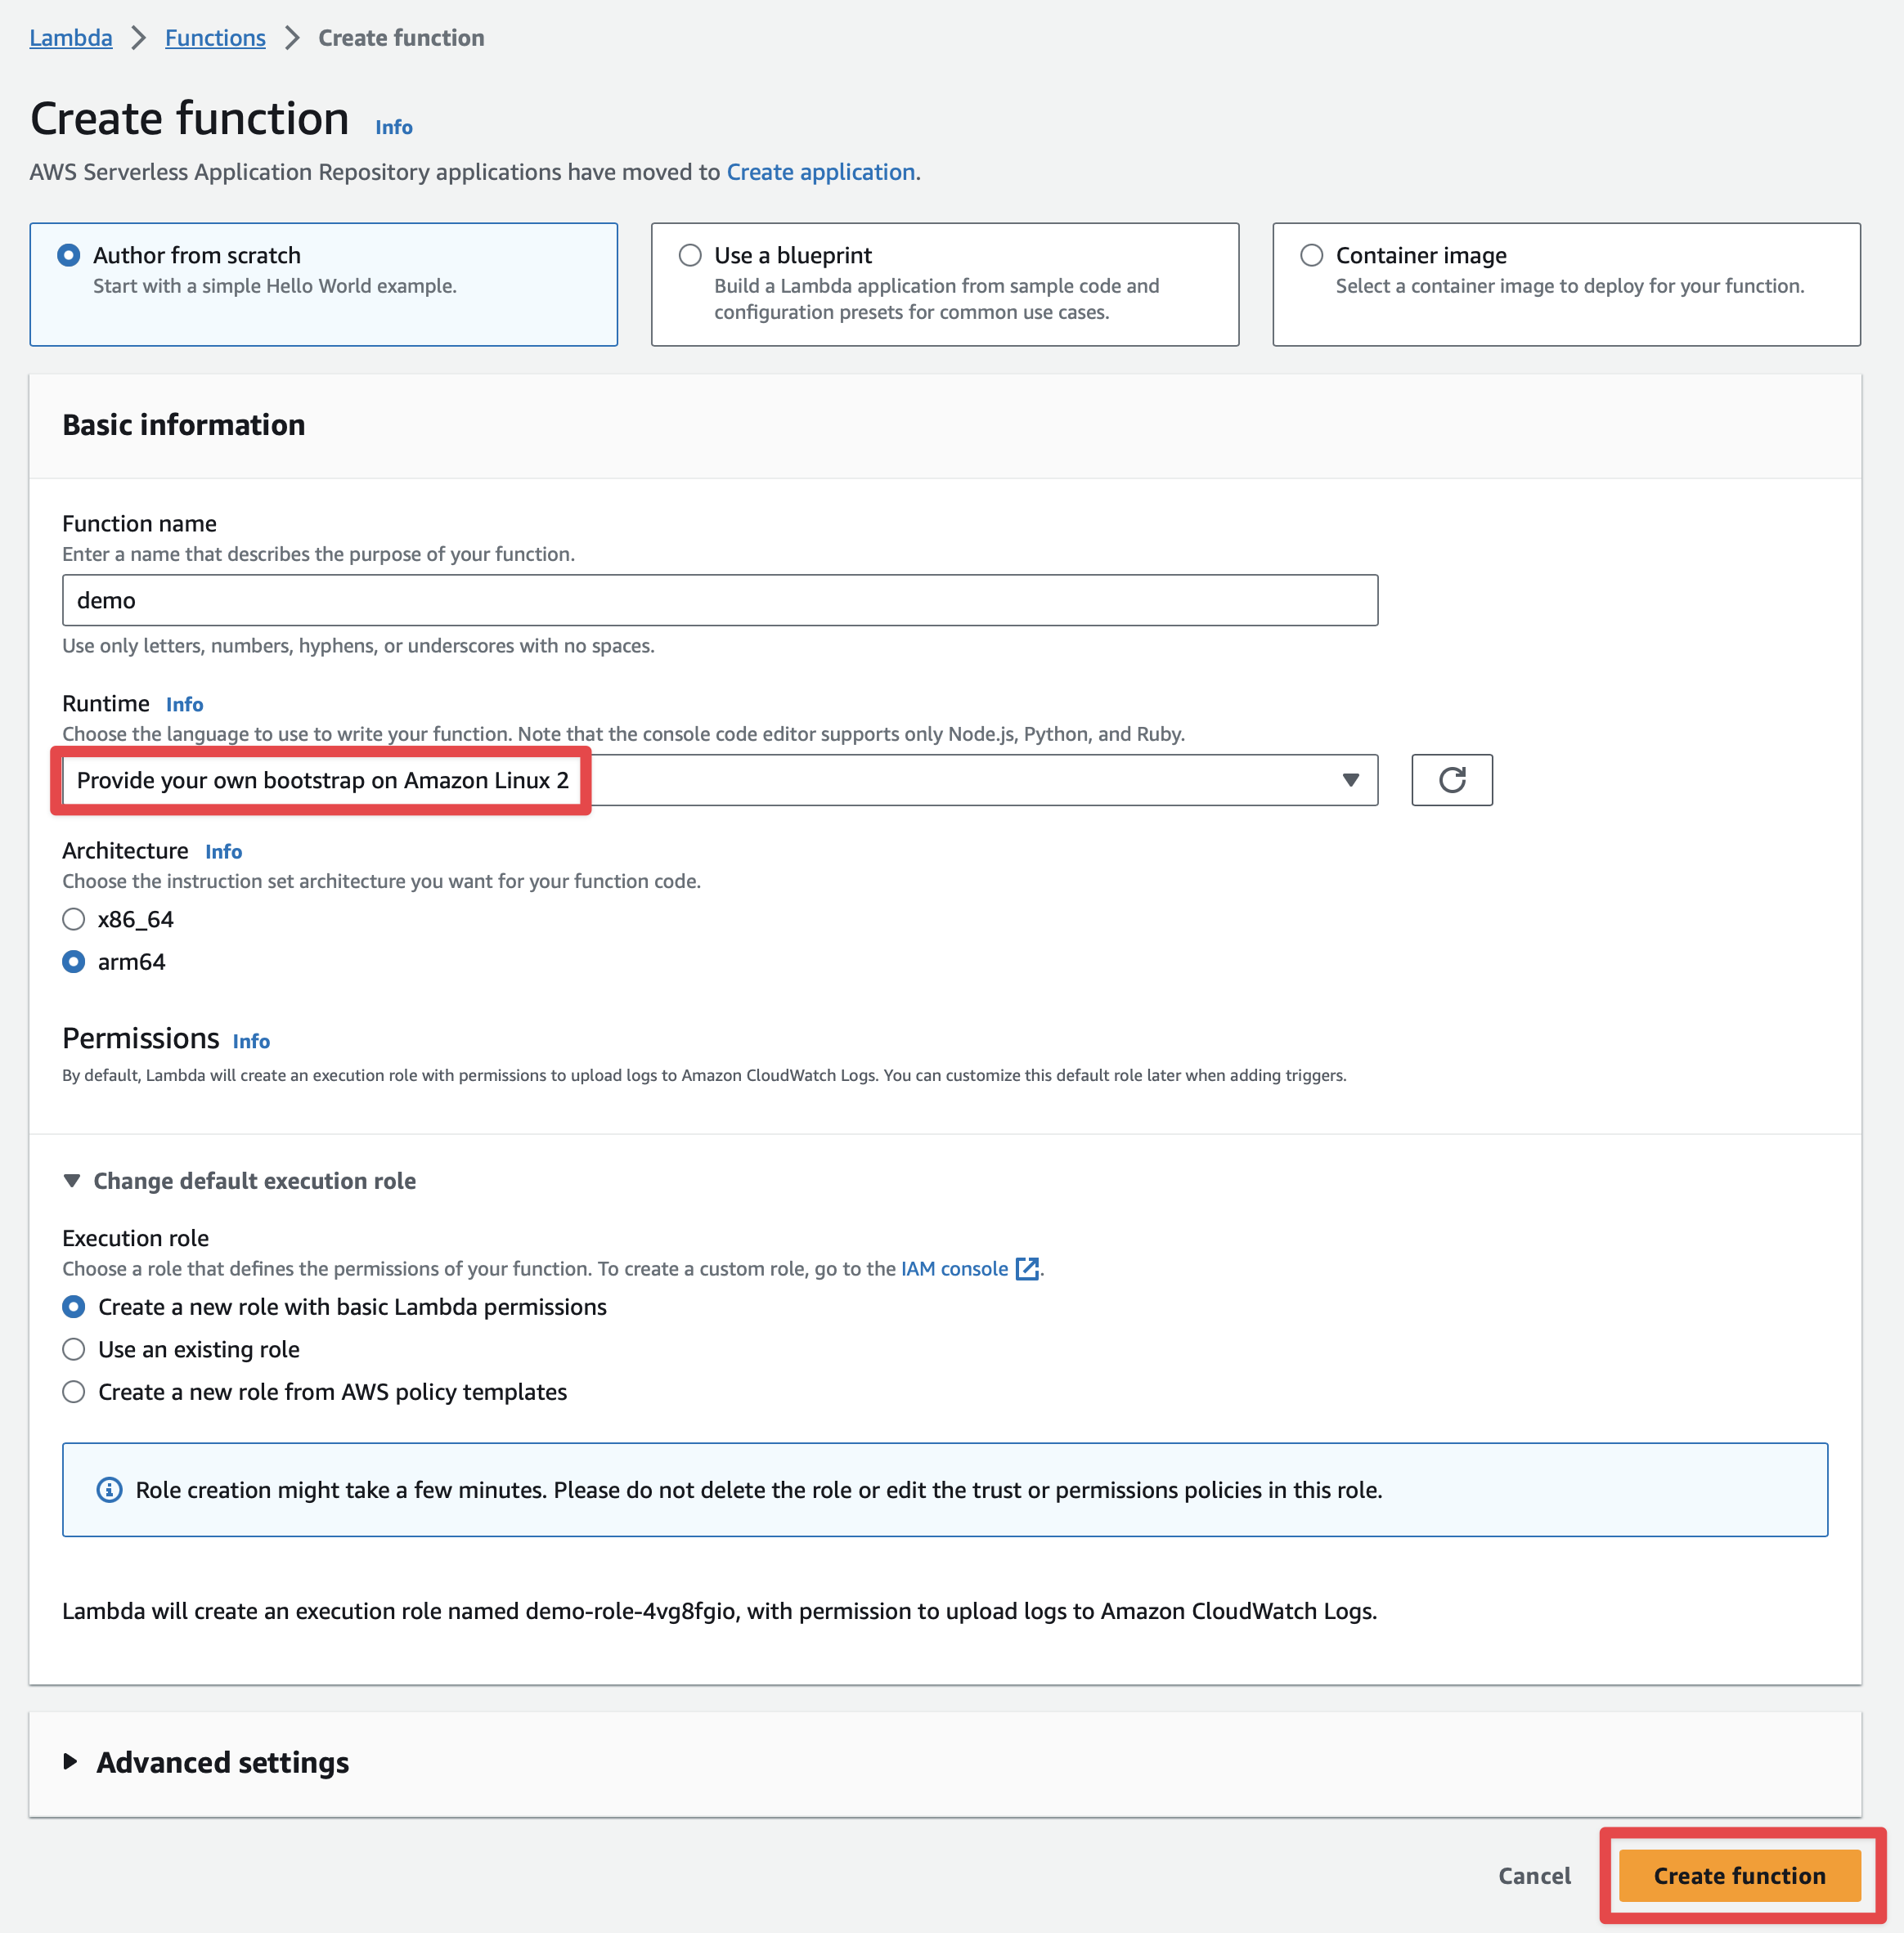
The Micronaut framework eases the deployment of your functions as a Custom AWS Lambda runtime.
The main API you interact with is AbstractMicronautLambdaRuntime. This abstract class can be subclassed to create your custom runtime mainClass. That class includes the code to perform the
Processing Tasks described in the Custom Runtime documentation.
Upload Code
The generated project contains such a class:
|
Note
|
Missing source |
./mvnw package -Dpackaging=docker-native -Dmicronaut.runtime=lambda -PgraalvmThe above command generates a ZIP file which contains a GraalVM Native Executable of the application, and a bootstrap file which executes the native executable. The GraalVM Native Executable of the application is generated inside a Docker container.
Once you have a ZIP file, upload it.

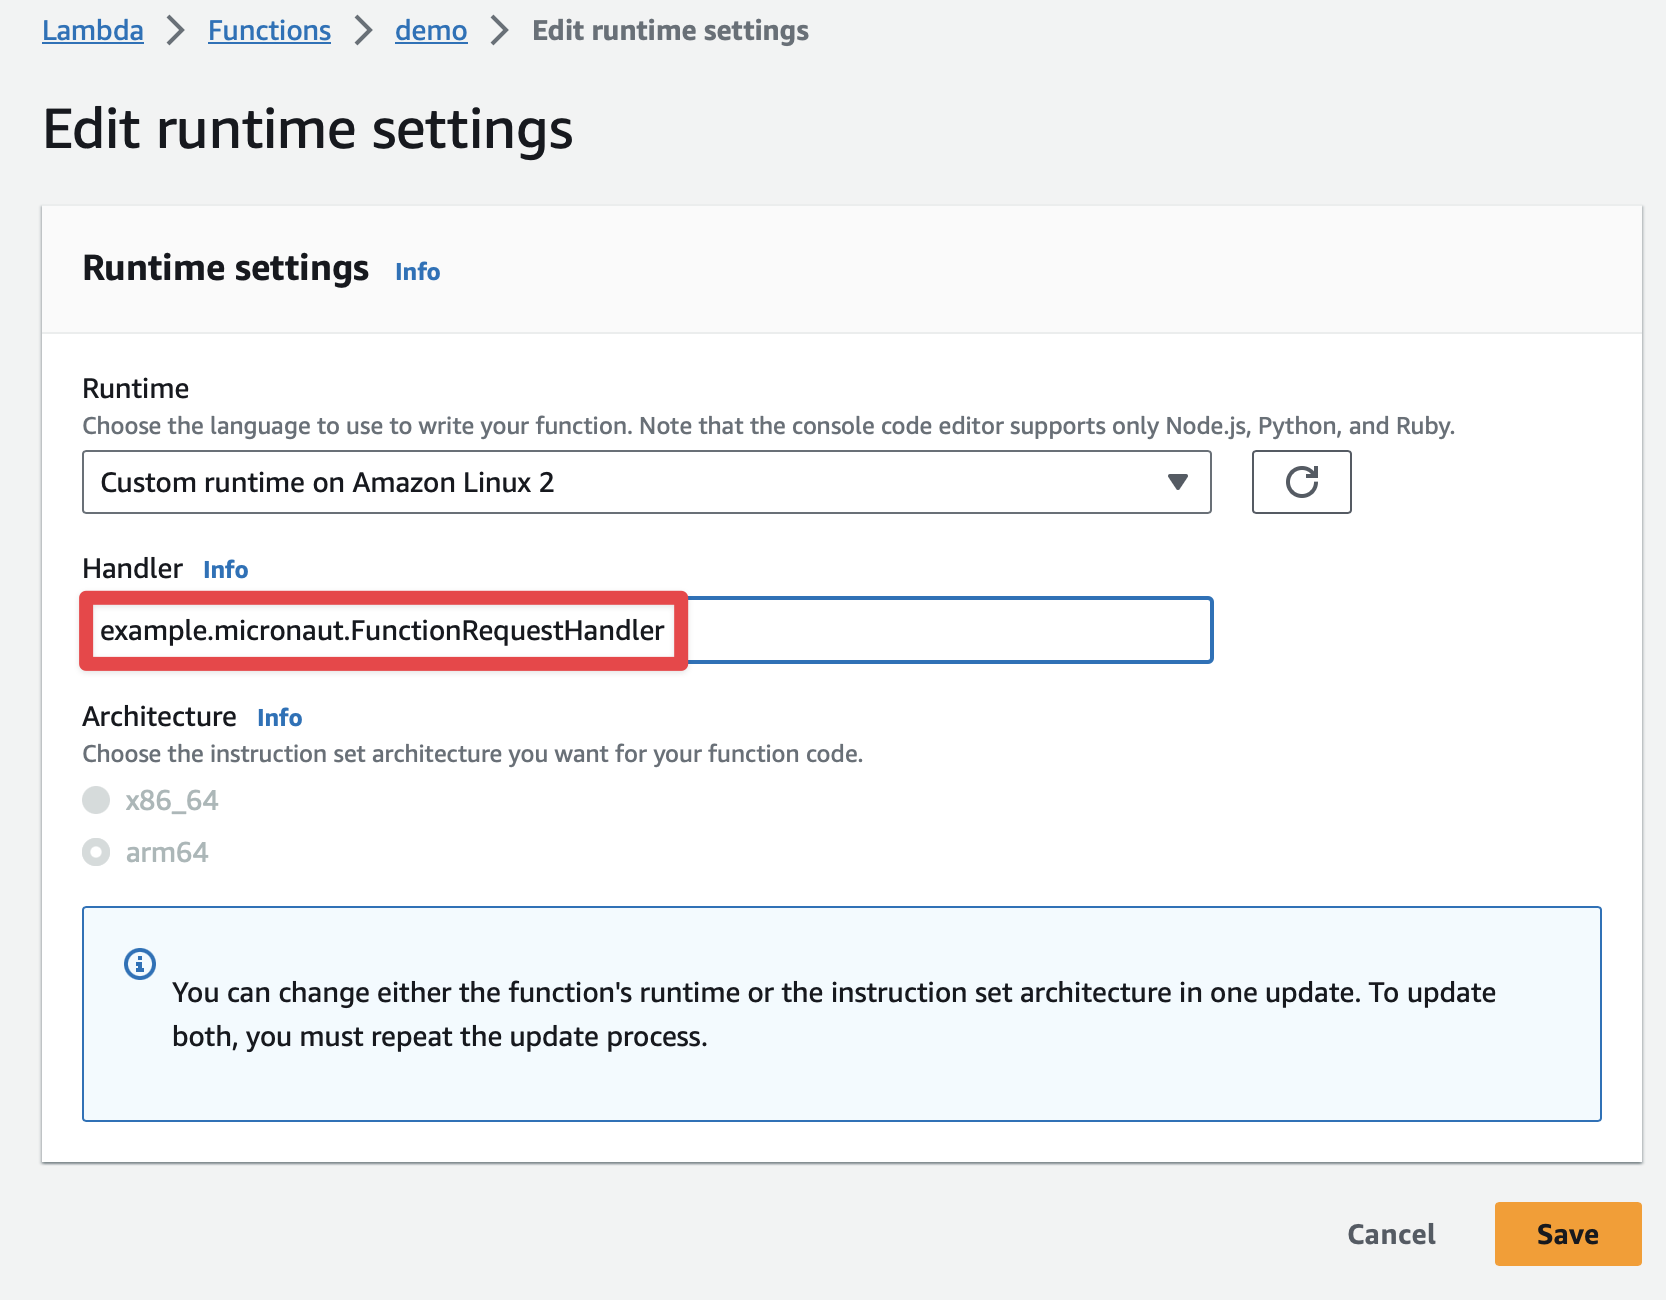
Handler
The handler used is the one created at FunctionLambdaRuntime.
Thus, you don’t need to specify the handler in the AWS Lambda console.
However, you can specify it in the console as well:
example.micronaut.FunctionRequestHandler
Test
You can test it easily.
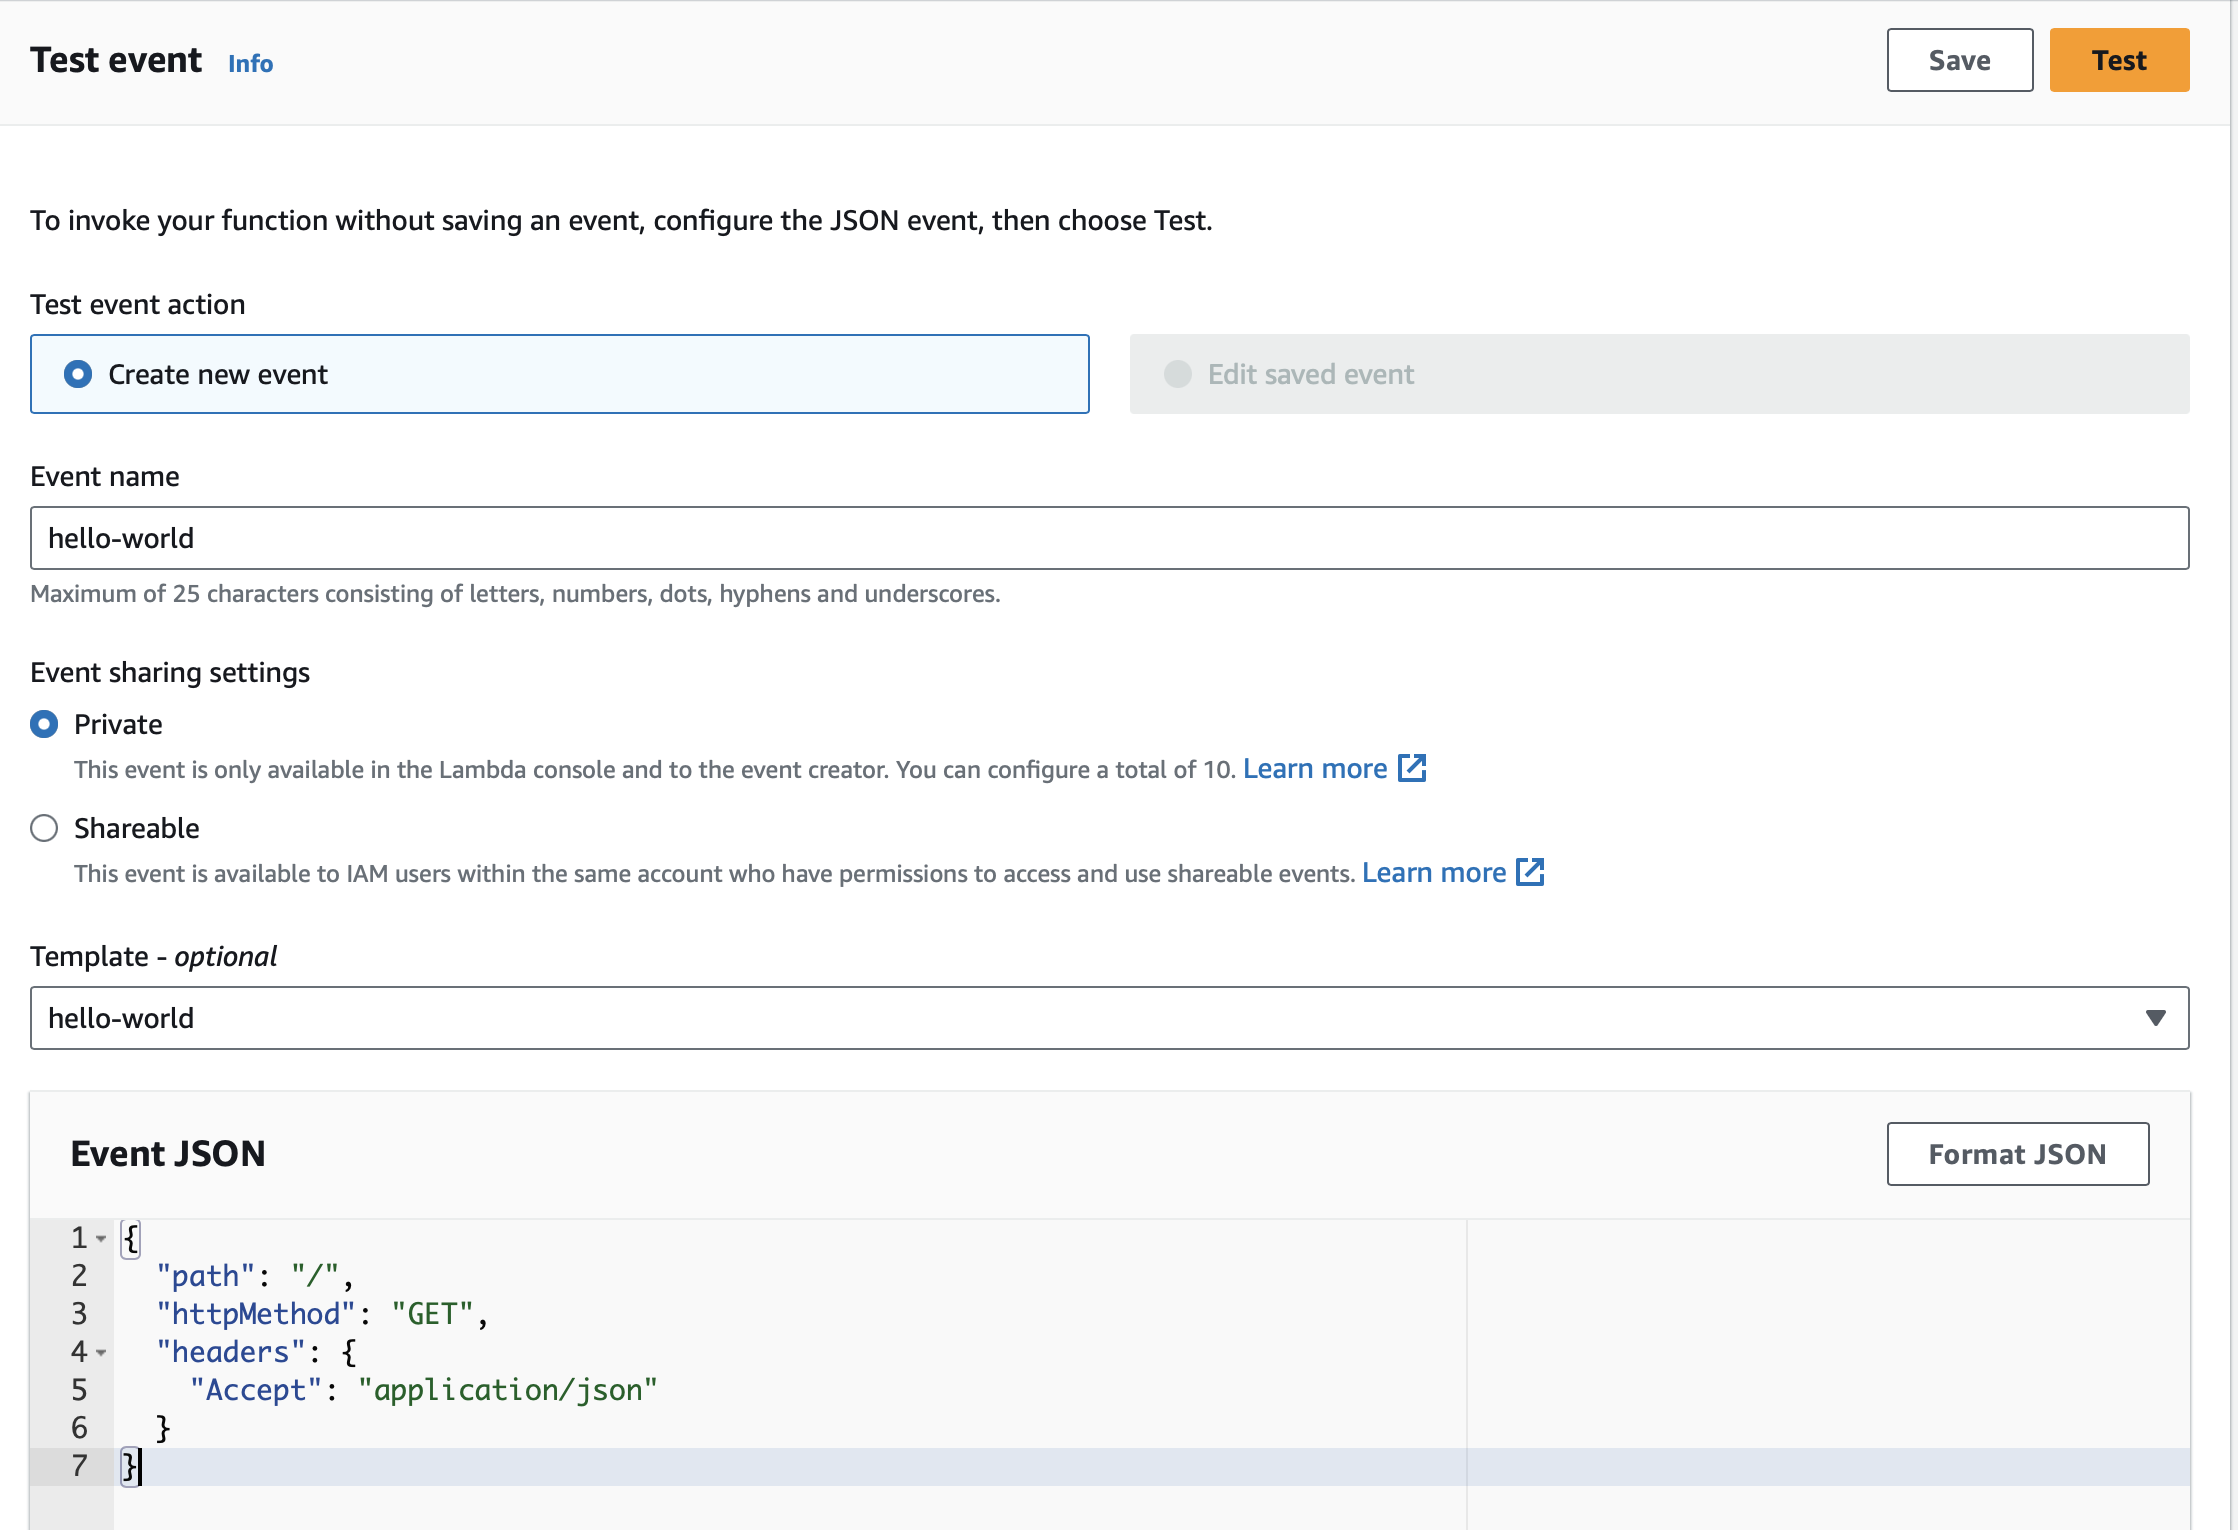
{
  "path": "/",
  "httpMethod": "GET",
  "headers": {
    "Accept": "application/json"
  }
}
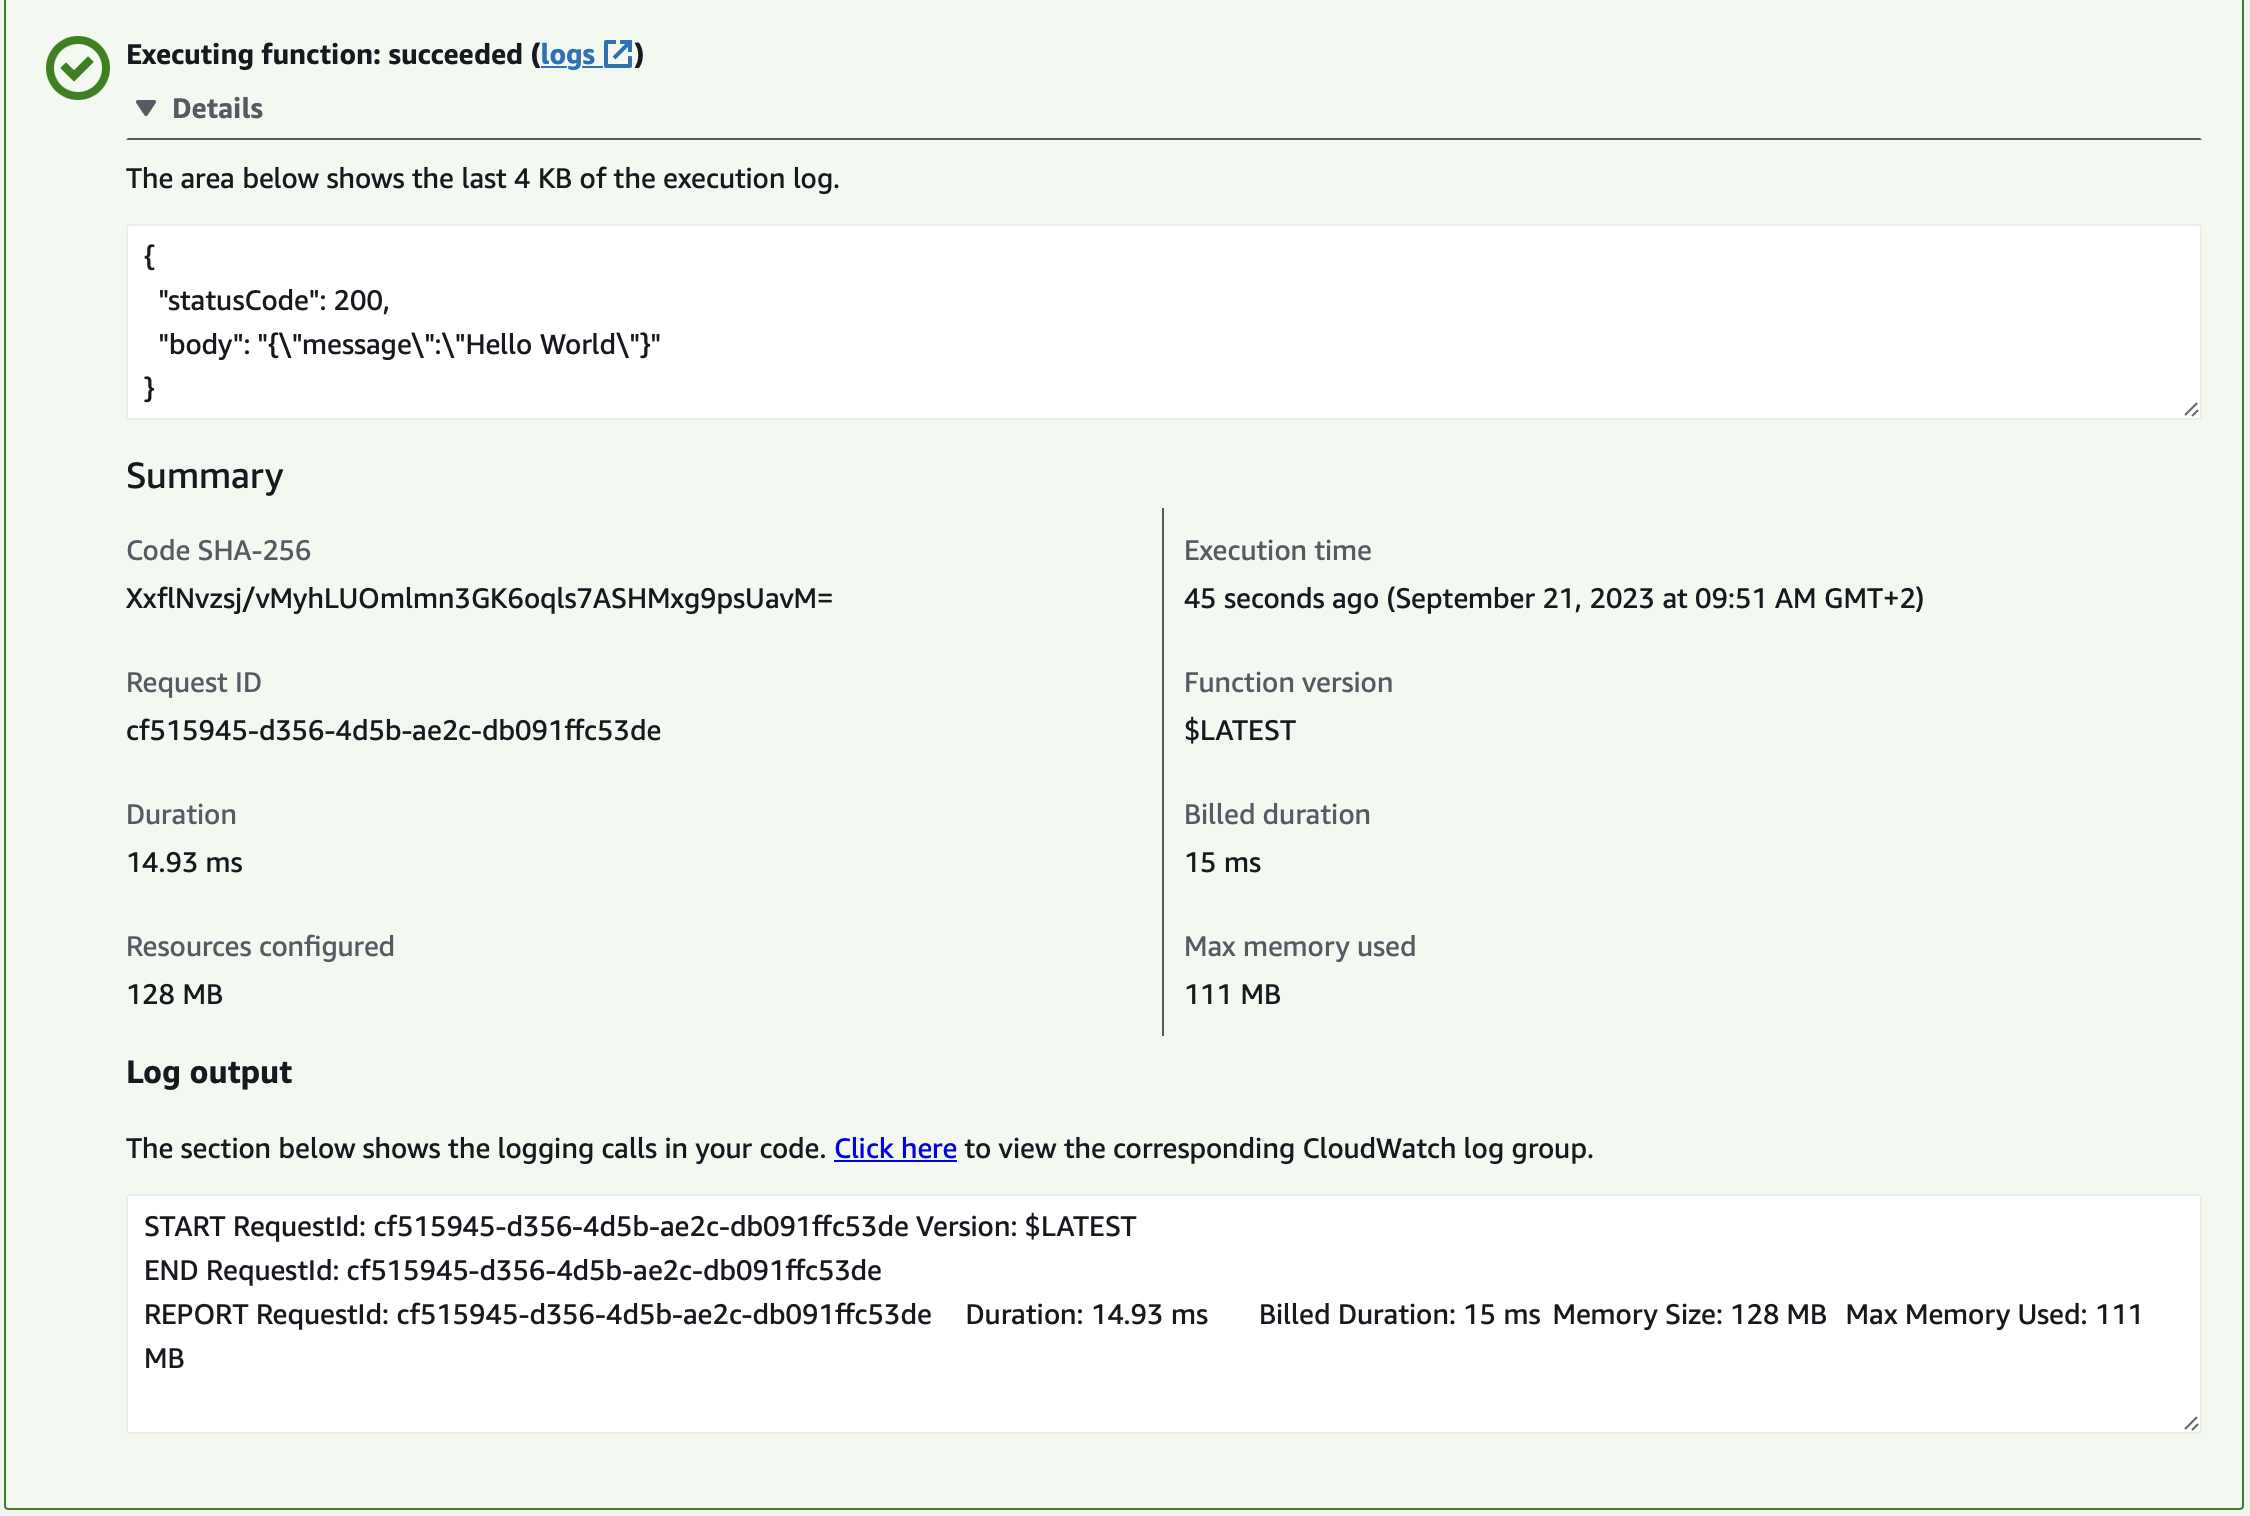
You should see a 200 response:
Next Steps
Explore more features with Micronaut Guides.
Read more about:
License
|
Note
|
All guides are released with an Apache License 2.0 for the code and a Creative Commons Attribution 4.0 license for the writing and media (images). |